OUR NEWEST KITCHEN UPDATE: WE’RE MAKING PROGRESS!
I am so excited to share our kitchen progress with you today! If you remember this sneak peek post I shared a while ago, then you know what has been happening around our home lately. It’s been a process, but I can say the changes that are already in place are huge.
I won’t be showing too much just yet, I want to save it all for the final reveal. I will however, be sharing some more peeks at the new custom cabinets we had made, our newly painted hood and upper cabinets (finally, yay!), our new brass hardware, tiled wall, new fabric for our bar stools, and what we’re planning for our new backsplash plus a few extras. Oh, just wait until I get into all the juicy stuff!
We’ve been so busy planning and having everything installed and ironing out tweaks. There’s been some delays, so we’ve been working on things ourselves in between. Everything should be completed by the end of September. Come and take a look at where we’re at, I hope you love all the new things we’re working on!
Affiliate links are provided throughout this post – see my full disclosure policy here. As an Amazon Associate I earn from qualifying purchases.
KITCHEN UPDATE PROGRESS: OUR PAINTED HOOD

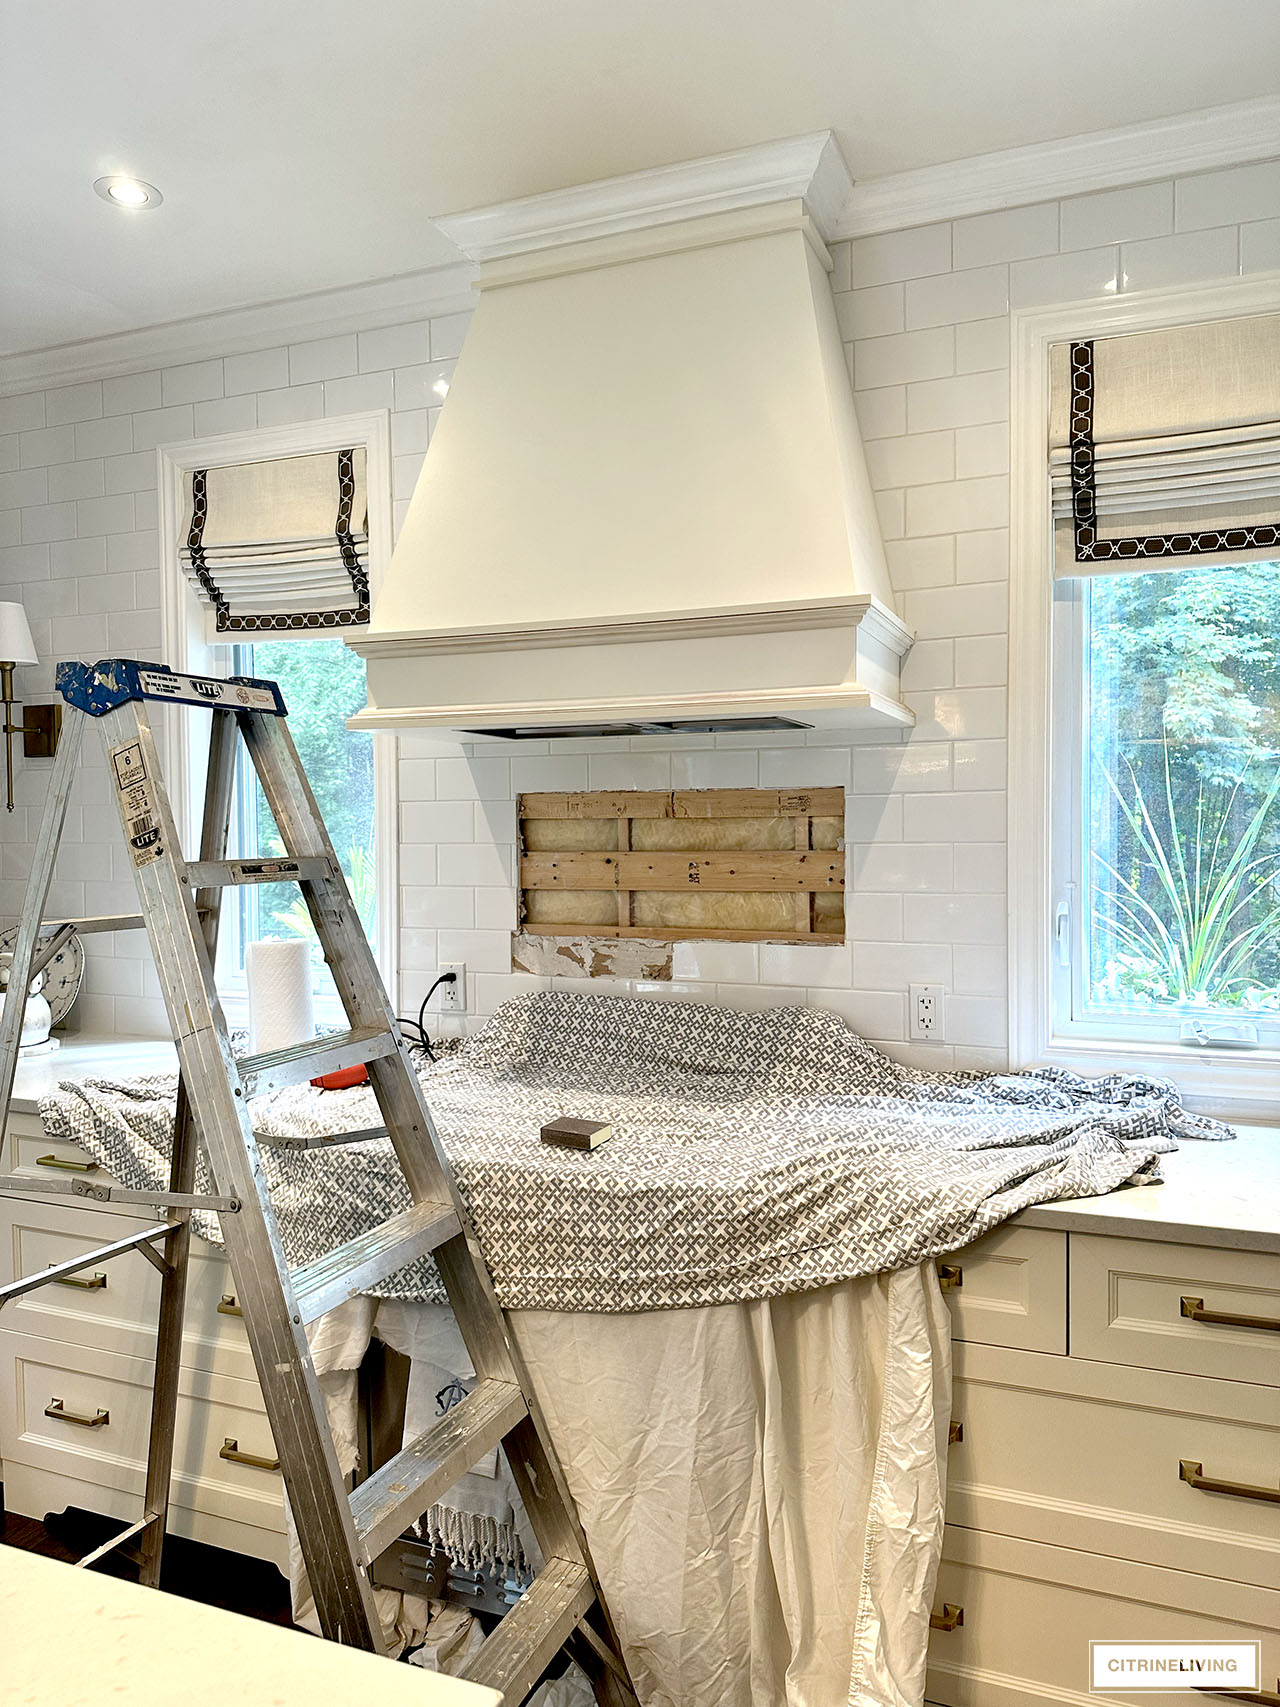
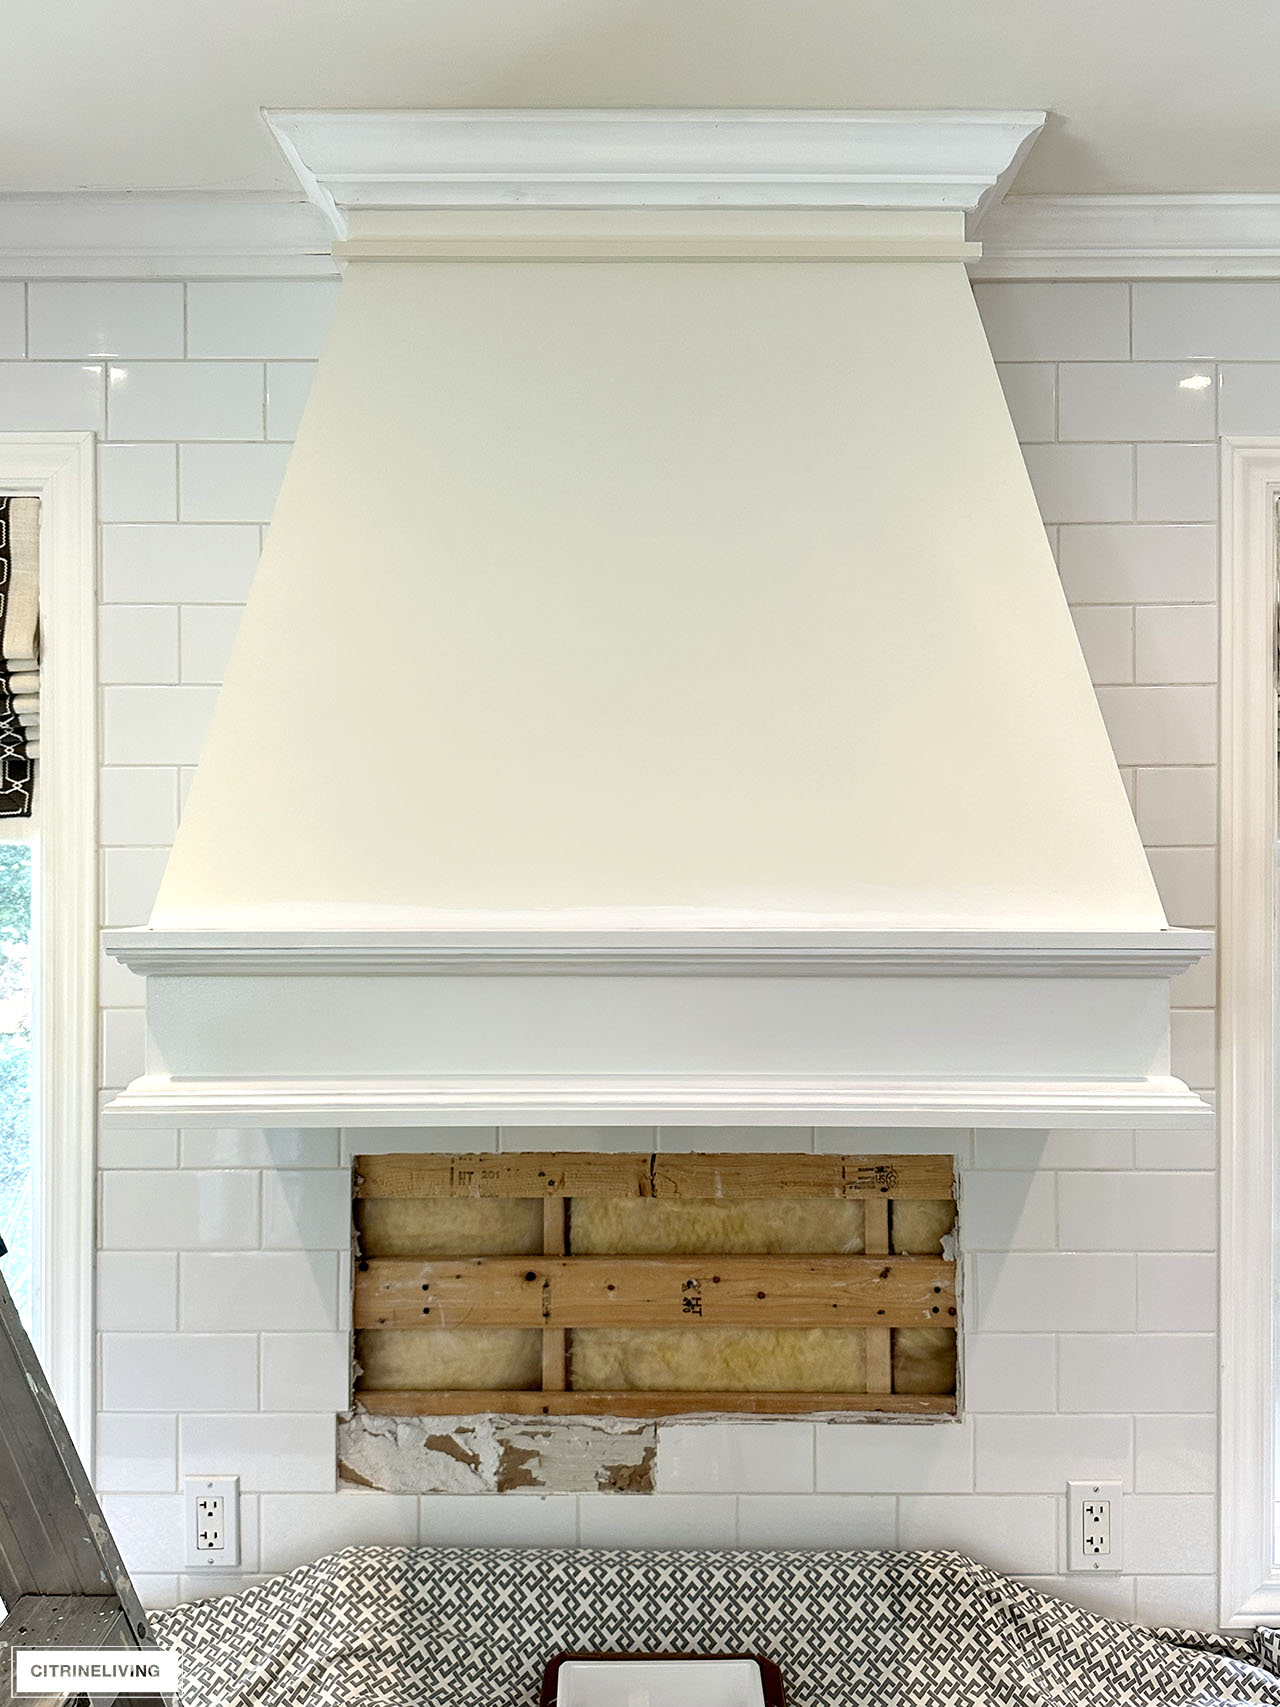
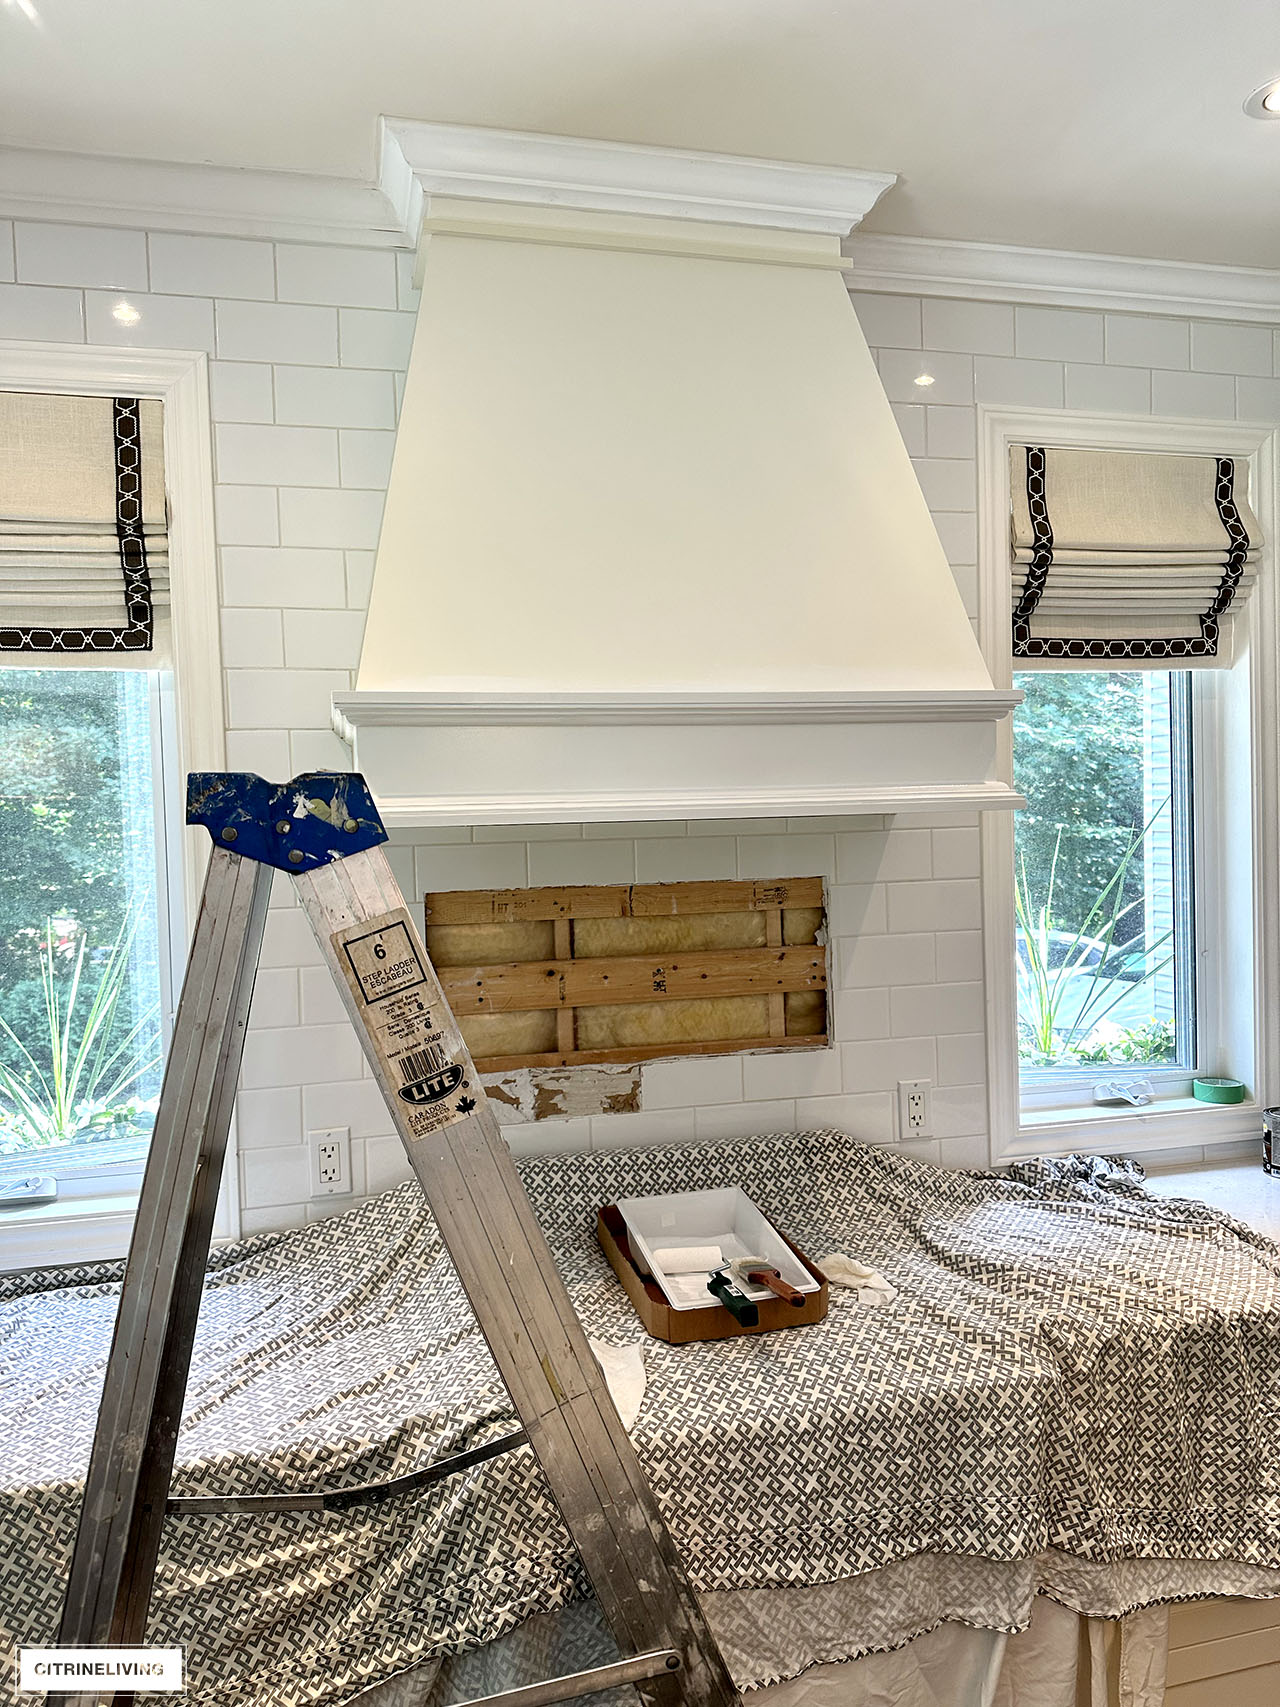
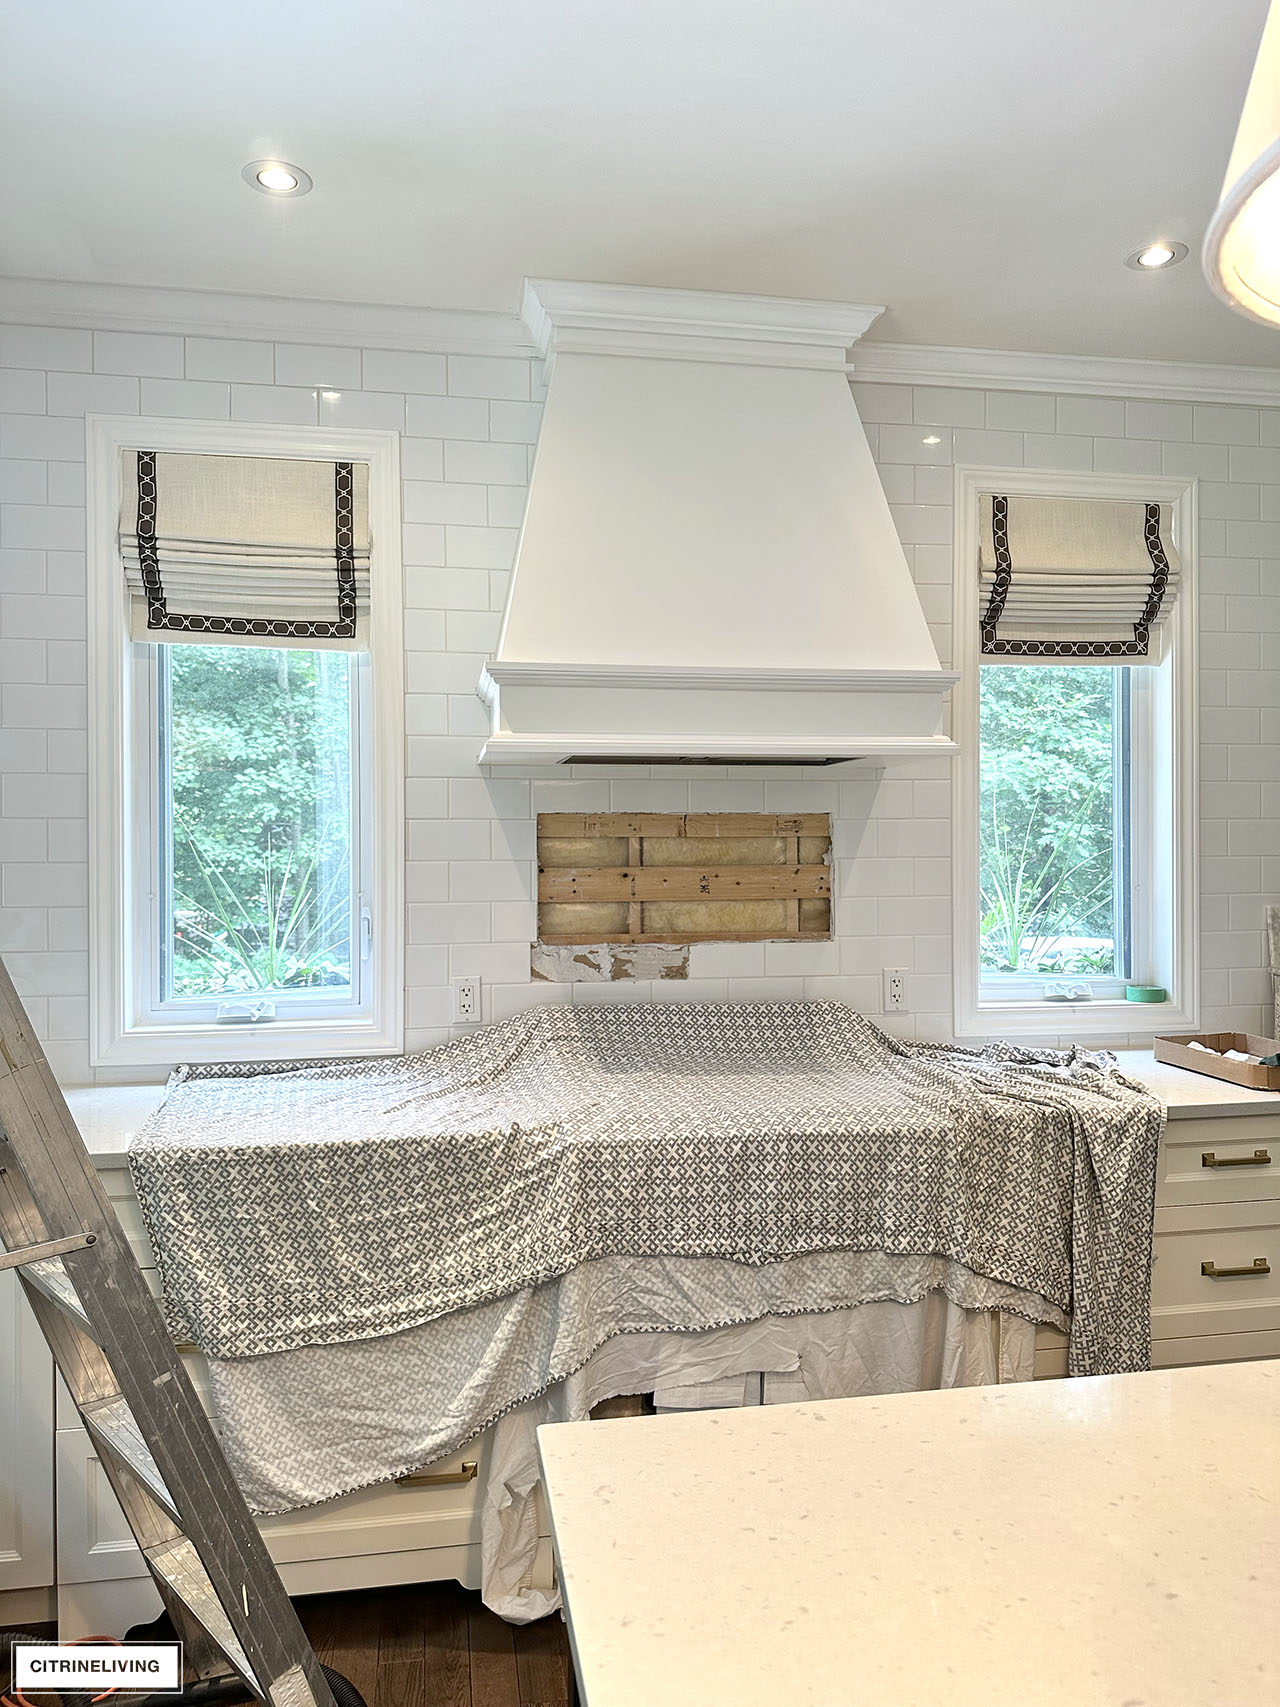
Yes, there’s a gaping hole in our wall…but more on that later. First, let’s talk about our newly painted hood! I’ve wanted to update this for a very long time, it’s been on my radar for for years.
It looked dingy all the time and I always had to retouch photos for my content because of the yellowish color. I finally took the plunge since we’re in the middle of a new kitchen update, and I painted it!
I’ve never liked how the ivory looks against our white tiled backsplash, it always reads yellow in photos and I’ve never loved it – you can really see it in the image below.
It was so easy to refinish, I cannot believe I put if off for all of these years. I was scared to touch it and ruin it, but it was actually so simple to do.
You can see the true ivory color in the before shot above, and the progress shots below, where I started painting. I love the ivory on all of our lower cabinets, but not on our range hood.
Can you believe the difference in these shots below with just one coat of paint (I’ve since painted a second coat)? It really is amazing what paint can do.
We’re so happy with the results, I also decided to paint our upper cabinets in the entire kitchen, since it was such an easy job.
We chose Benjamin Moore Simply White (OC-117), a warm, creamy white – it’s a classic color and works anywhere.
It looks so gorgeous, and now everything above our counters is Simply White throughout our kitchen, and below the counters is our original ivory.

Our cabinets and hood are a material that is called polyester, which is sort of similar to laminate or melamine. Essentially, it’s like a veneer that is heat wrapped over a pressed wood cabinet.
They do have a lot of pros – they’re very durable, easy to maintain and wipe clean, and they’re generally more affordable.
There’s definitely a process to painting cabinets that aren’t wood, but it’s really quite simple. Keep reading for the process we used.
VISIT MY AMAZON STOREFRONT FOR MORE!
HOW TO PAINT KITCHEN CABINETS THAT AREN’T WOOD
Below I’m sharing the process I used to paint our polyester cabinets and hood with a brush and foam roller. You can also apply your paint with a sprayer if desired.
HOW TO PAINT KITCHEN CABINETS
Follow these simple steps thoroughly to get a new look in your kitchen.
STEP ONE:
Remove your cabinet doors from the frames and all hardware.
STEP TWO:
Wash cabinets thoroughly with a degreaser that is meant for this type of work (we used TSP degreaser). Wipe down and let dry completely.
STEP THREE:
Lightly and thoroughly sand the entire surface and all moldings/trim work with a fine sandpaper – we used 150 grit. You are not removing the surface, only the sheen, and creating a rough texture the primer and paint will adhere to.
STEP FOUR:
Wipe the cabinets completely clean so they’re free of dust with a washcloth. A tack cloth also works great. You can also vacuum them first with a brush attachment.
STEP FIVE:
Time to prime! Use a good quality primer that is specifically made for this type of job. I used a brush on the raised side panels and moldings, and a foam roller on the flat panel in the middle. Make sure to follow the instructions and drying time. We applied two coats.
STEP SIX:
Your cabinets are ready for paint! Again, make sure to use a good quality paint that’s made for this kind of work! We used Benjamin Moore Advance – it has a long drying time and curing time once you’re finished. Be sure to follow the instructions to achieve the optimal outcome. After your first coat is dry, you’ll want to repeat. We applied two coats, and may do a third.
STEP SEVEN:
When everything is finished drying you can hang your doors back up and when they’re done curing (BM Advance is one week curing time), you can install your hardware. Time to enjoy your new cabinets!
Note: I followed the same steps to paint our hood, except the removal obviously!
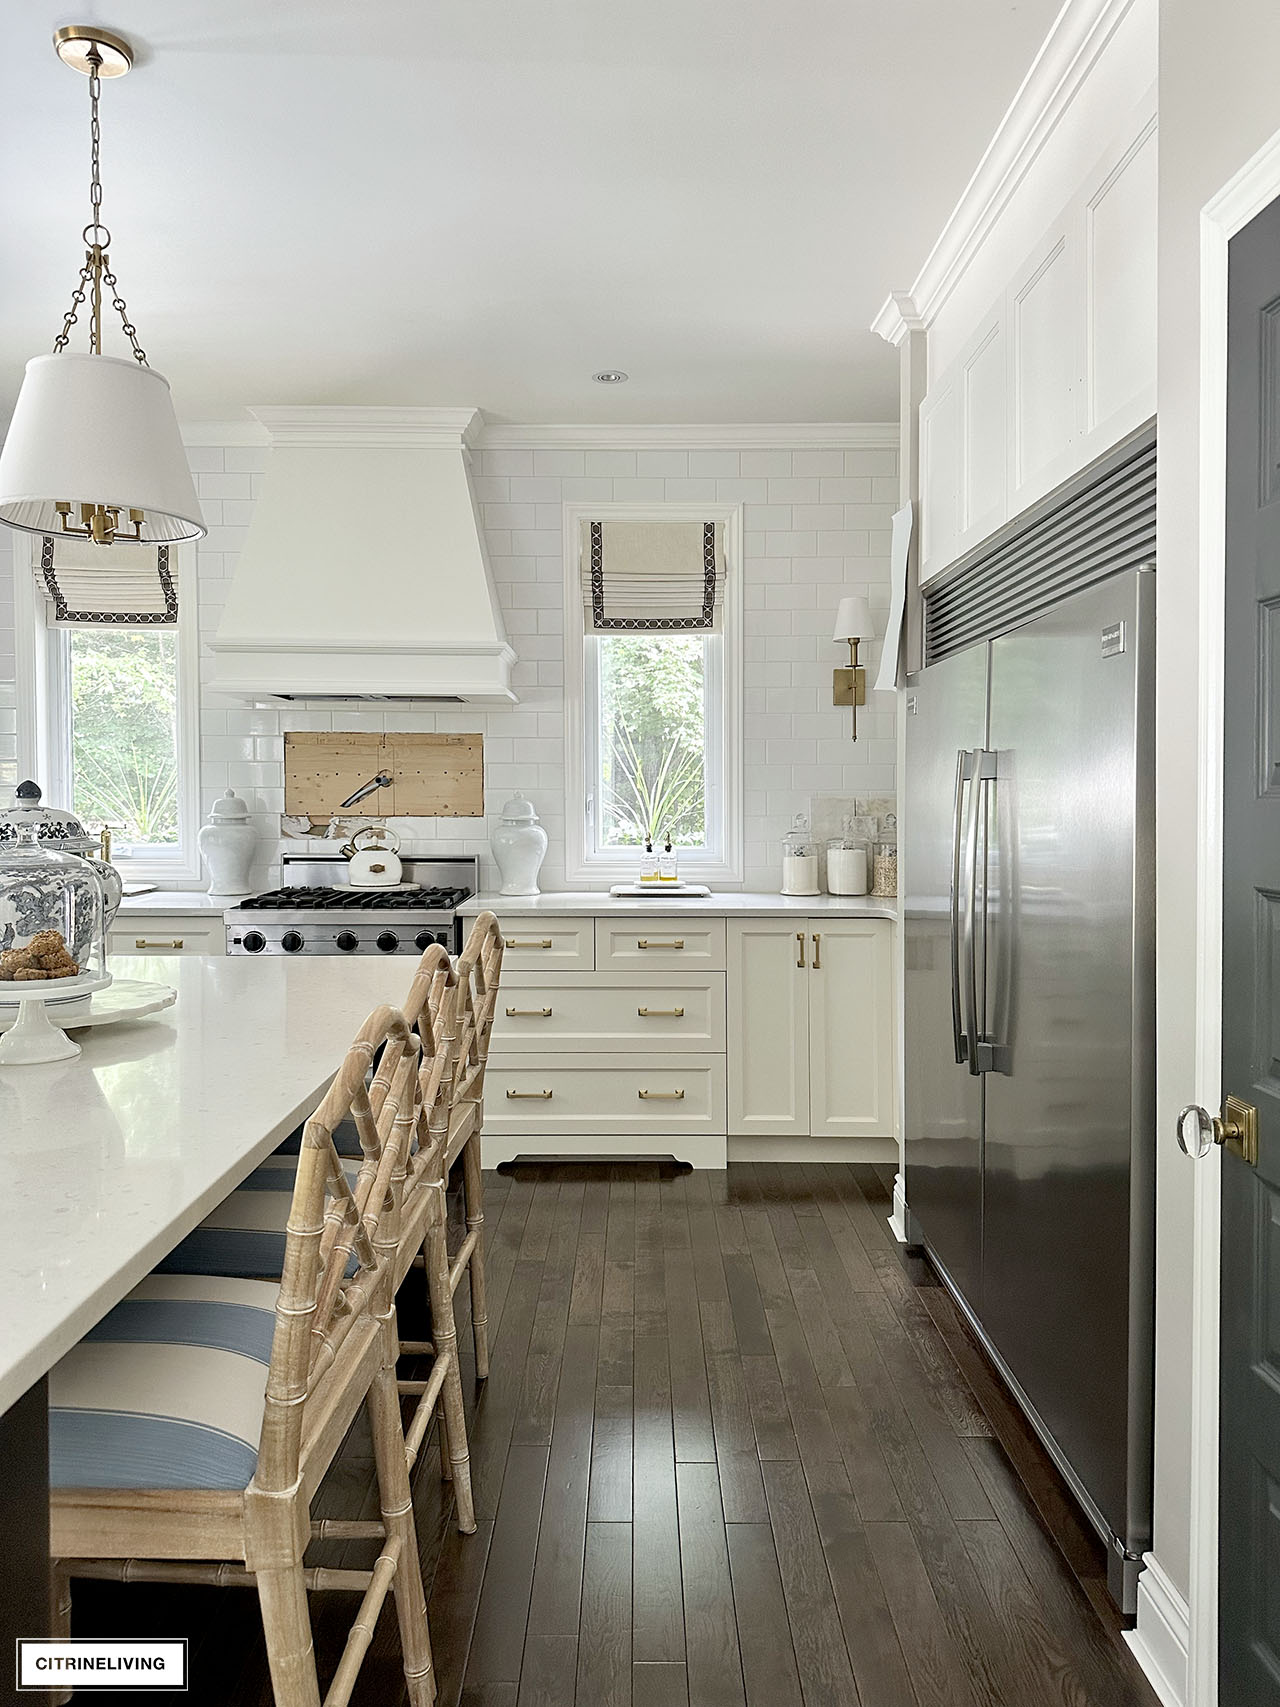
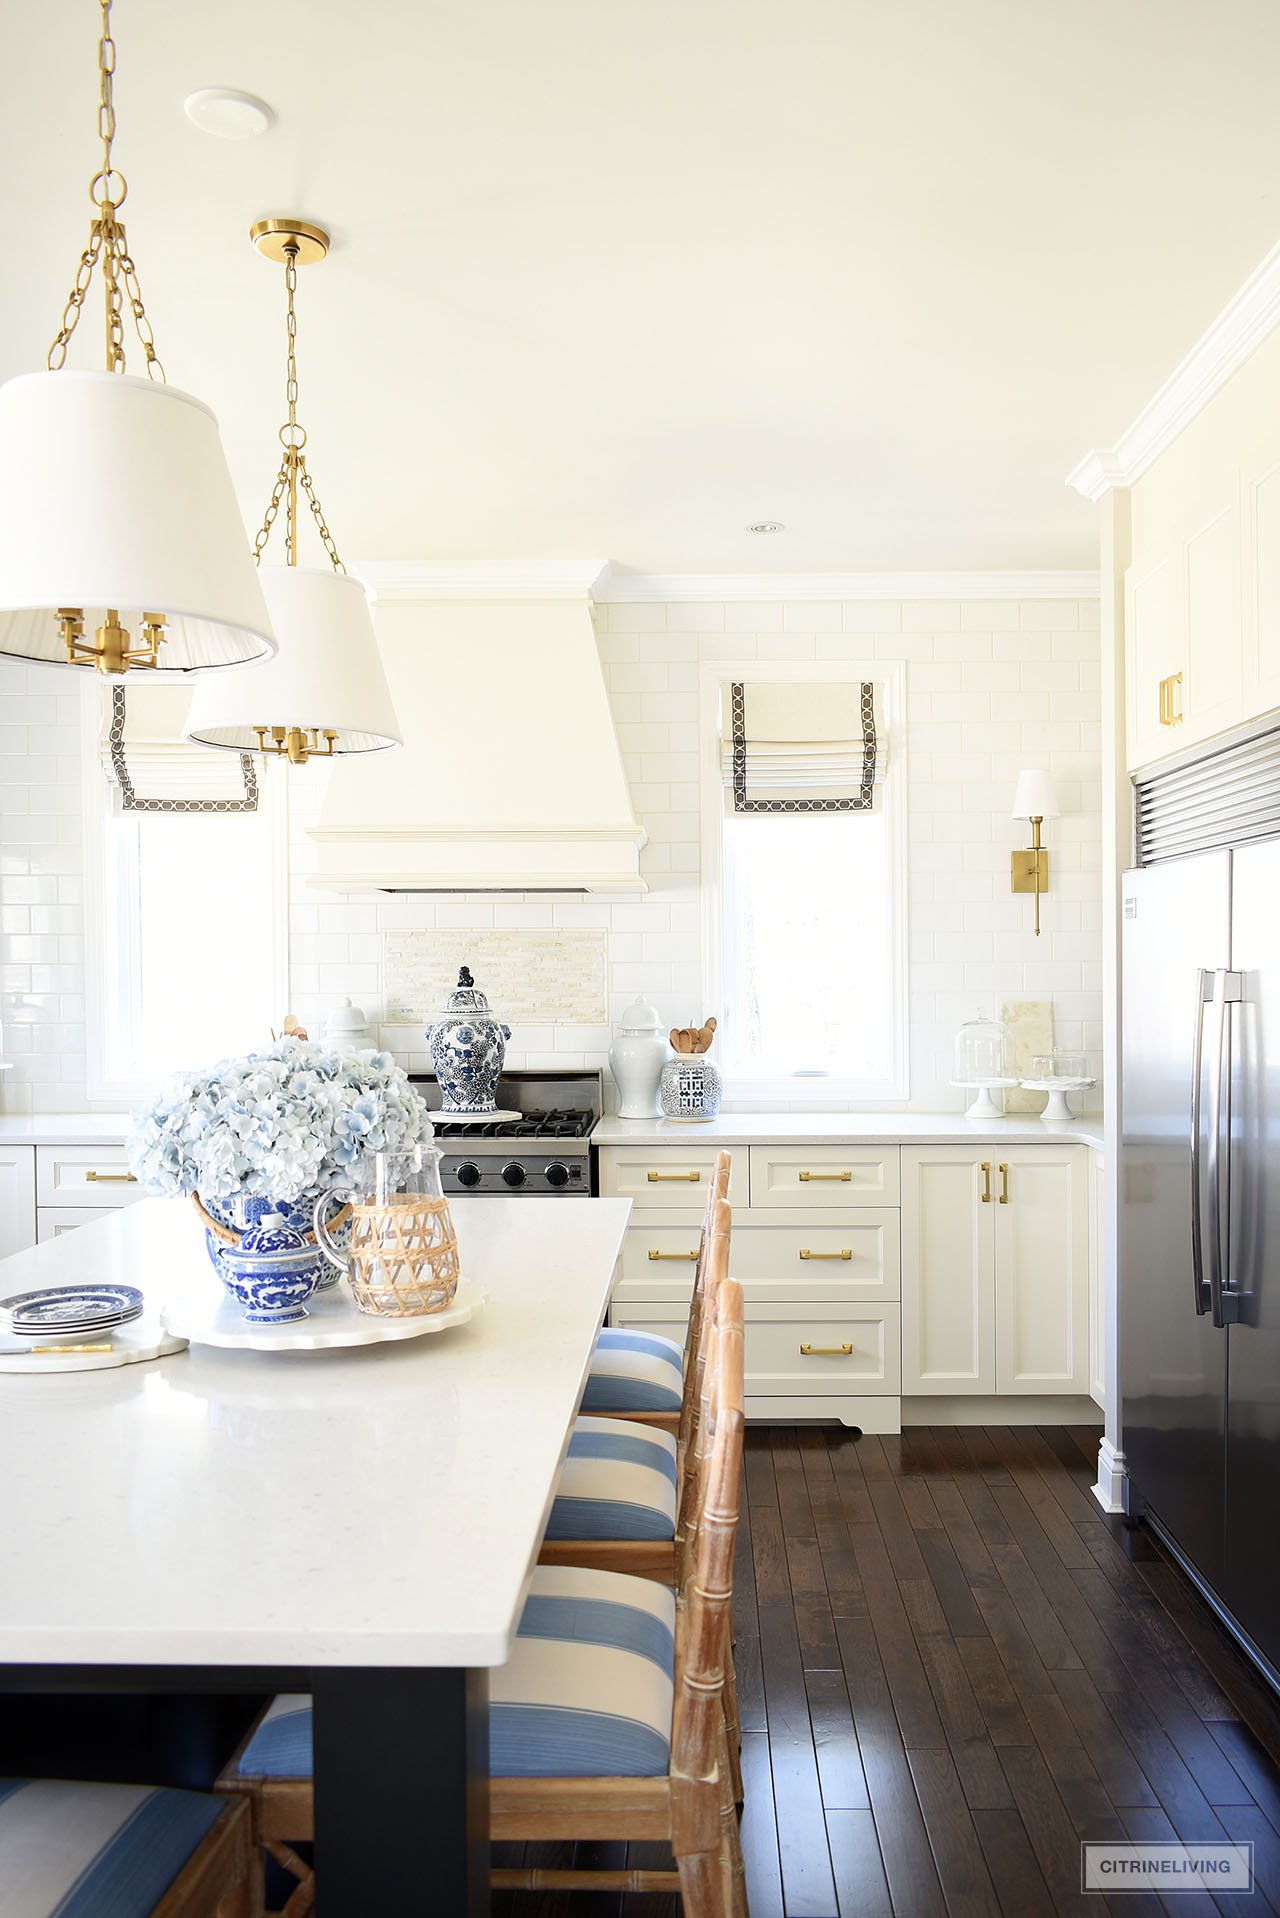
You can see a big difference in our kitchen between these two images (the top one is a quick snap, the bottom is from our spring kitchen last year), everything looks so bright, clean and beautiful already.
I love the tone on tone look of our existing ivory lower cabinets and our newly painted white upper cabinets and range hood.
We had rough-in plumbing for a new pot filler installed (shown above), and now we’re waiting on our new quartz slab to get delivered. Keep reading for more about that!
SHOP OUR KITCHEN

VISIT MY LTK SHOP FOR MORE!
OUR NEW QUARTZ BACKSPLASH, BRASS RAIL + TILED WALL
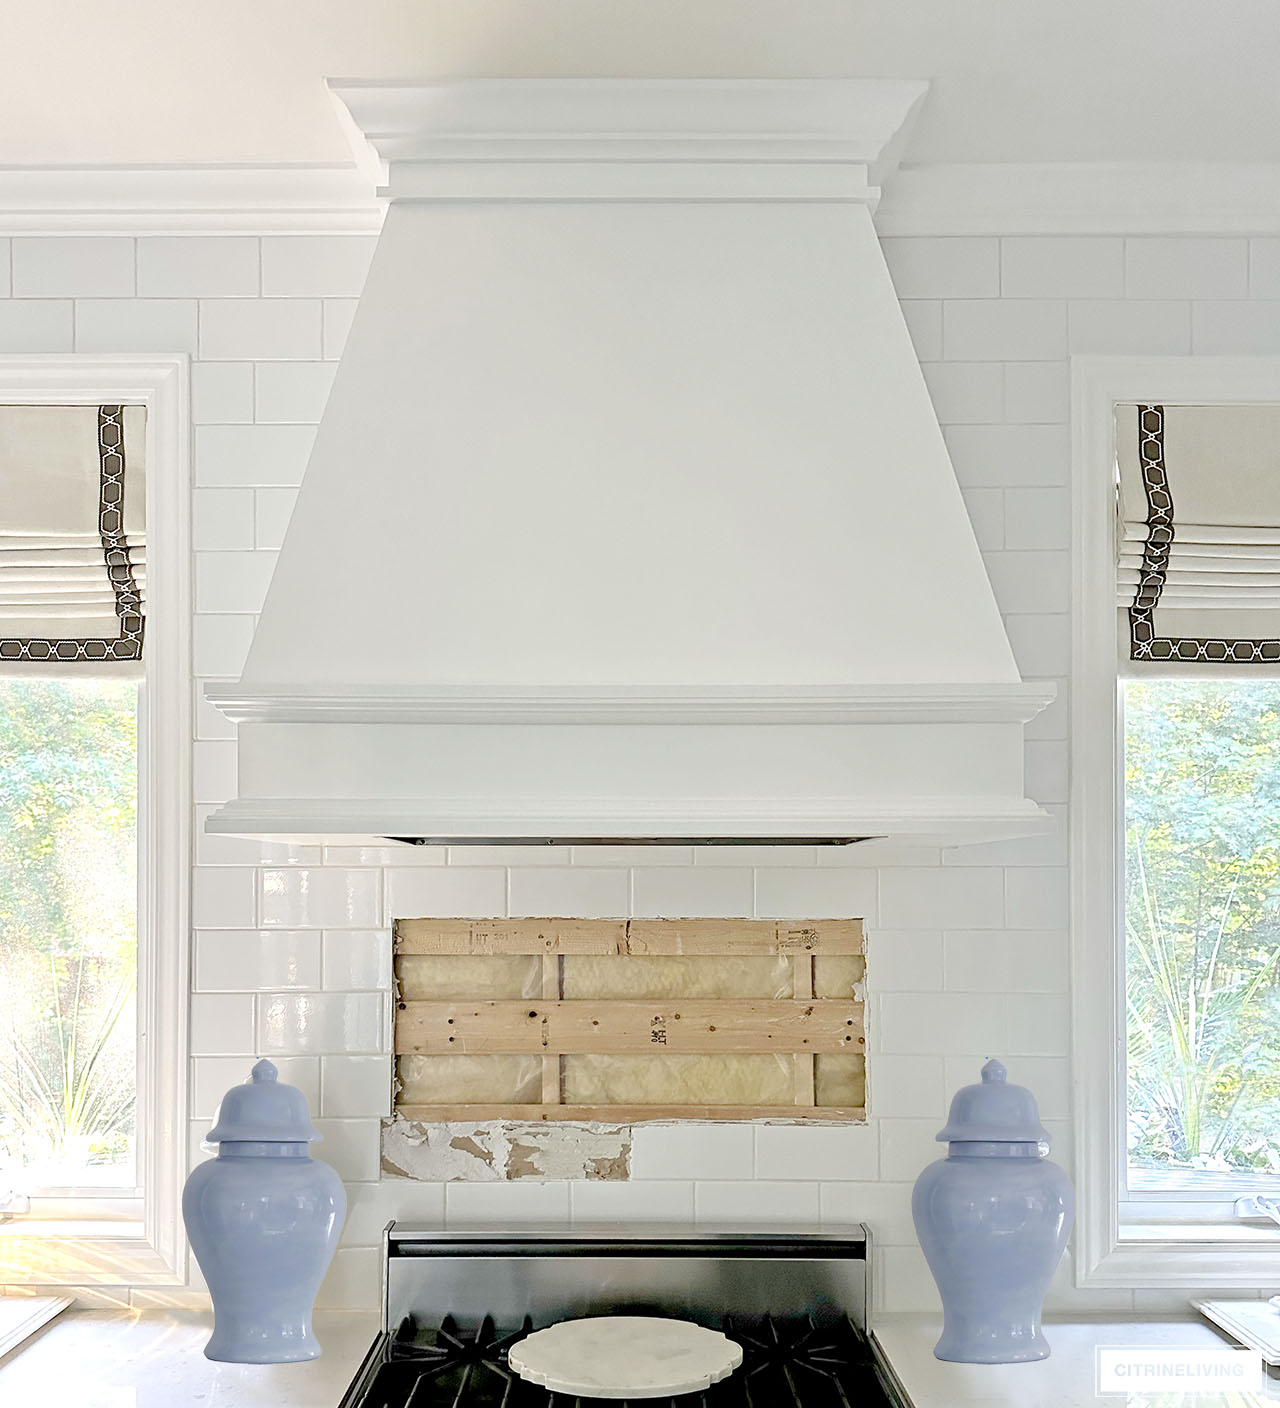
We’re also updating our backsplash, something I’ve dreamed of doing for a very long time! We’re adding a quartz slab behind the stove to go over the existing white subway tile.
We removed the smaller tile insert that was there before and installed plywood (which you saw a few photos further up), so the quartz can be glued to something stable.
I wanted a material that would contrast with our existing quartz counters, which are Misty Carrera by CeasarStone. We decided on a stunning, grey quartz slab called Bahia. I’m so in love with how the color will pop against our white tiles and the veining is very beautiful.

BAHIA QUARTZ SLAB
I love the gorgeous grey tones and how it will contrast with our white subway tiles and existing counters.
We’re also installing a gorgeous brass pot filler and a beautiful, vintage-inspired brass rail, either suspended from the hood underneath, above the pot filler on the wall, on the front of the hood on the flat part, or on top of that upper molded edge (like below). So many options!
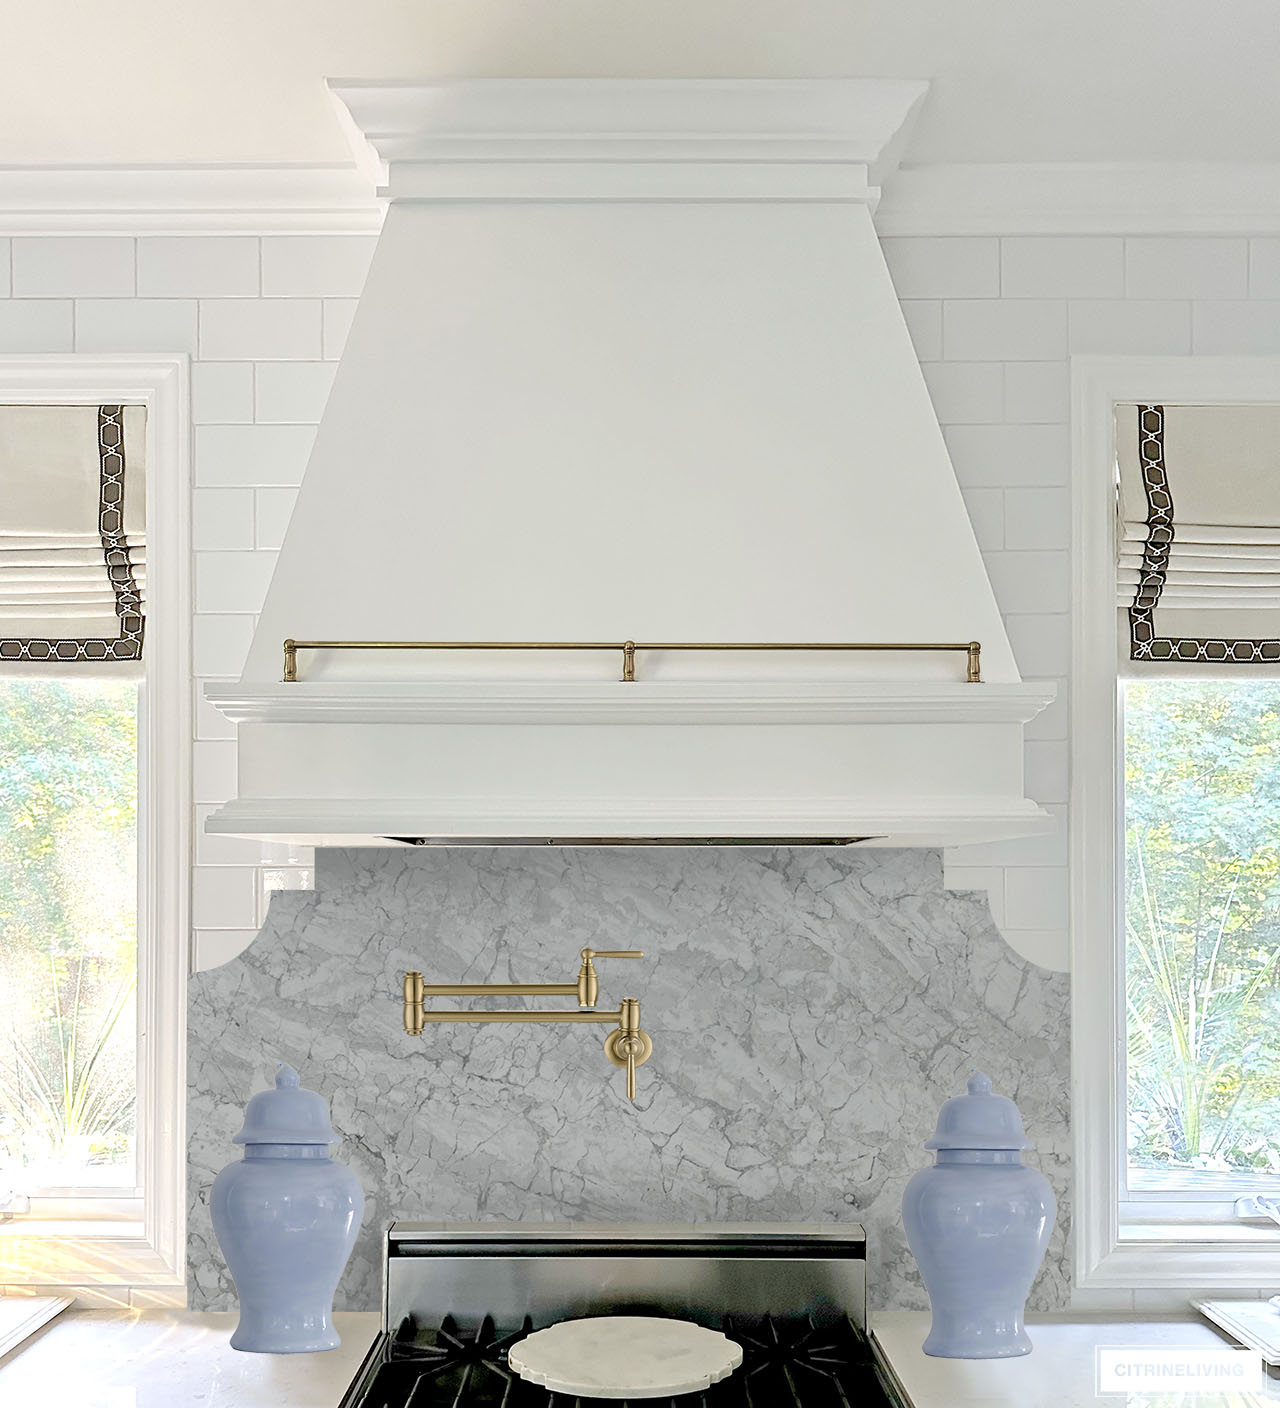
Above is a photoshop rendering of the Bahia quartz slab we designed and our new brass pot filler. The rail is resting on the hood edge until we figure out where we want it – either as a decorative element, or for function to hang things from. I just can’t wait to see it all come together!
The quartz slab, pot filler (and plumbing) and rail were a small splurge, but worth every penny for an upscale look that elevates our kitchen.
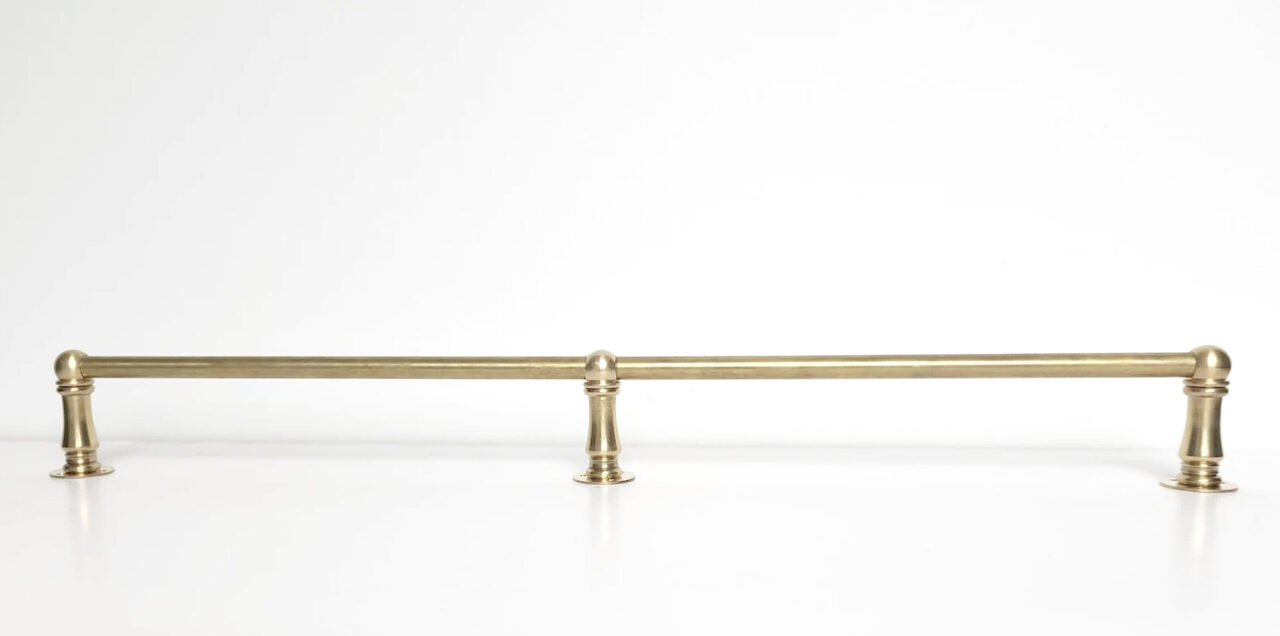
OUR BRASS RAIL
We’re adding this beauty to our stove area and also to adorn some shelves for some vintage charm.
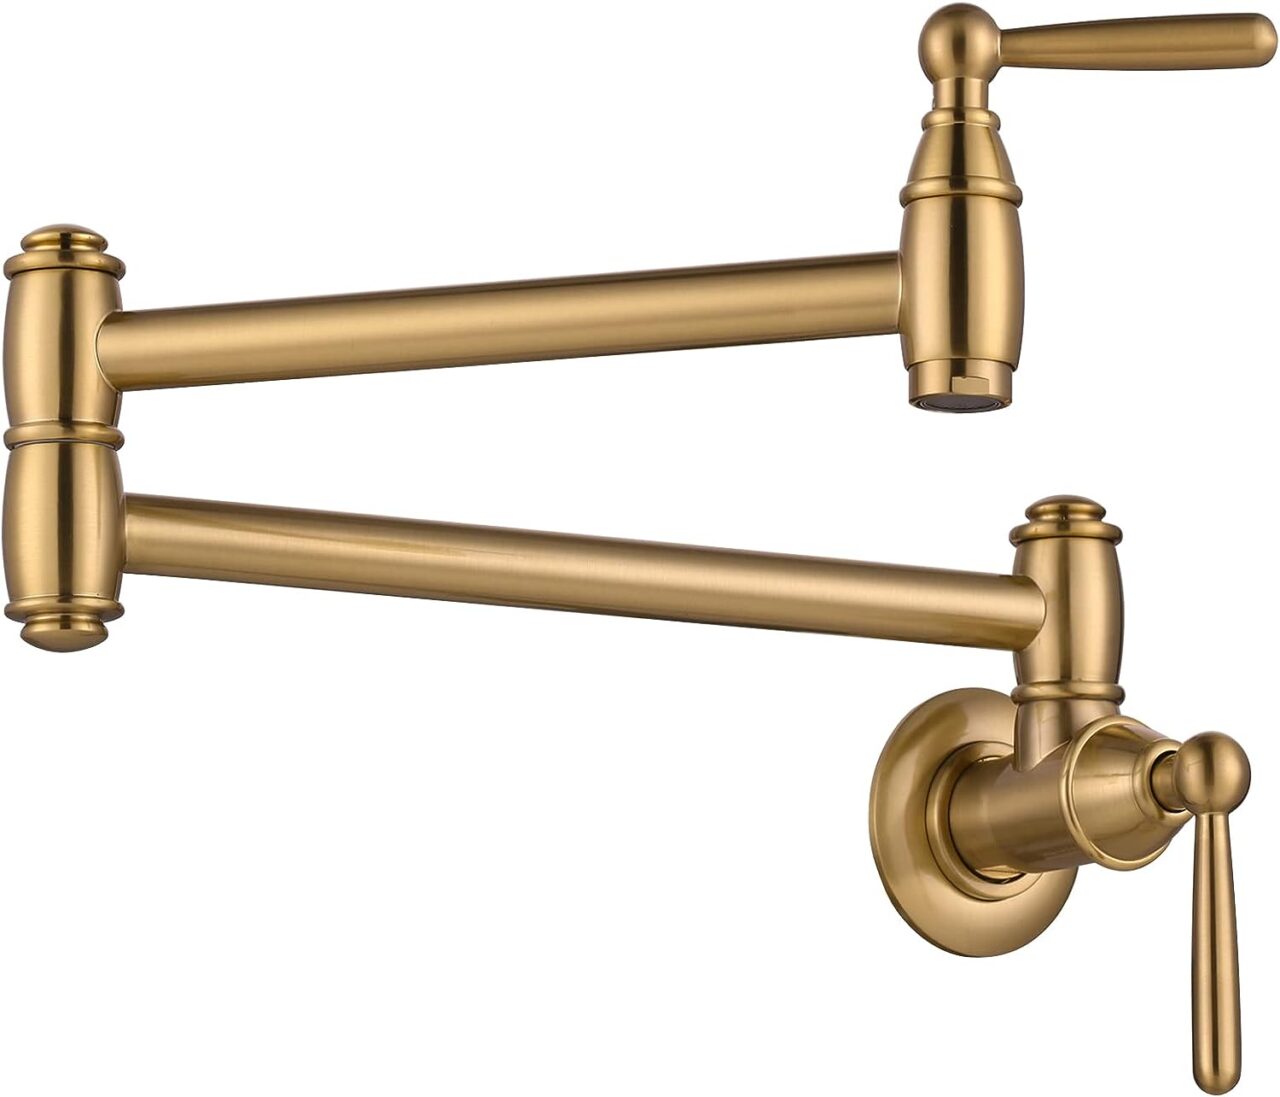
OUR BRASS POT FILLER
This simple, classic style is perfect for our kitchen – and super affordable!

Surprise! Here’s another peek, but please ignore our dirty windows, ha! We tiled the wall around the window to match our existing adjacent tiled wall and we love it! These are classic, white, 4 x 8″ subways tiles.
We installed new crown moldings here as well. And as you can see our dishwasher is waiting for its new panel to match the other cabinet doors…lots of little things still left in here.
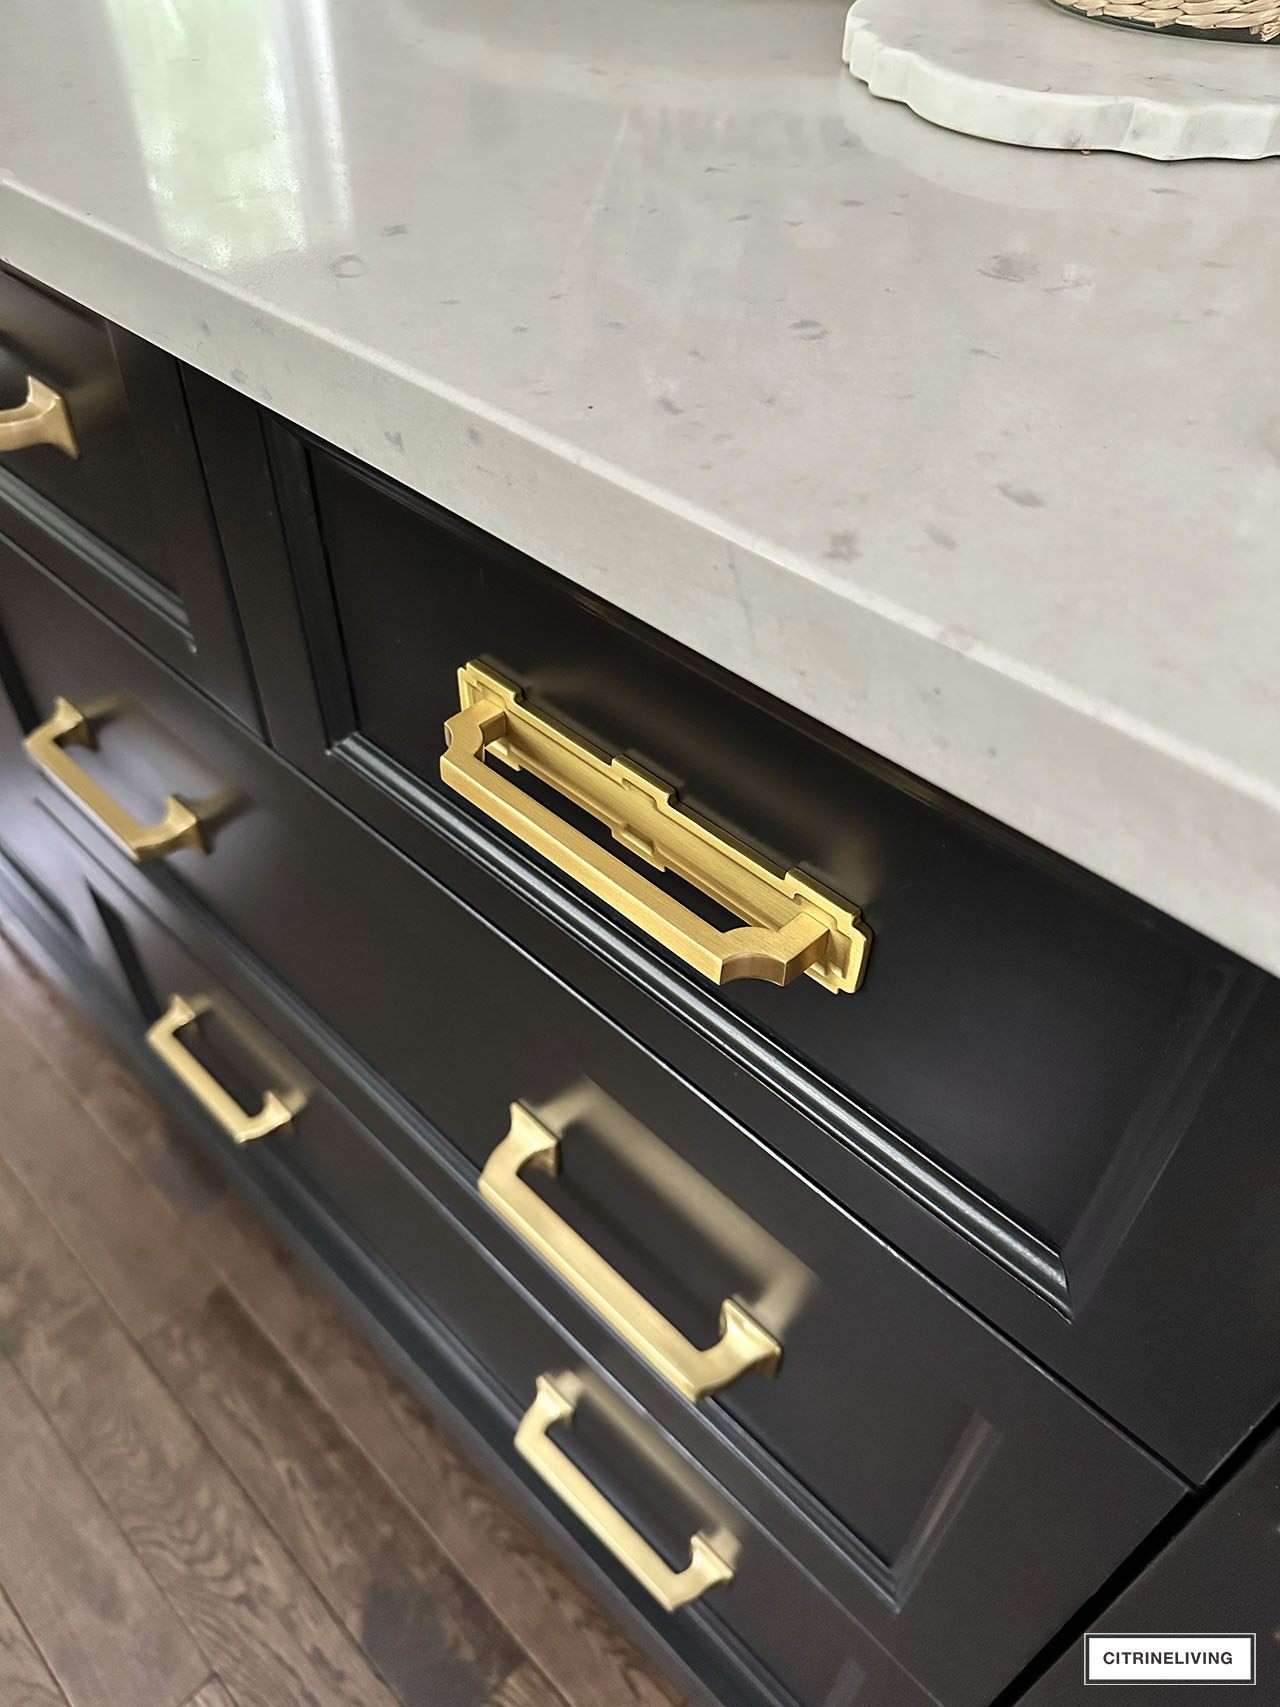
OUR NEW BRASS CABINET + DRAWER HARDWARE
Since we needed new hardware for our new custom cabinets and drawers, we’ve decided to update the hardware throughout our entire kitchen.
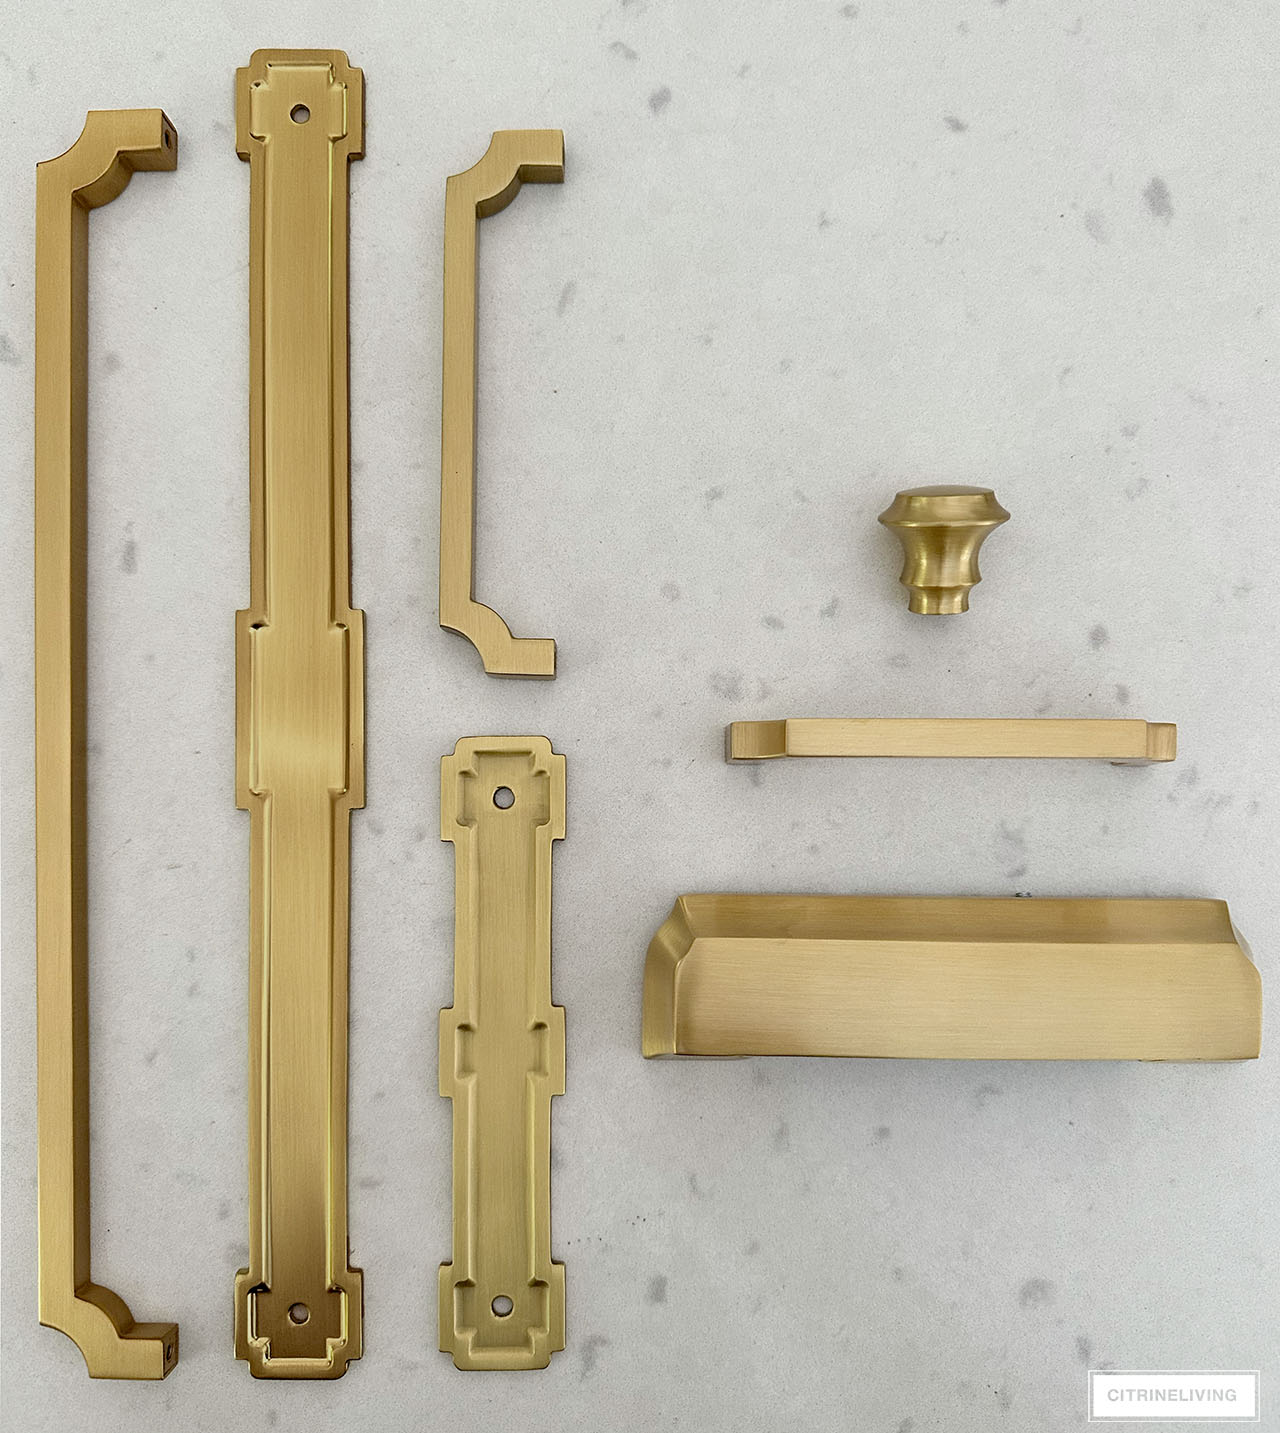
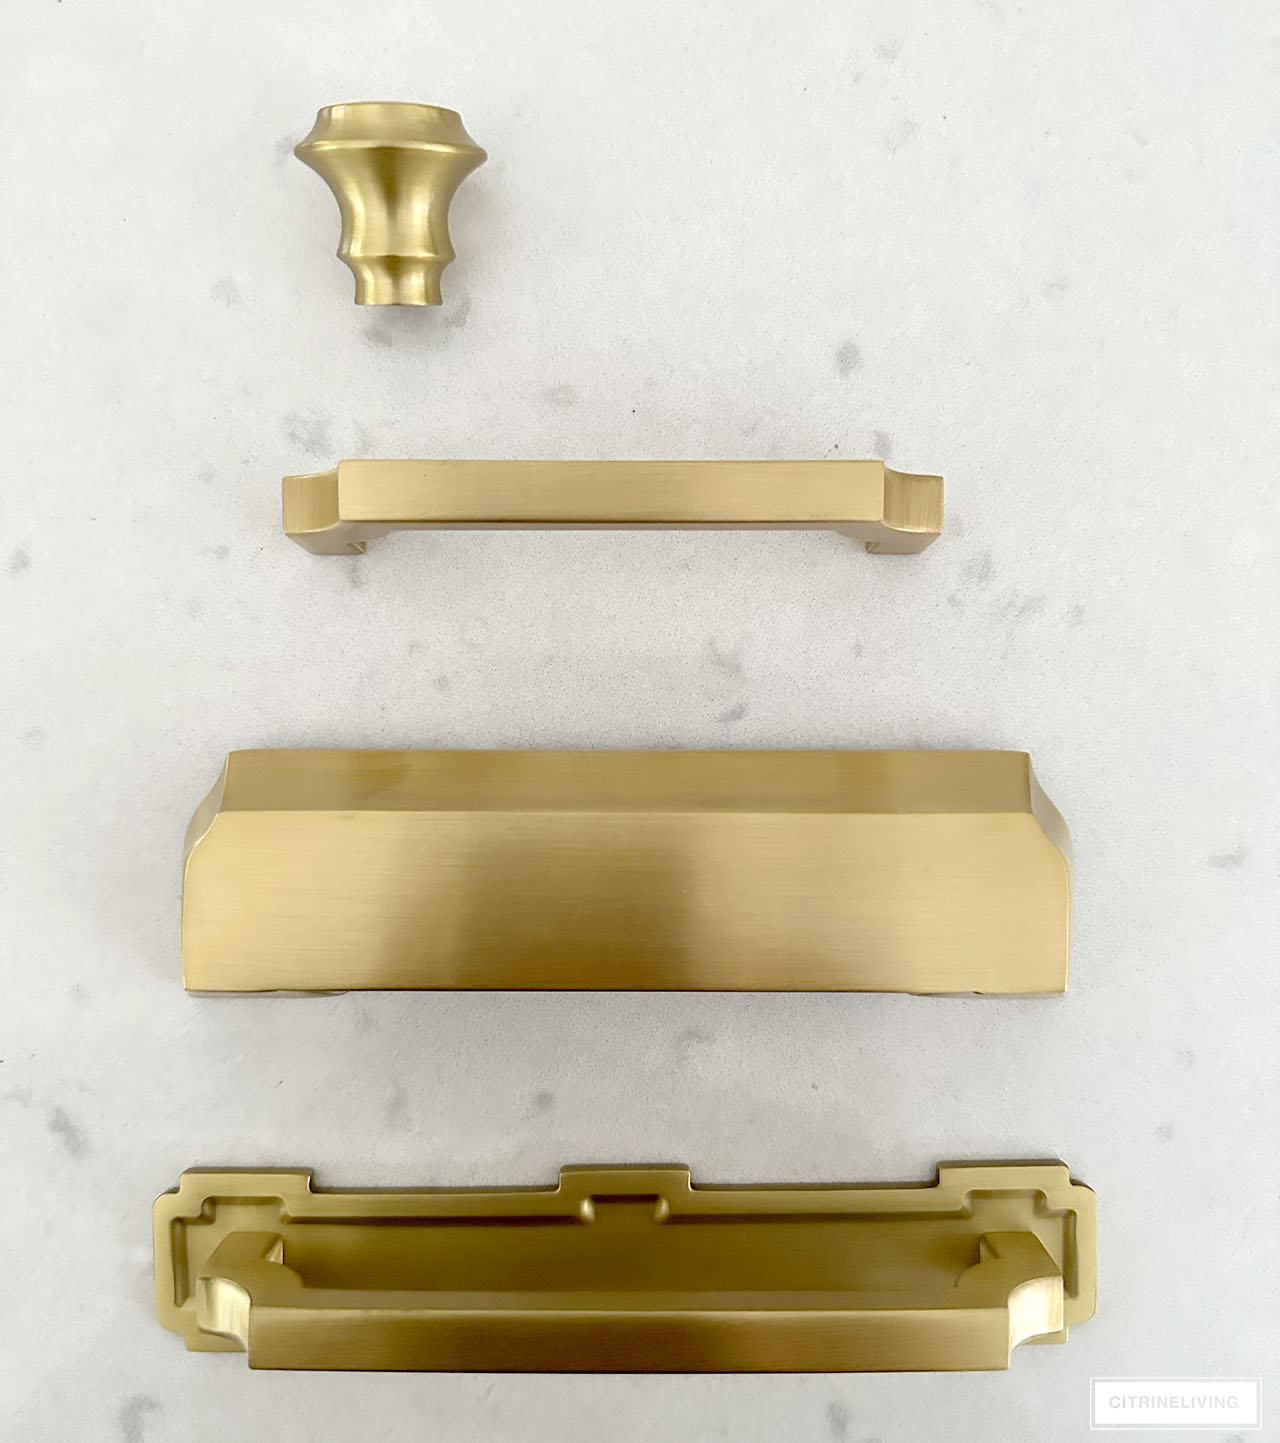
We chose something very unique and different, and we’re mixing different handles, knobs, cup pulls and backplates from four different collections.
They’re all from one of my favorite brands, Belwith-Keeler, who I’ve worked with several times before – take a look at these projects also featuring their beautiful hardware : this white and grey kitchen (our friends’ home), our kids bathroom refresh, and a previous kitchen update.
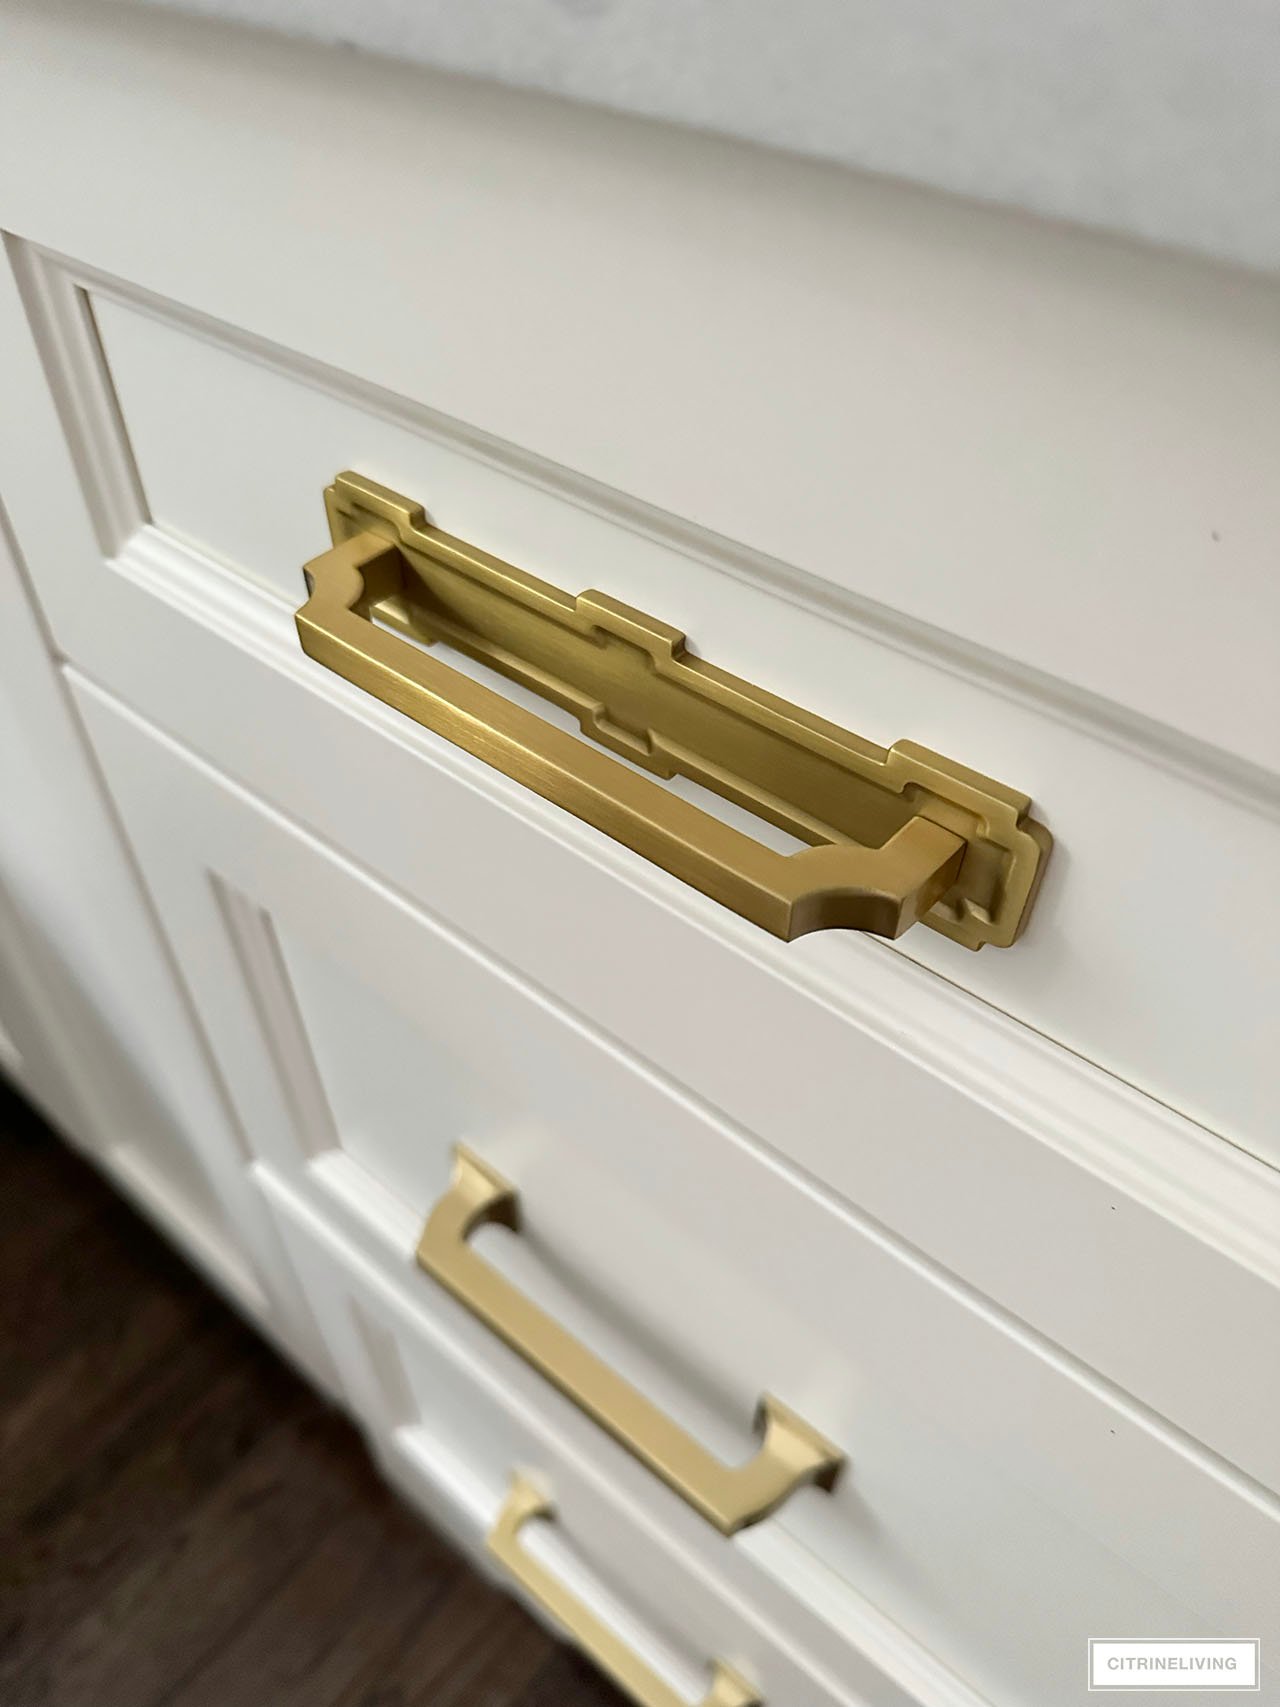
We’re mixing these very chic brass Coventry backplates with these elegant brass Monarch pulls (did you notice how the shape echos our quartz backsplash?), in two sizes – 128mm on all of our drawers and 96 mm on all of our existing cabinet doors.
WANT THE LATEST NEWS FROM CL BLOG?
WE’D LOVE TO HAVE YOU JOIN US!
CLICK BELOW TO SUBSCRIBE!
I love this mix so much, and the Chinoiserie feel they lend to our space is just so gorgeous.
We explored various styles of hardware and finally decided on this beautiful brass mix.
Below is a sneak peek of our new cabinets, brass cup pulls and handles, along with all of the hardware you’ll see throughout our kitchen soon.
Below is the 12″ pull and backplate for our new dishwasher panel that’s being made to match all of our lower ivory cabinet doors.

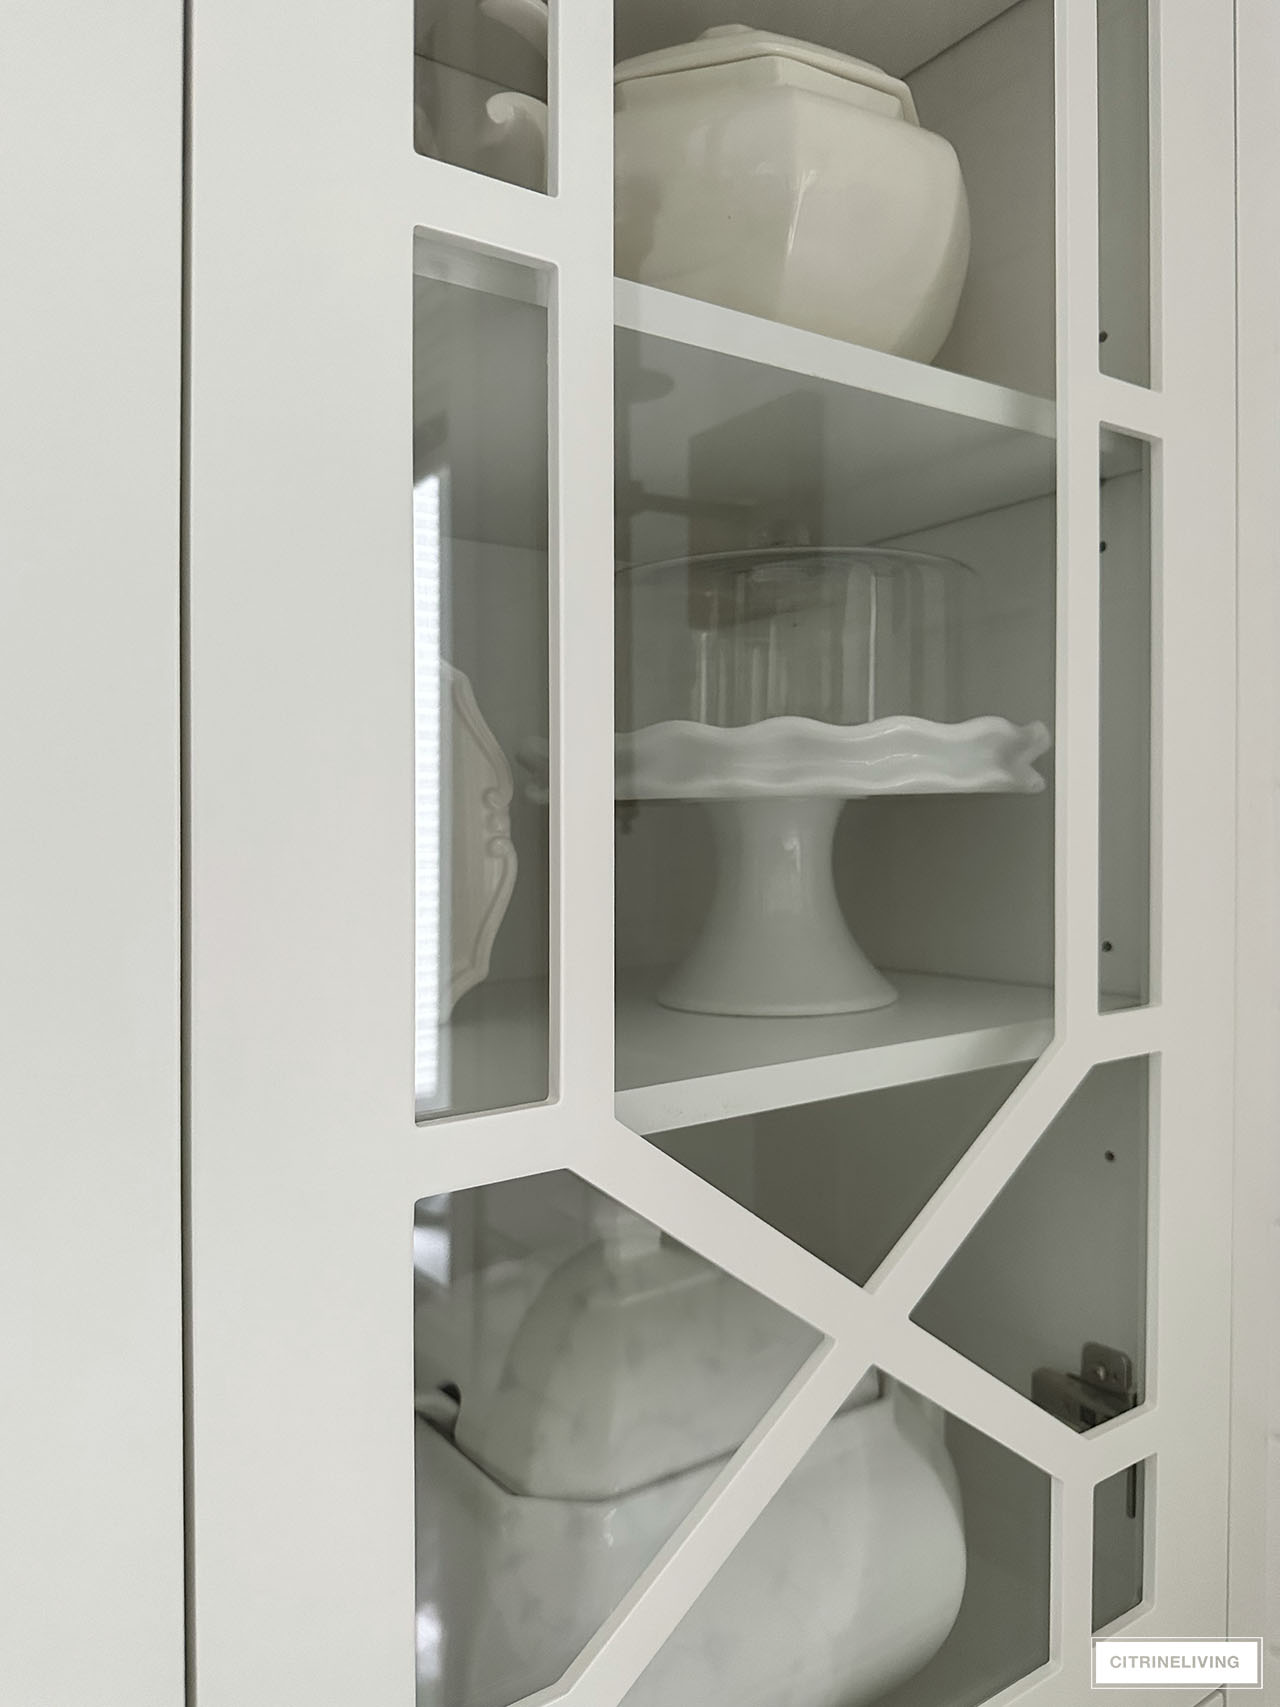
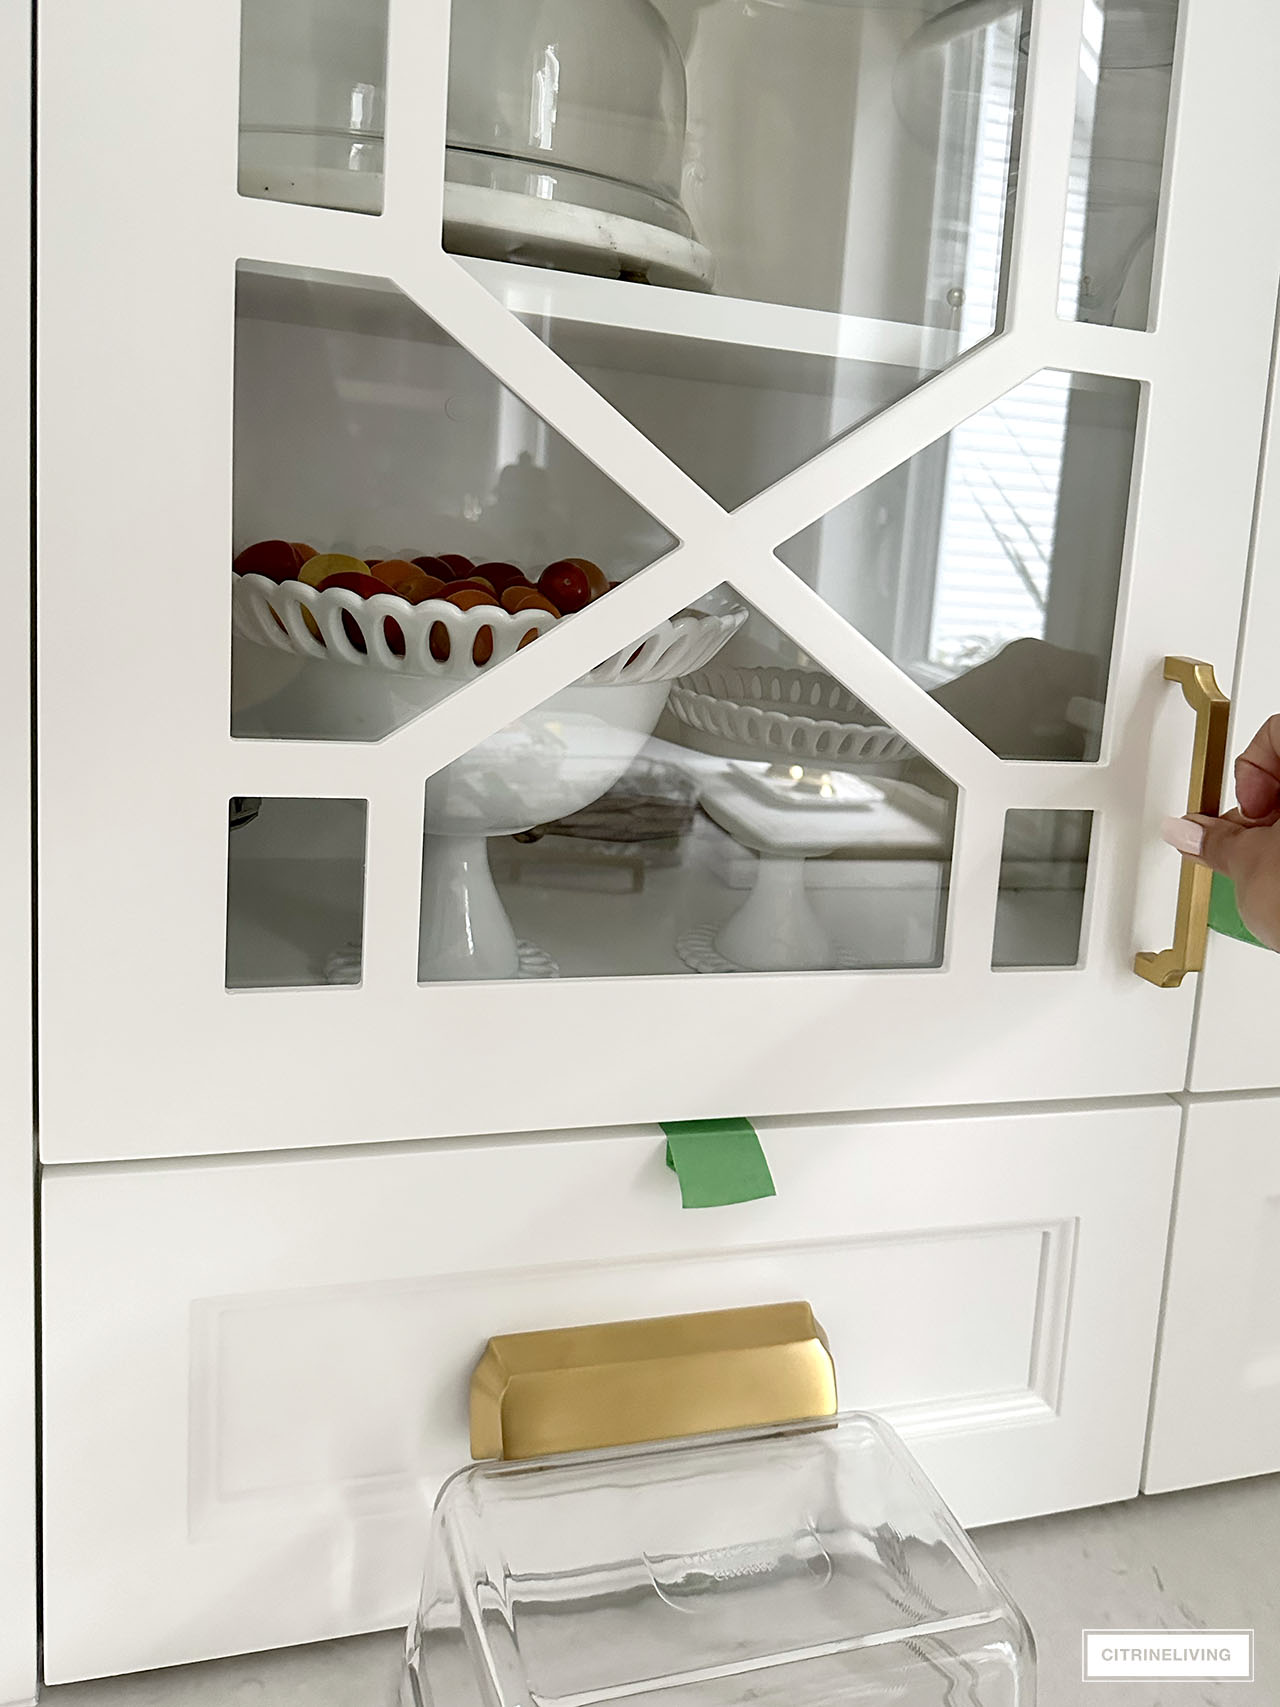
And here is another trellis cabinet door peek…oh it is sooooo gorgeous, don’t you think? Notice how it echos our bar stools in the below shot further down. All of these little details have a big impact in the overall design of a space.
SHOP OUR HARDWARE


Chic additions to beautify your kitchen!

GET 10% OFF AT HICKORY HARDWARE
Designed by the same designers at Belwith-Keeler at a more affordable price point.
Our kitchen used to be adorned with these beauties in chrome! I love the satin brass finish. They’re a very affordable option for any space! Click below to shop and use code CL10 to get 10% off!
A FEW EXTRA DETAILS IN OUR KITCHEN UPATE
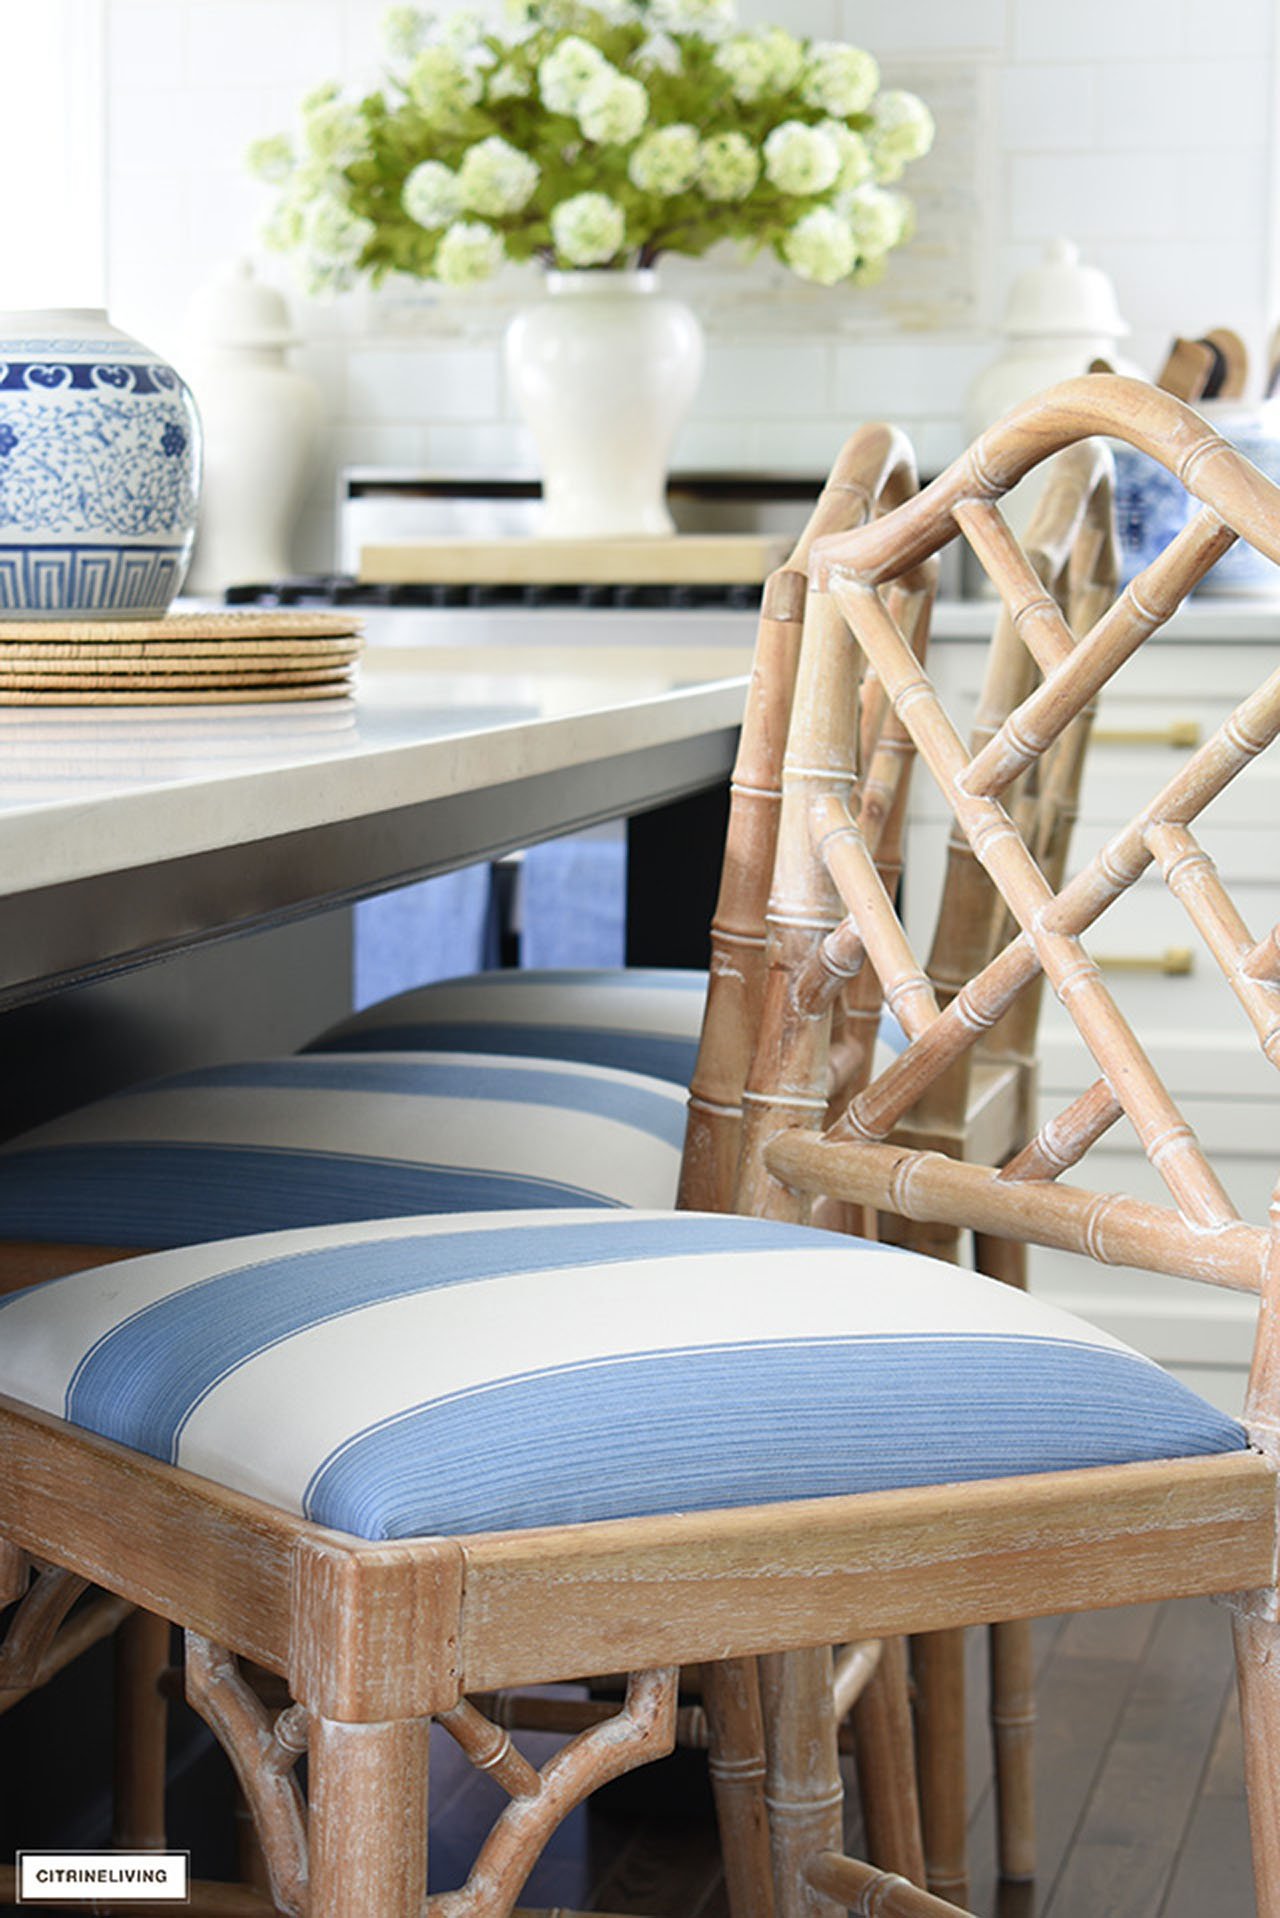
If you know me, you know I love to recover our barstools (like these from our summer kitchen a few years ago), I’ve done it twice now. I’ve decided that the third time’s a charm and I’m going for it again. Below you can see the new vintage ticking stripe fabric I’ll be using from Ballard Designs.
I love the more traditional, classic look of this fabric. I think it’s perfect for all of the updates we’re making in our kitchen and will compliment our bar stools beautifully.
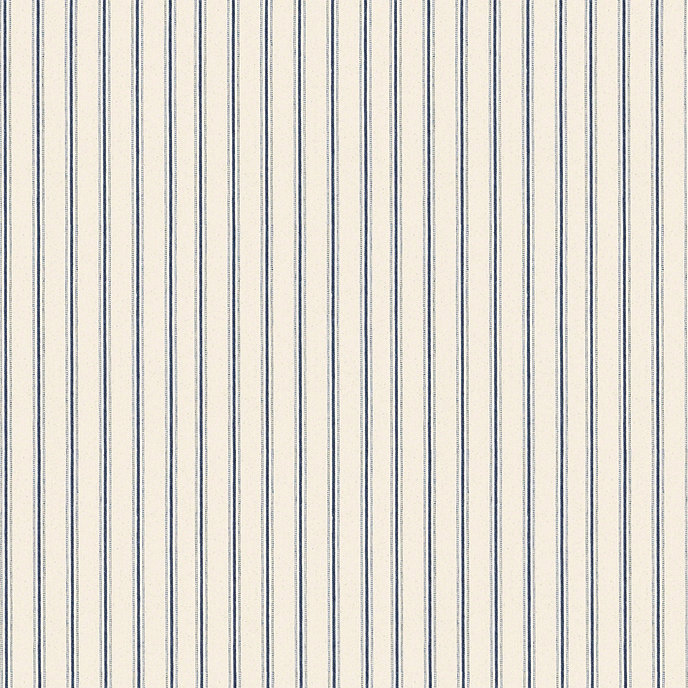
STRIPED FABRIC
Our latest fabric to recover our kitchen barstools! I love the vintage, classic stripe.
I’ve always wanted a larger stove, it’s one of my biggest regrets when we built our home, fourteen years ago. We were on a budget and wanted to sell fast for a profit, so the less we spent the better.
We’re still here and still have a small stove, ha! I love this Ilve Nostalgie five burner gas range, it would be perfect in our kitchen…it’s not bigger, but at least has an extra burner that would be so amazing to have. And it’s super chic!
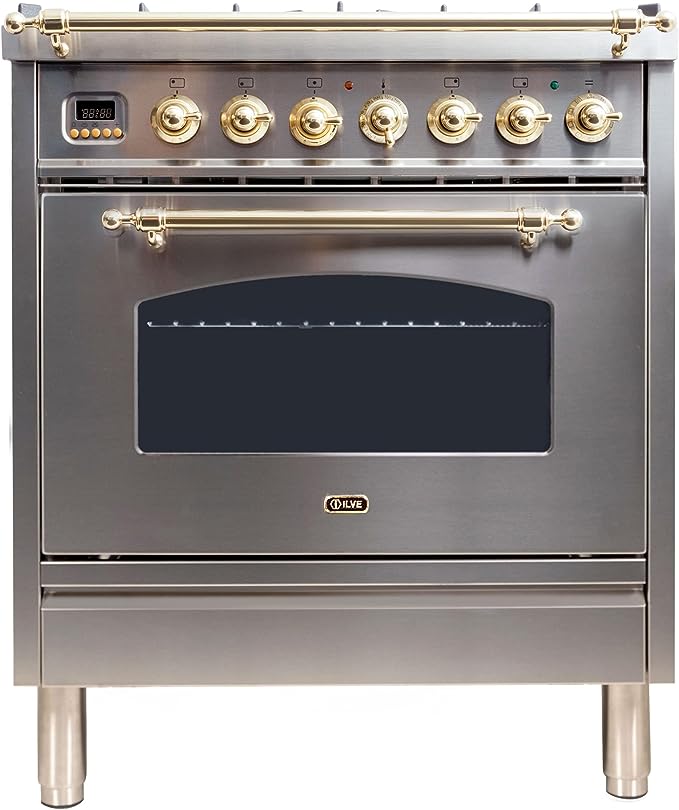
ILVE GAS RANGE
I wish had space for a larger range with more burners, but that would mean a major demo. For now, I’ll dream of this stunner, with five burners…maybe one day!
Check out some of our kitchen updates through the years for loads of ideas and inspiration.
MORE KITCHEN UPDATES THROUGH THE YEARS
- Our original kitchen – see what it looked like many years ago!
- Our new kitchen hardware
- Our built-in kitchen shelves
- Our new kitchen lighting
I can’t wait to share the full reveal of our kitchen update – I hope it will be sooner than later! For now we’re still waiting on the quartz slab, our dishwasher panel, our hardware and a few other items to arrive. Then we have to finish up all those little details that will complete our space. Thank you so much for reading with me…stay tuned for the full reveal! xo

Hi!
The lowers are a material called polyester, the color is ivory. The new drawer unit and dishwasher panel we had custom made was a custom color match – unfortunately I don’t have an actual color name! Thank you for stopping by!
Hi. What is the color of your lower cabinets?
Thank you so much Sally! We are so excited to get it all finished. There are a lot of little things that we’re doing in here and it’s amazing how significant an impact they make! I’m thrilled you like it all so far! I totally agree about the BM paint, it’s amazing and so simple to do. Thank you for reading with me! xo
Your new kitchen is coming along beautifully! Love your choices, especially the new range and kitchen handles (well, ok everything else too). The hood looks amazing. I used Benjamin Moore Simply White Advance to repaint all my kitchen cabinets and could not believe how great they came out. Their self-leveling paint is worth every penny! Can’t wait to see the finished project!
Thank you. very much!
Beautiful!