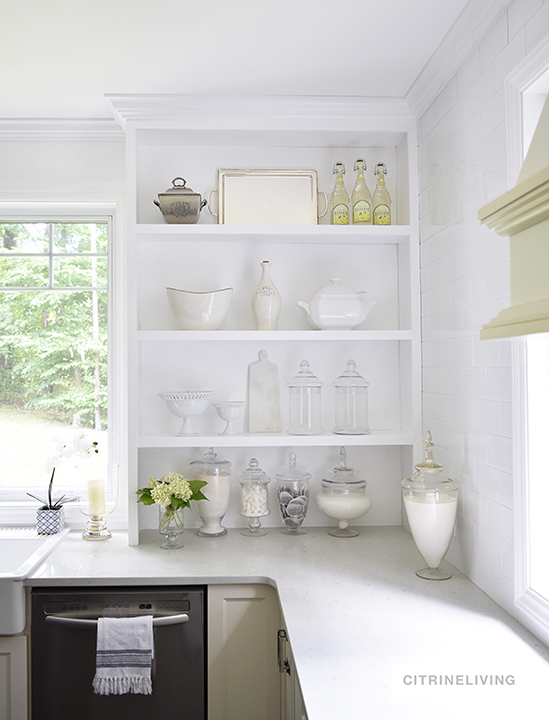
KITCHEN UPDATE REVEAL: OUR OPEN BUILT IN SHELVES
The time is finally here! Our built in shelves are done! I have been waiting months to work on this little kitchen project of ours and we were finally able to tackle it this week. I had written about it HERE this past January.
Just when we were about to start working on it this winter, my husband had an accident and hurt his arm. After a few moths recovering, he was finally able to get this one crossed off the list. I owe him a HUGE thank you for doing it on his vacation too – we all work on home improvement projects on our time off, right?! I can tell you he’s as happy as I am with this transformation and how much brighter and finished our kitchen looks and feels.
Affiliate links are provided throughout this post – see my full disclosure policy here. As an Amazon Associate I earn from qualifying purchases.
This project was so simple to do and it cost us virtually nothing (only about $100). It was two days of work – one day of building (really just a few hours), and one day of painting – which was a full day. Below is the before – we had a single floating shelf.
Our intention was always to add a few shelves, however it was one of those projects that never got finished. In the end, I’m happy because I love the built in SO much better! Here they are, our new built in, shelves.
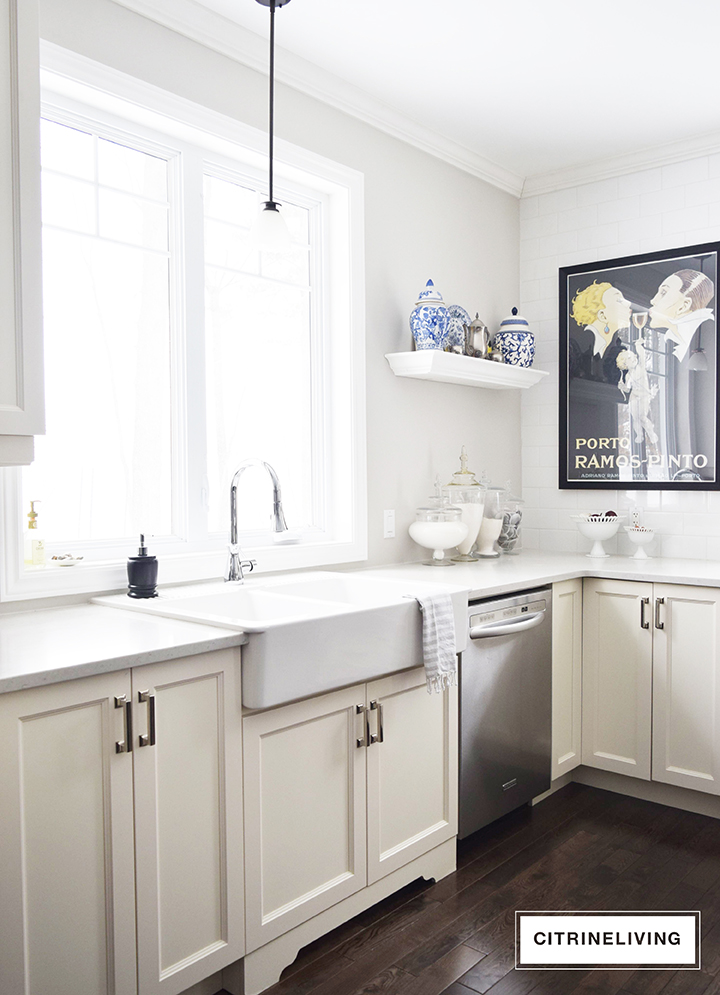
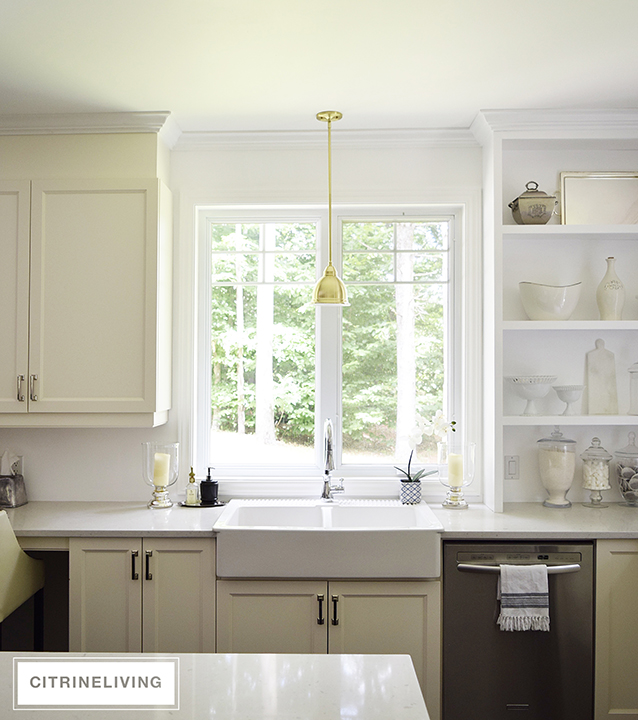
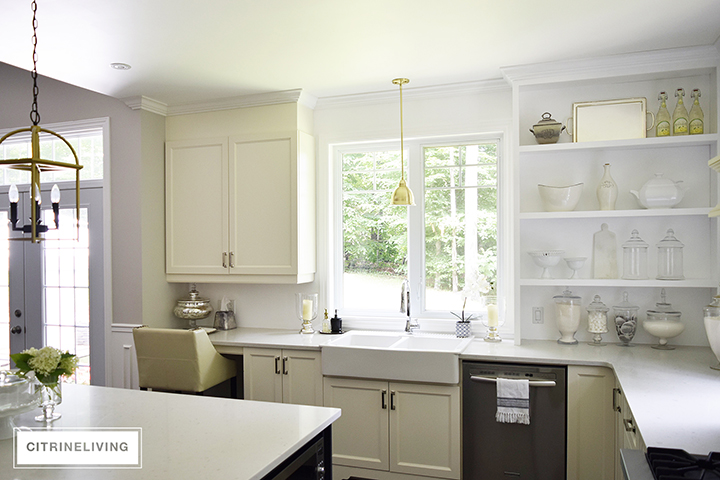
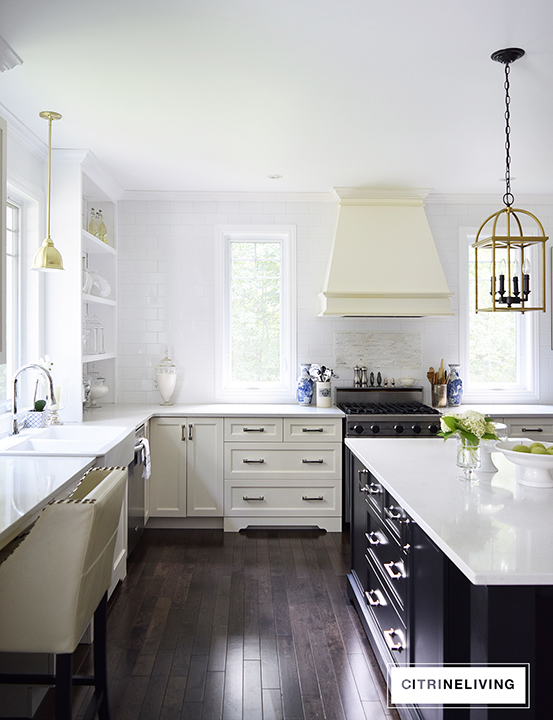
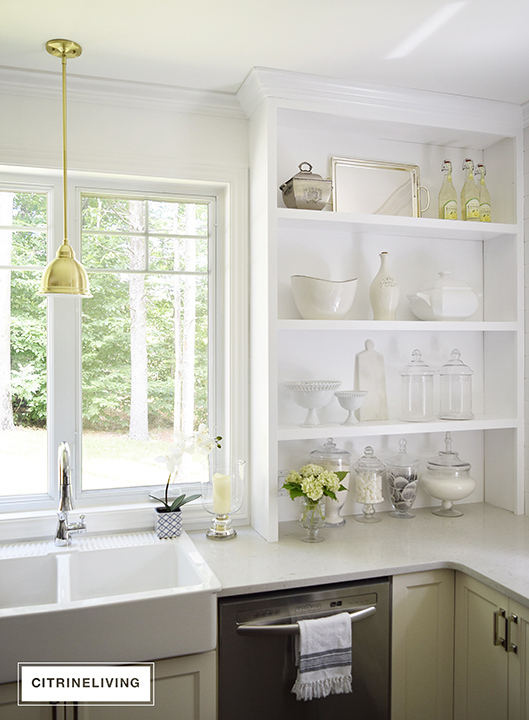
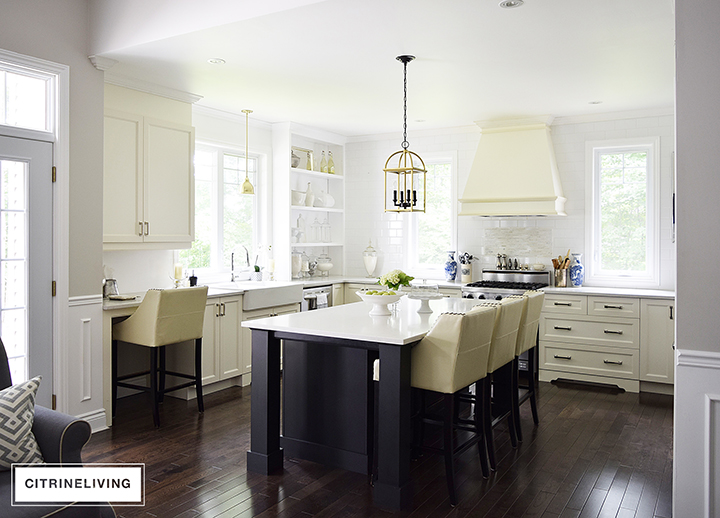
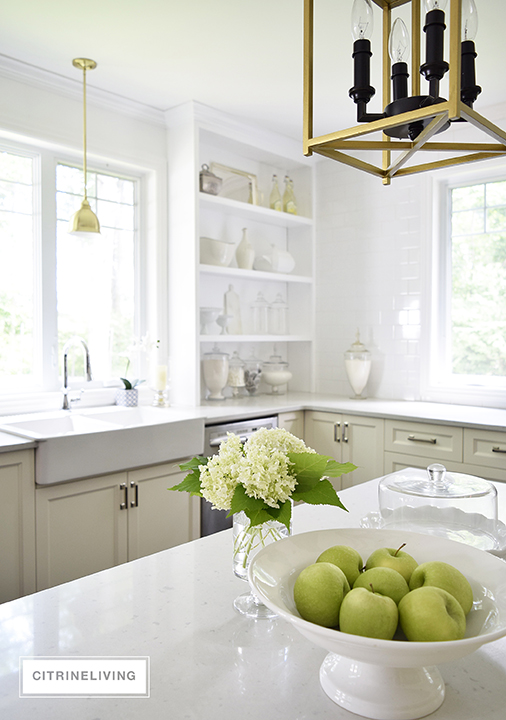
There is another reveal I’m sharing with you today as well, our new brass pendant light over the sink. You can read about my pendant and sconce lighting roundup HERE, which I shared in my previous post. I love this cute, little light! It has all of the qualities I was looking for : brass, a vintage vibe, elegant and inexpensive.
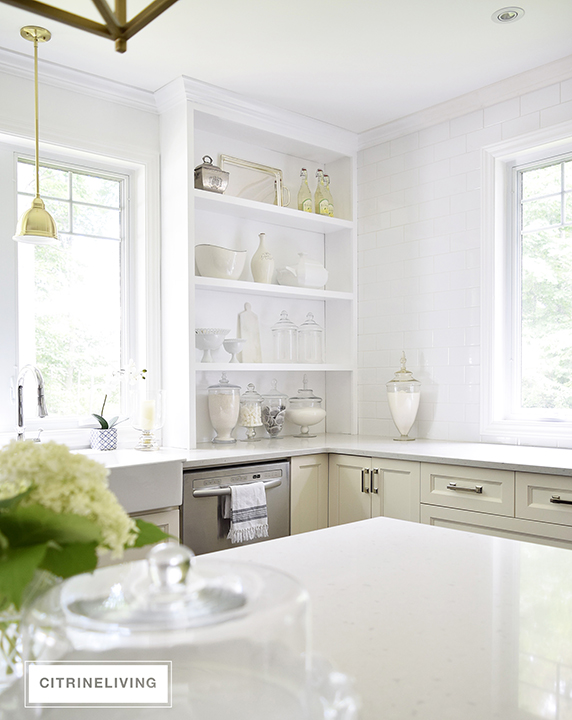
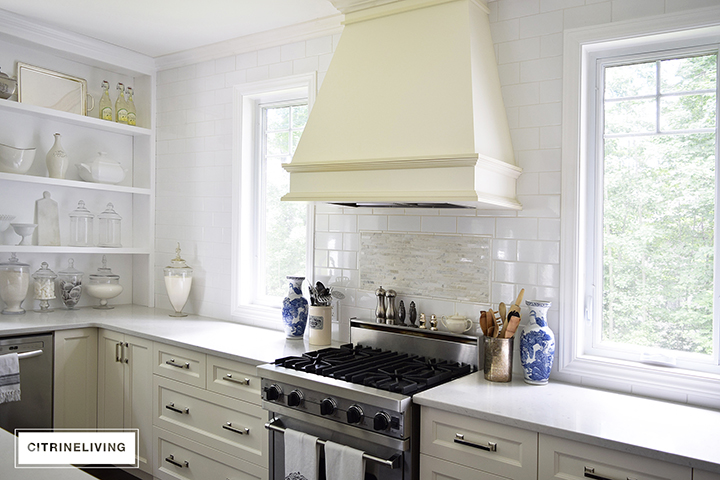
Now let’s get back to the shelf. There really is an airy quality that wasn’t here before. The shelf has an open back and I had planned to keep the wall color the same warm grey, Collingwood, by Benjamin Moore.
Once the shelf was built, I realized we needed to paint the back as well as the entire sink wall, white. This color is the same as all of the trim throughout the house, Ultra Pure White by Behr Paints. It is just that, a pure white and very bright.
SEE THREE WAYS TO STYLE OPEN SHELVES HERE!

You can see the grey on the far left next to the cupboard. It was too dark and I wanted to create visual balance so I decided to paint it all white, which was the key to tie everything together. Keeping the background for everything white, was also a way to diminish the business of so many objects on display.
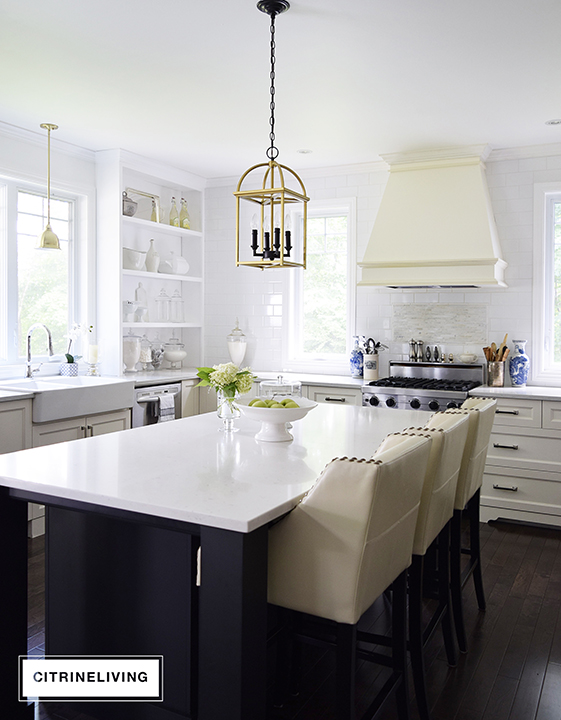
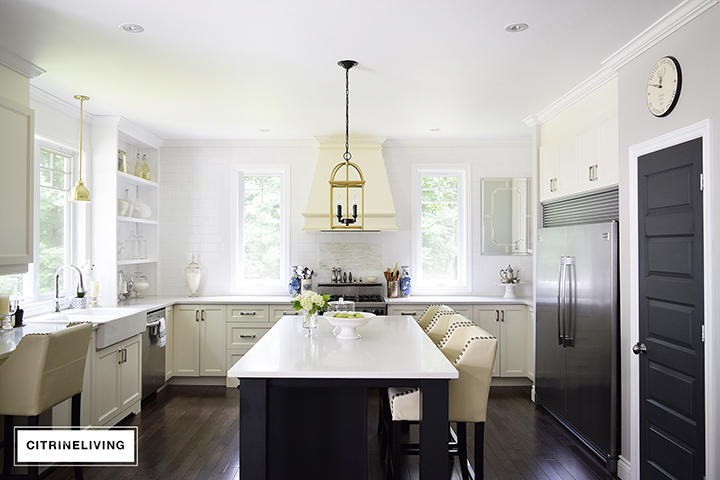
Below a full view of our kitchen. If you remember, we had a vintage print hanging on the left side of the window (which is still a favorite of mine), I haven’t decided yet if it’s going back up or not. I’m really enjoying this clean look right now.
One of the options I’m considering, is hanging candle wall sconces on the far side of each window, instead of the print that was here and the mirror.
UPDATE : WE ADDED WALL SCONCES TO COMPLETE THE LOOK EVEN MORE…READ THE POST HERE!
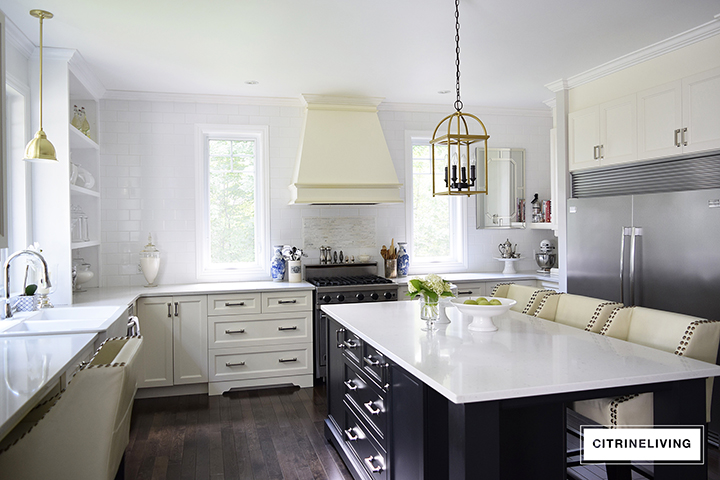
The opposite wall of our new built in shelf also has a small open shelf, next to the mirror. We plan to build something similar, which will go up to the ceiling as well, to utilize the vertical space and bring in an element of symmetry…that will get done eventually!
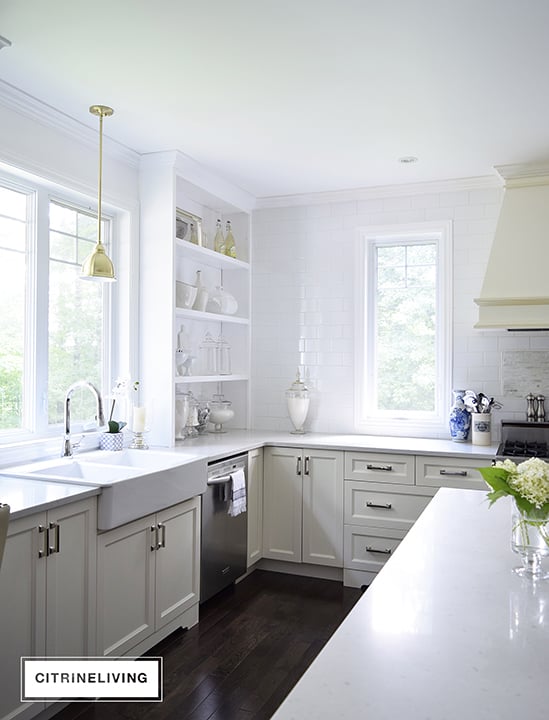
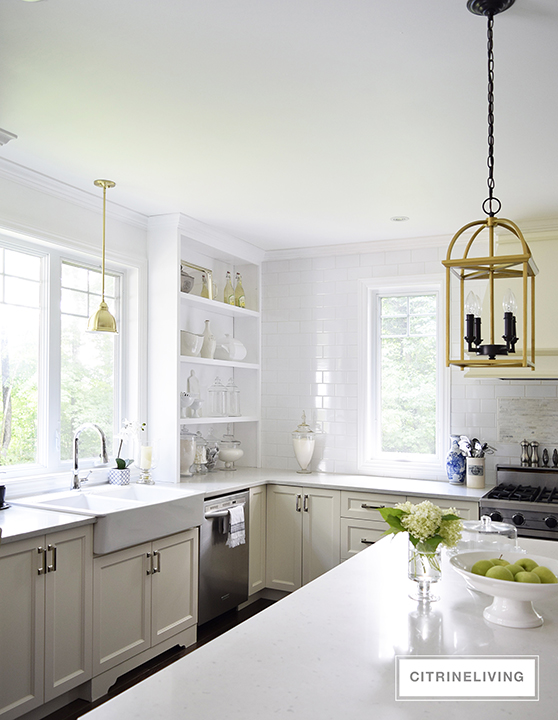
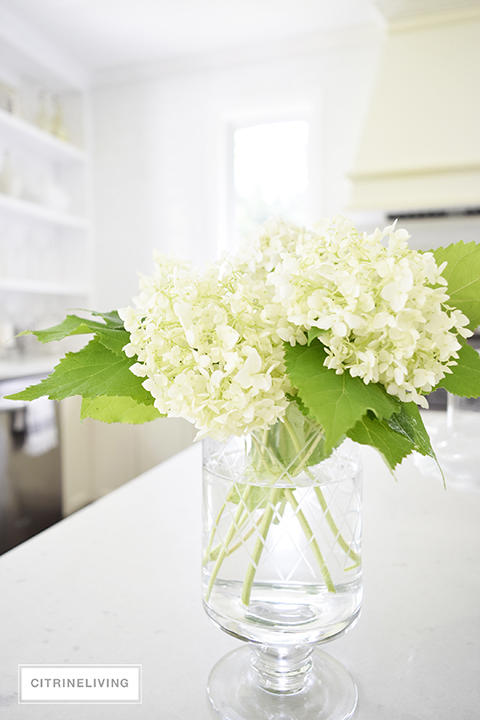
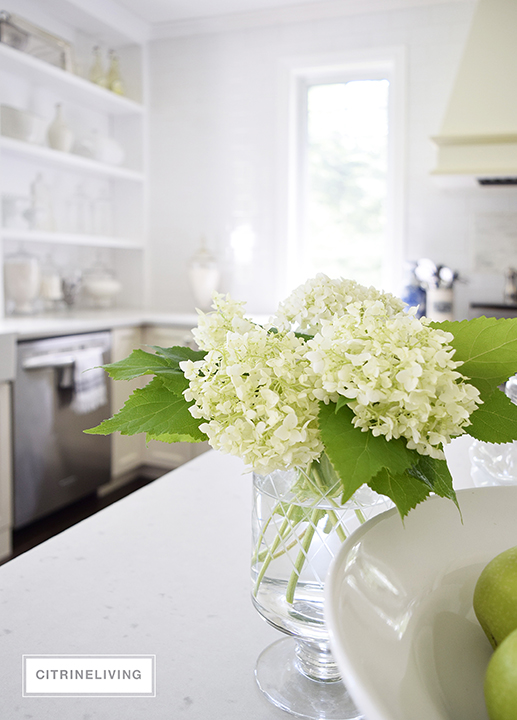
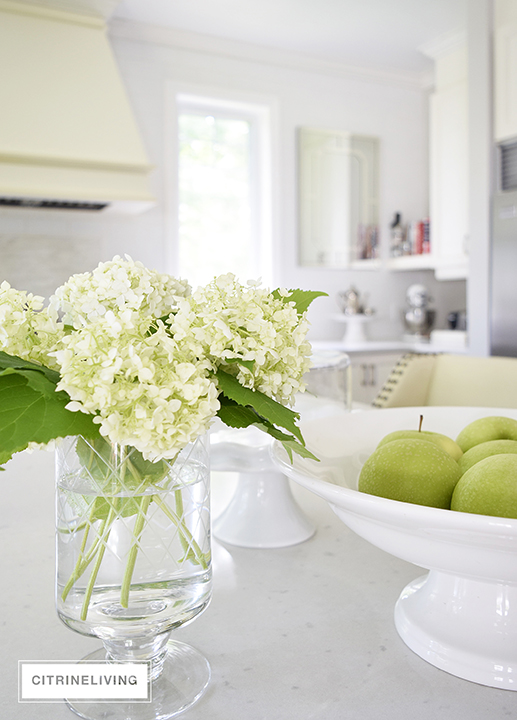
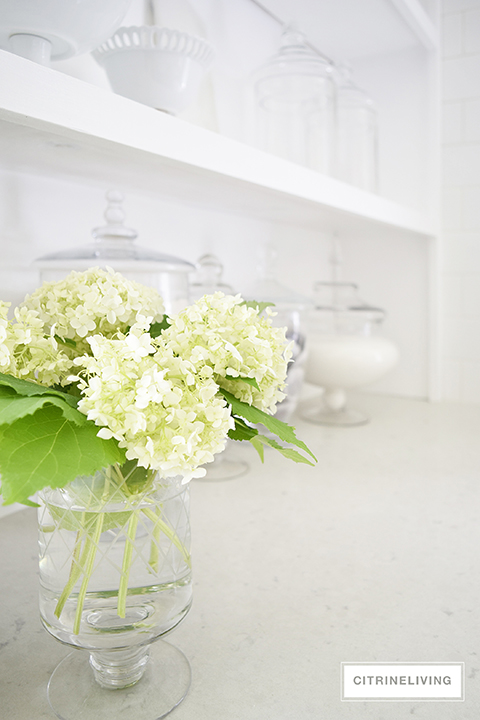
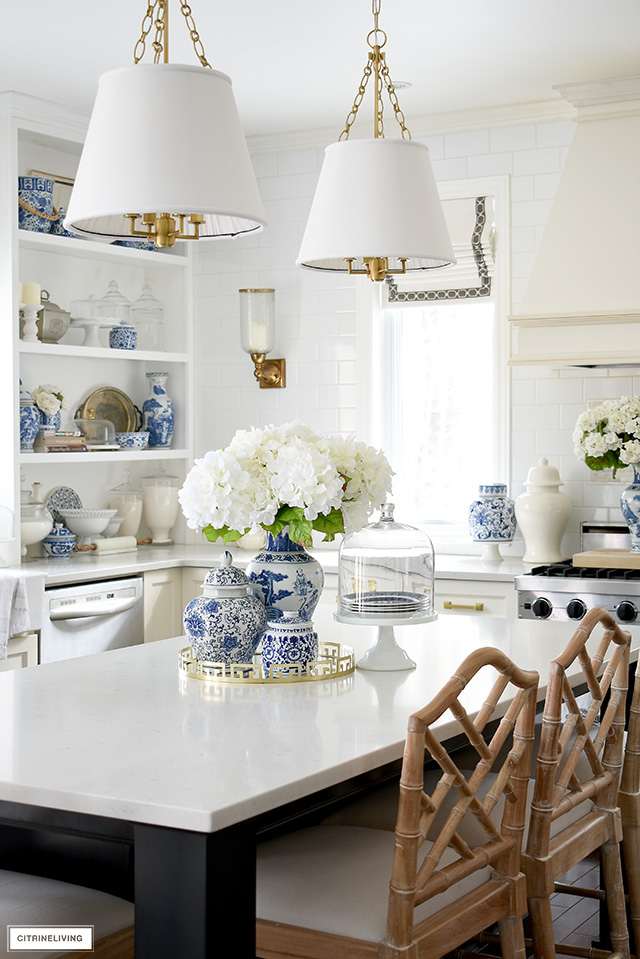
Fresh hydrangeas from our garden are the perfect summer touch. I wanted to create the feeling of a butler’s pantry when styling this shelf, showing all of my favorite essentials. Since I don’t have one, I can at least dream about it!
I think the shelf and brass light elevate this look without compromising the intention of the design. Combined, they were a very small investment – which proves you don’t need to spend a fortune to create something that really wows you.
I’d love to tile this wall as well, with the same white subway tile we have on the feature wall – I think it would be perfect in here. That’s another one on the list!
The look of our kitchen has always been a an old-world-meets-modern vibe. I’ve always wanted it to have the feeling that it’s an extension of our living space, rather than just a kitchen, if that makes any sense.
GET THE LOOK OF OUR KITCHEN :

There you have it – I would love to know what you think! Did you like the before better, or the after? I’d also love to know what you think about our new light! Stay tuned for a post on how we built this shelf – you won’t believe how easy it was.Thanks so much for reading! xo


Thank you so much for your comment, Cathy, and for stopping by! These are only about 10″ deep – so I can only fit more shallow pieces on here. Good luck with your project!
I’m a couple years late but I just came across your post about your kitchen open shelving on Pinterest & I love it! Could you tell me how deep the shelves are—I’m thinking they look less than a standard 12” wall cabinet but it’s hard to tell in pictures. I think i’d like to do something similar in my kitchen that I’m in the process of remodeling. Thanks! Cathy
Hi Jacquelyn! Thank you so much for visiting and for the feedback and advice! I would LOVE to replace the whole cabinet actually, and go from counter to ceiling – wouldn’t that be gorgeous? I love your tips – such a great trick to balance it all out! I can’t paint the soffit as this matches the opposite side of our kitchen – the cabinets over the fridge and next to them as well – but what a great idea it would be if they were the only cabinets! I really love to hear everyone’s input, feedback, tips and tricks and these are so great :) Thanks again for stopping in! xo
LOVE the after! I especially love the pendant, if you want to share the manufacturer! I also love that you are showing people that little changes and little money spent still can have a big impact. My only small constructive criticism (hope you don’t mind!) involves the soffit above the two cabinets to the left of the sink. I think I would paint it the white of your walls. OR, if you ever feel like buying two new doors (and a new side panel), I would carry the doors over and above the soffit to cover it (called a false front). I think that would also balance the height of your new great open shelving. Just my .02 ? Love your blog!
Thanks TJ!! So happy you like it – such a huge difference in here!! xox
LOVE IT Tam… I know it was on the to do list, but so well worth the wait… !!!
Good job Bro! xoxo
Thank you so much, Randi! That means so much! I can’t wait to see your new kitchen!! I’m so excited for you!
Tam! Your shelves look amazing!!! You have such a creative eye for design! Well done my friend!!!
Hi Marissa! Thank you so much! I’m so happy you like it! My floors are a mixed grade of oak and the stain is dark – however because the grade is mixed, it has a lot of color variation. Unfortunately I don’t have the name of the flooring or the stain color. I hope that helps! Thanks for stopping by! xo
Tamara – absolutely beautiful! We are in the process of a remodel. Do you mind sharing the details on your flooring? The entire kitchen is stunning.
Bree thank you so much! I’m so happy I went with the white! What a huge difference it makes! And I’m happy you approve of my lighting decision :) It’s amazing how small things can make a world of difference! You know you are welcome to come and sit with me any time of day! I’d love to have you! xoxo
Thank you so much, Cindy! I’m thrilled you like it! I wish I could pick my house up and move it over to Chicago just for you! It is not easy finding everything you want in one place – trust me I get it! Would you consider building? You don’t have to build a huge home to have everything you want! Something to think about! I hope your hubby is getting better :) Keep me posted!! xo
Thank you so much! I really appreciate that! I love it and LOVE that it feels like that! Who doesn’t want one?! Thanks for visiting! xo
Thank you so much, Mel! Do you have any idea how much that means to me? You are the styling QUEEN! I agree, it really emphasizes the height of the kitchen! Thanks for stopping by! Miss you! xoxo
Shar, you know how much that means to me! It’s amazing what you can do without spending a fortune! Definitely one of my favorite DIY’s so far! Love you! xox
I know, right?! It’s like a brand new blank canvas!! Thank you so much, Haneen, I’m thrilled you like it!! xox
Thank you, Izab :) I’m so happy you like it, I LOVE it and wish I did this sooner! Love you! xox
Thank you so much, Kathy!! I’m so happy you like it – there’s nothing better than more room for display! Thank you for your sweet words! xox
Thank you so much!!
One word…….beautiful!
I love it Tam!!! So bright and airy and I love the all white back drop! Love your lighting choices too…couldn’t be prettier!! Now if I could just hang out at that big island with you for a glass of wine that would be even better?
Oh my goodness Tamara! It’s absolutely gorgeous! More room to display all your goodies! I LOVE IT!
Oh ! I love it Tam! This is such a clever addition. It makes such an impact. Beautiful as always,
Beautiful, Tamara!! And how fun will that be displaying cute seasonal stuff around the holidays?
Love it Tam!! It really finishes the kitchen beautifully. I love that you don’t have to spend a fortune to make a impact. Your husband did a great job. Well done!
Great decision Tam- I def love the built in shelves! I think it makes that corner of your kitchen look bigger and of course adds extra storage and major design !! I can’t believe you did it for $100 – amazing!! Love the white paint – and you did such a great job styling the shelves!!
This is beautiful! So classic and clean looking! It is as pretty as any Butlers Pantry :)
OMG Tam, I love the new unit, clean, classic and just the pop that was needed, as always perfect, I think in my quest to find a new home for us (which is not going well at all), I will just move into your beautiful house, it is EXACTLY, what we need, want and would be perfect for our lifestyle, I so wish I could find something as lovely here in the suburbs of Chicago, but it is a search that is not going well, and to get something to my liking, would take a mountain of renovation, which I don’t think would be good for my husband at this point in time. Hope all is well with you my friend.
Brenda! That is fabulous, I really hope you do! I’m in love and really wish I’d thought of it sooner! Thanks for leaving me your thoughts! xo
Love the after, really looks like a butlers pantry. I may do something similar to display my vases and milk glass . Beautiful.