ONE ROOM CHALLENGE : MASTER BATH MAKEOVER WEEK TWO
We’re already into week two of the One Room Challenge and I am feeling great about our progress so far! The weekends are the only time we’re able to work on projects like this, our weekday schedules are packed. Just a quick recap – the ORC is a six week blogging event, hosted by Linda of Calling it Home. Twenty design bloggers are asked to participate and show off their design skills, and anyone else who wishes to participate can join in as a guest participant (that’s me!). Before I get into the nitty gritty (there’s a lot of gritty), below is the mood board I shared with you last week, and a reminder of what we’re doing, just in case you’re new to follow along this week! You can read all about WEEK ONE HERE.
*Affiliate links are provided throughout, or at the bottom of this post for your shopping convenience – see my full disclosure policy here.
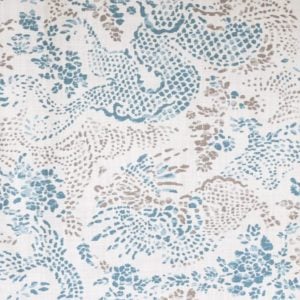
Once again, I’d like to thank my main sponsor, The Mine for helping me bring this vision to life! As well as Tonic Living for providing our custom roman blind we’ll be installing.
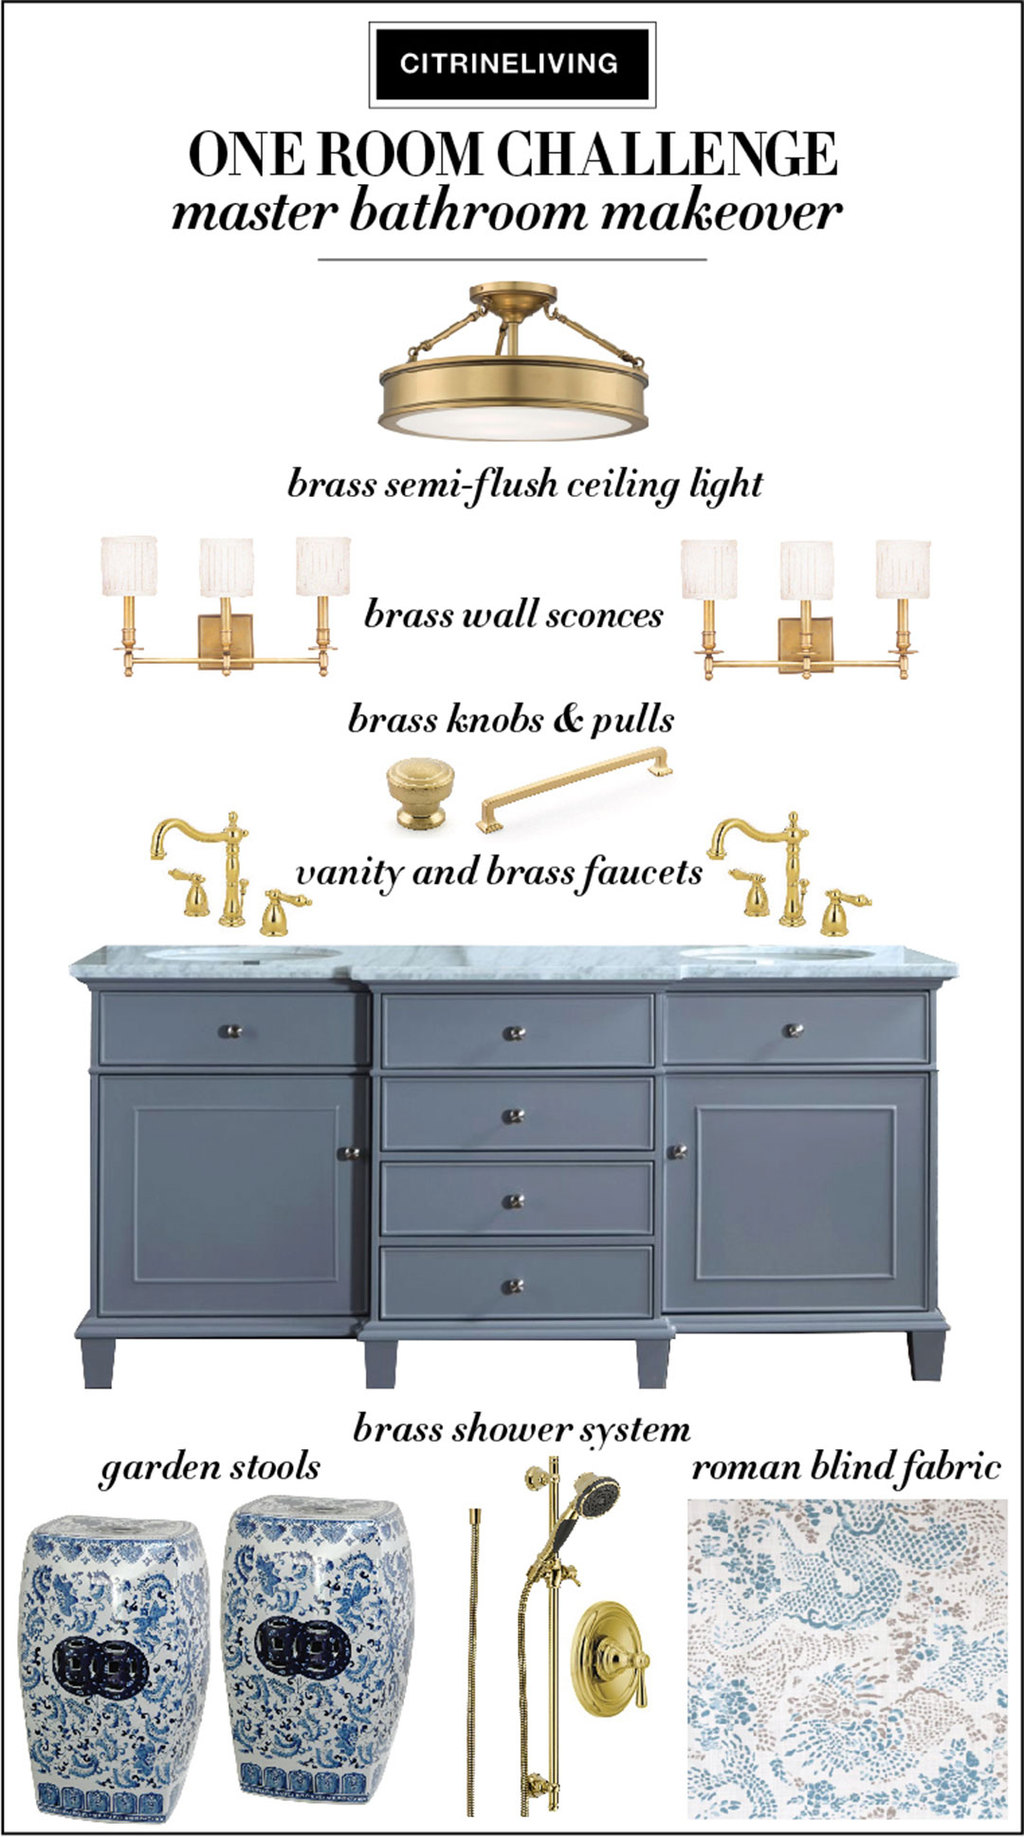
SCROLL AND TAP THE IMAGE TO SHOP ALL OF THESE ITEMS :

We were very lucky that we got most of the major work done this past weekend, especially since the most important part of our makeover had to happen first. We switched out the vanity before anything else, as everything will be centered off of this piece. My husband, Neil, and our good friend, managed to move them pretty easily, and from there, we had to fit it, adjust the plumbing and install faucets and hardware.
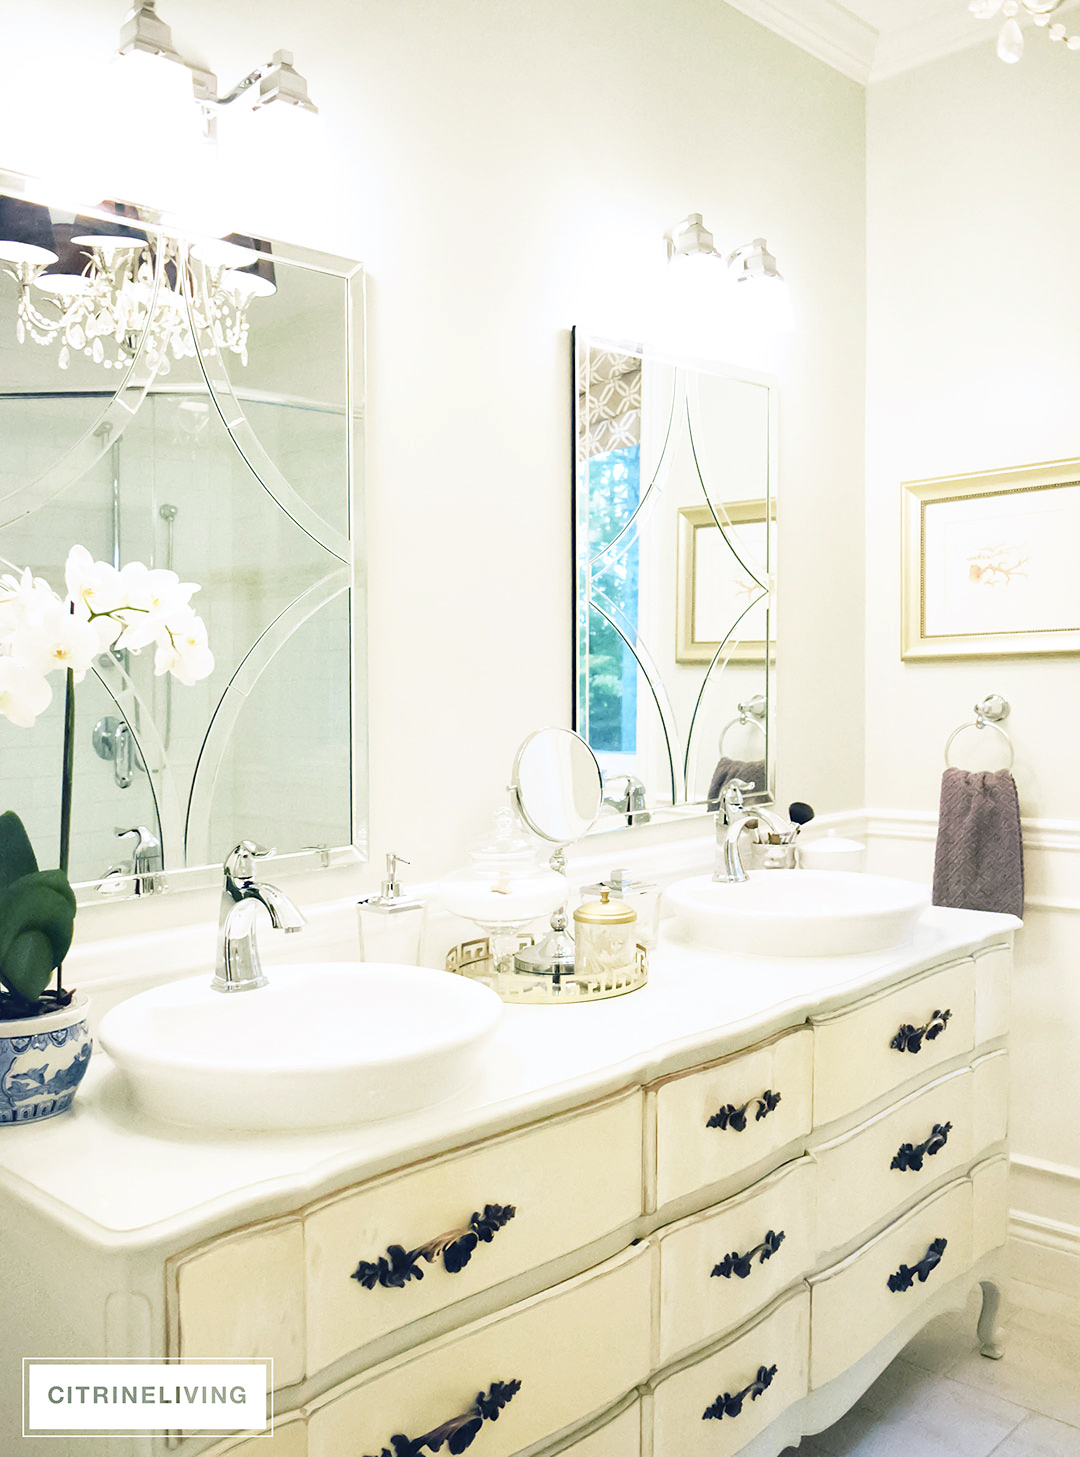
Here’s another look back at our existing bathroom, which was beautiful as it was. However, after seven years, our tastes have changed, and we wanted something more refined and traditional, as well as less feminine. Tailored and chic at the same time.
So here we go! First thing’s first, we obviously had to remove all the drawers and disconnect the plumbing.

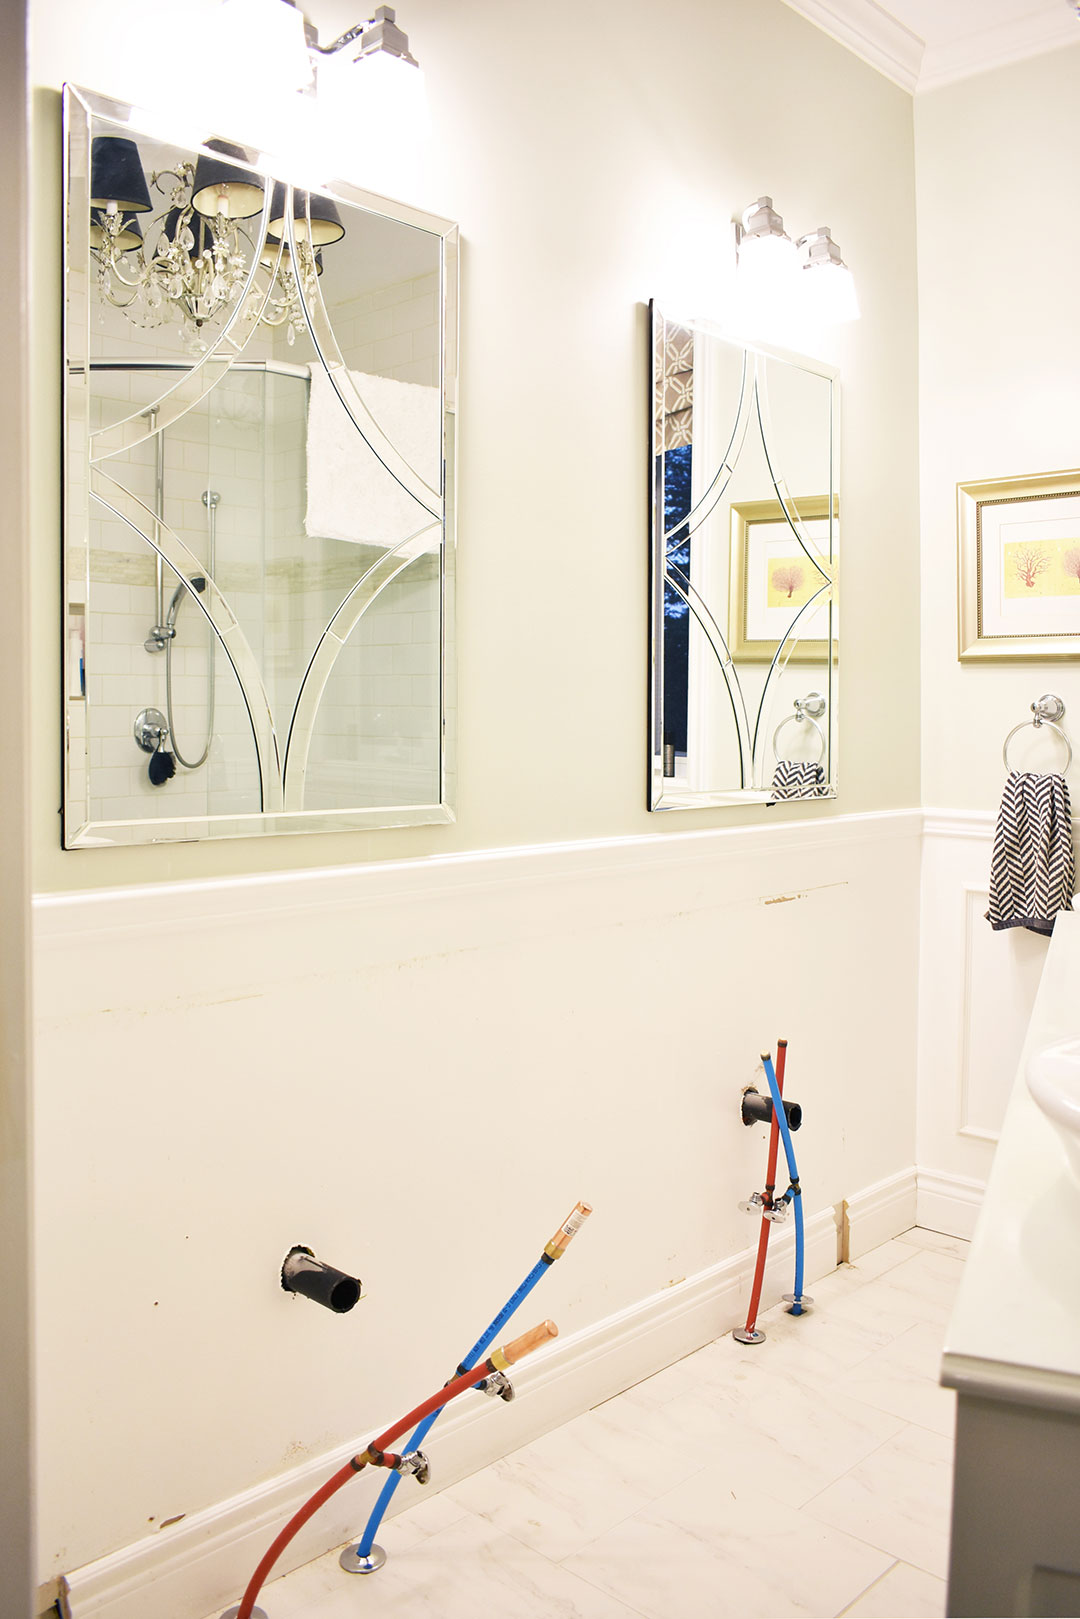
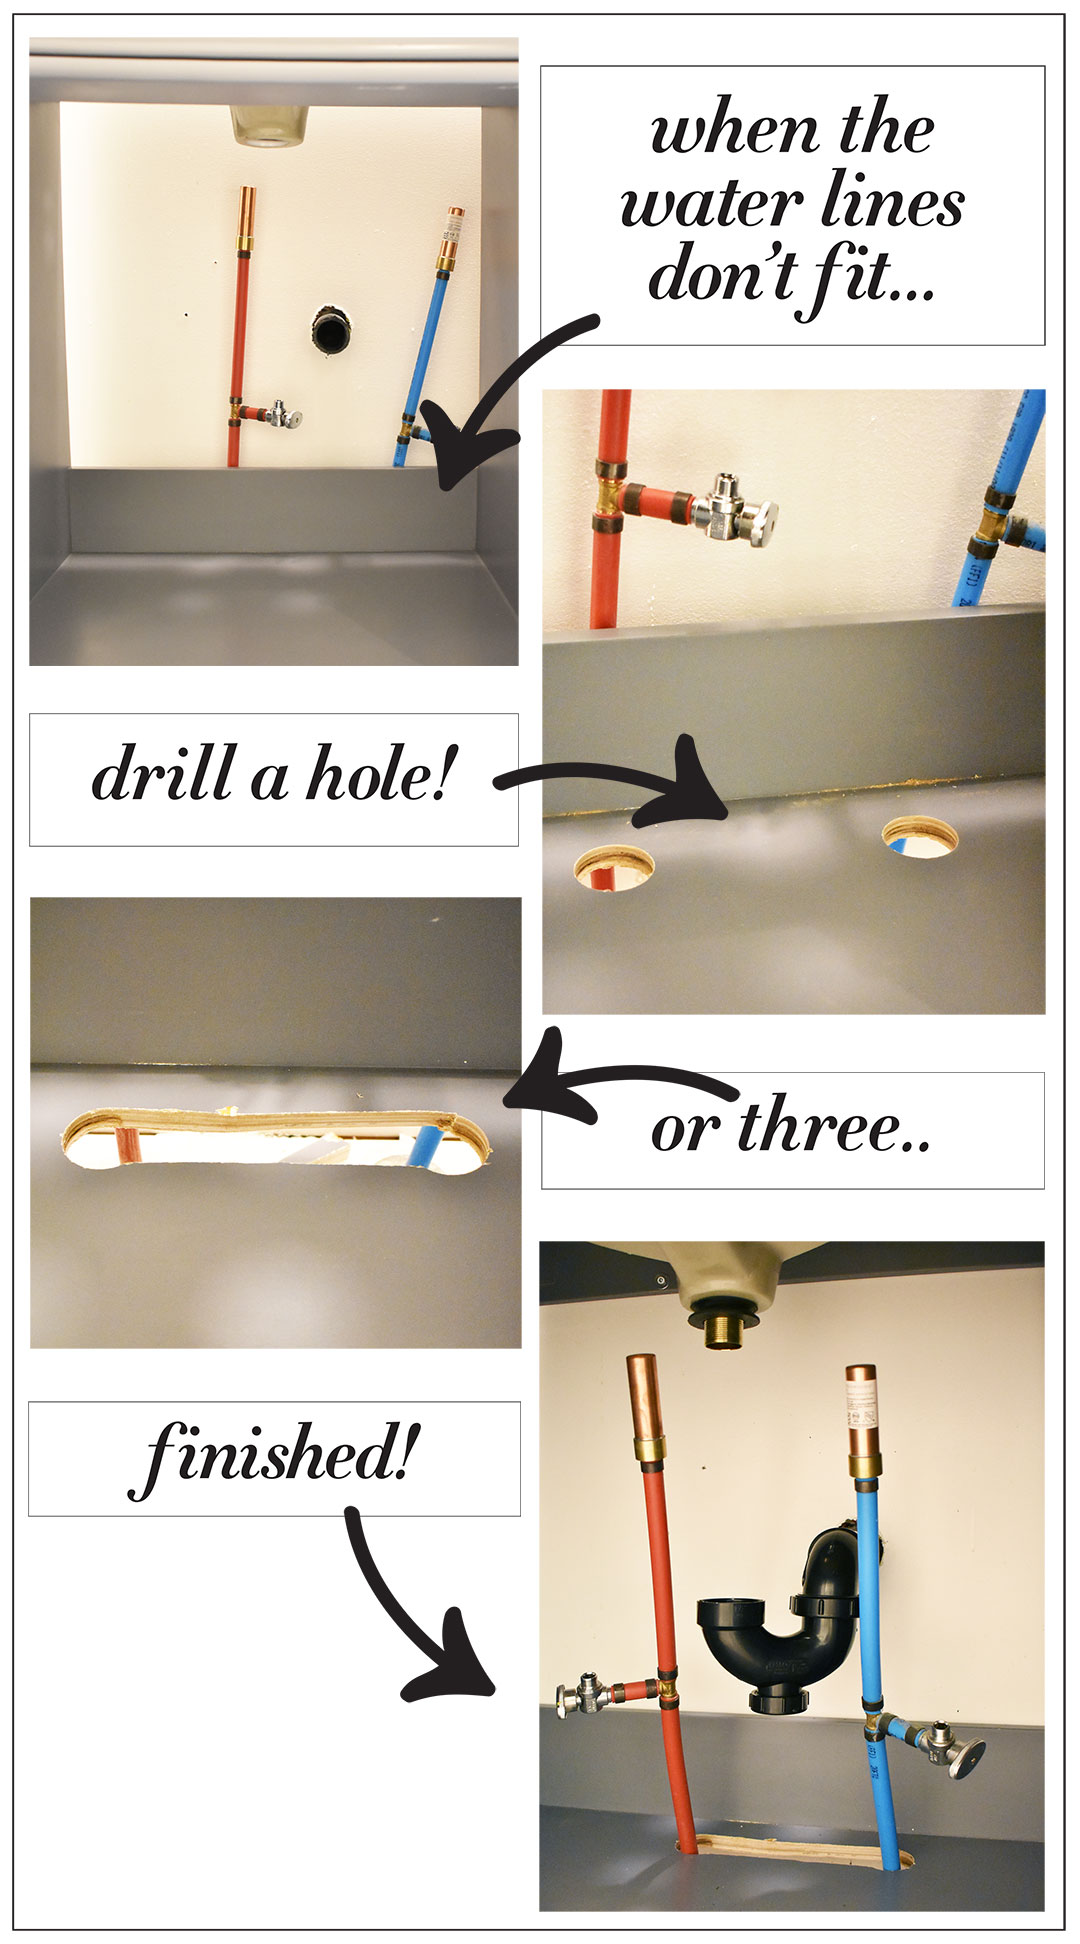
Below is a look at how are plumbing was done to fit this vanity. It was all open underneath, so there was no need for any drilling to be done at the time.
 Out with the old…
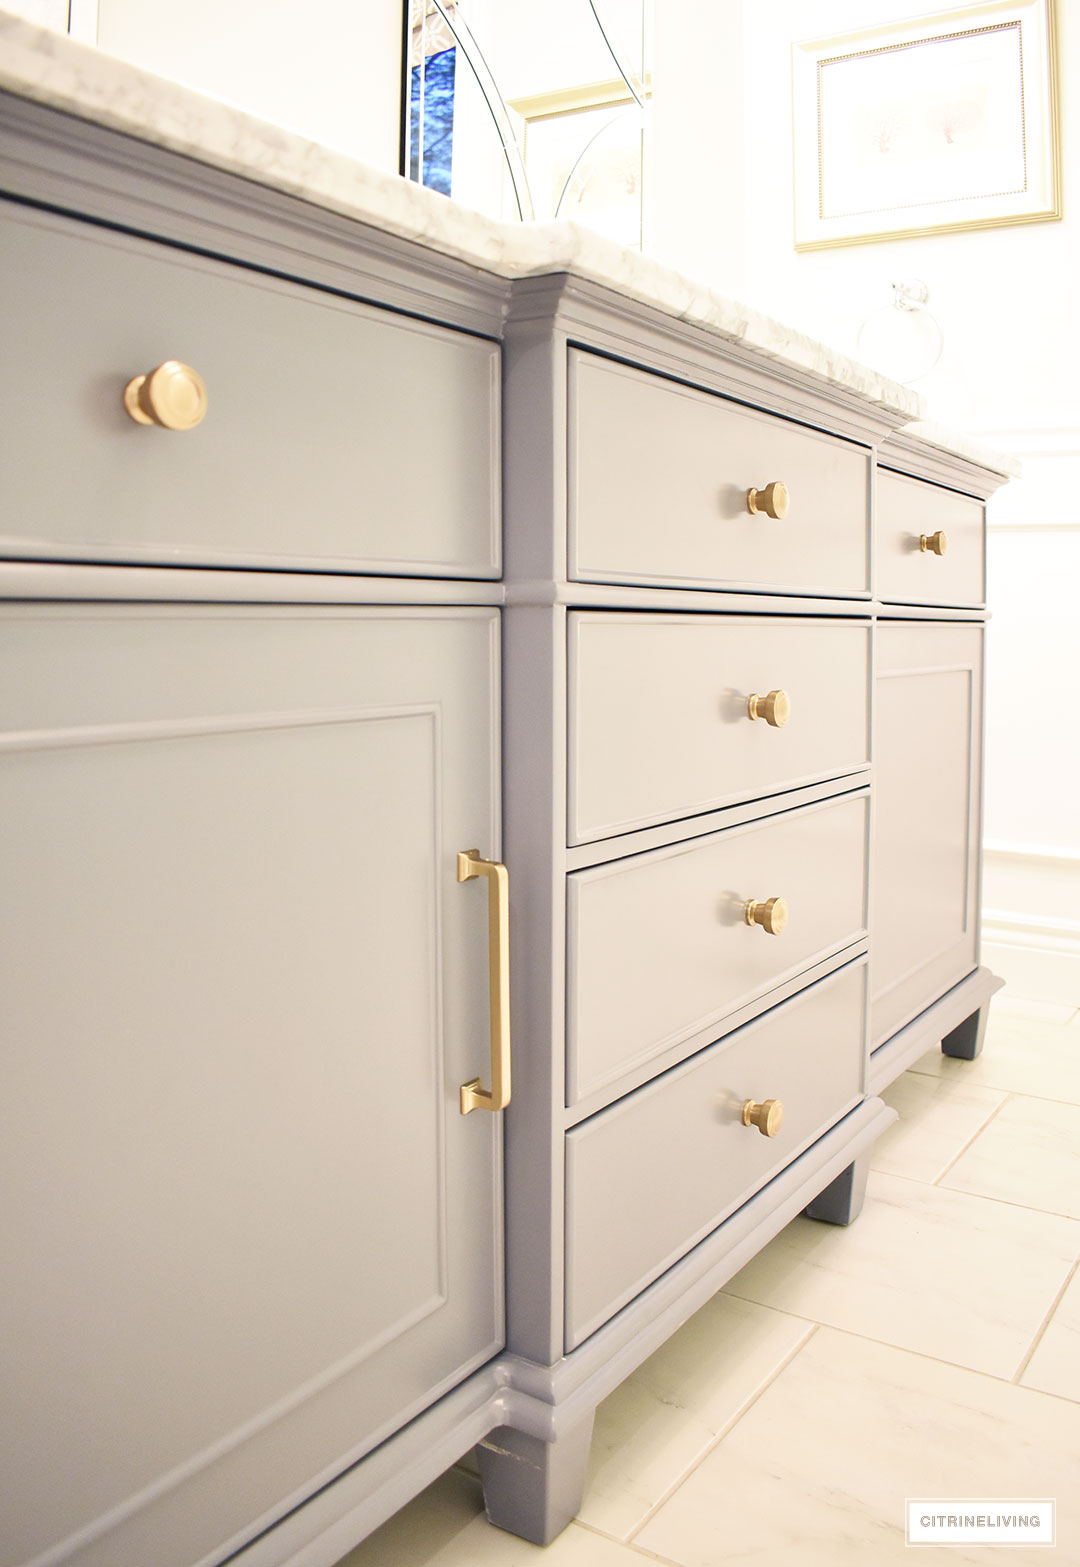
And in with the new! It’s all still wrapped up on top with the protective plastic in this shot, but I am already in love and by now, I can clearly see my vision coming to life! Already a HUGE improvement.
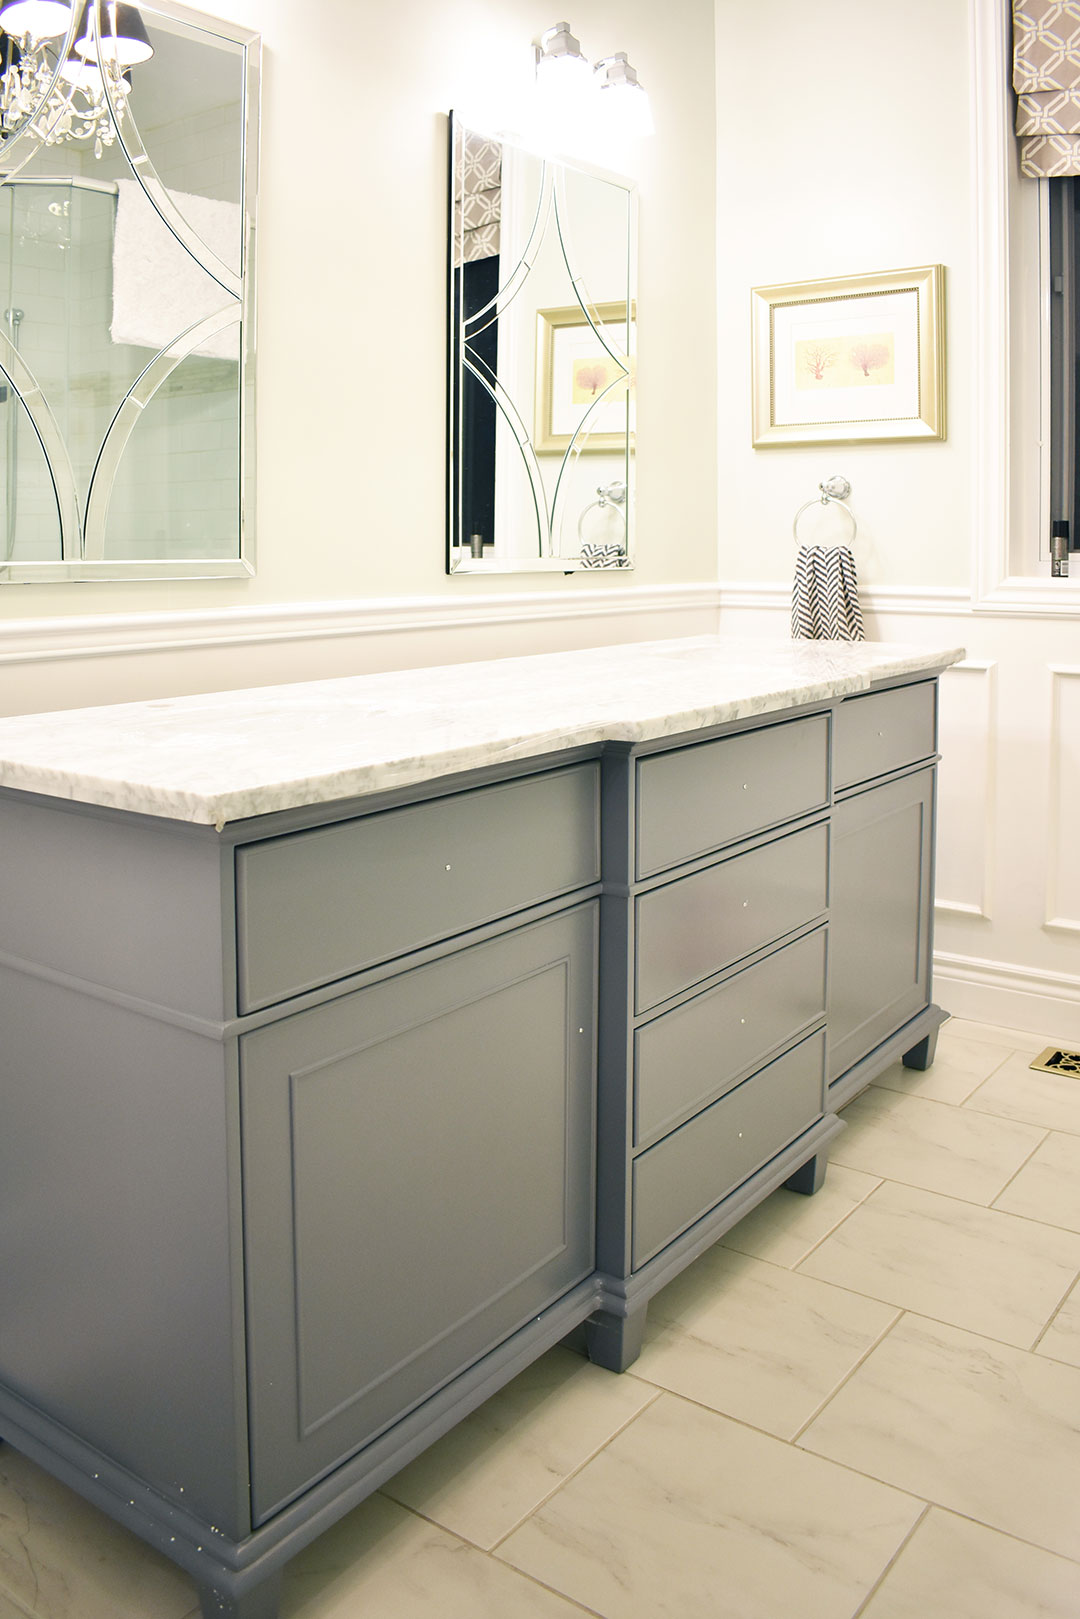
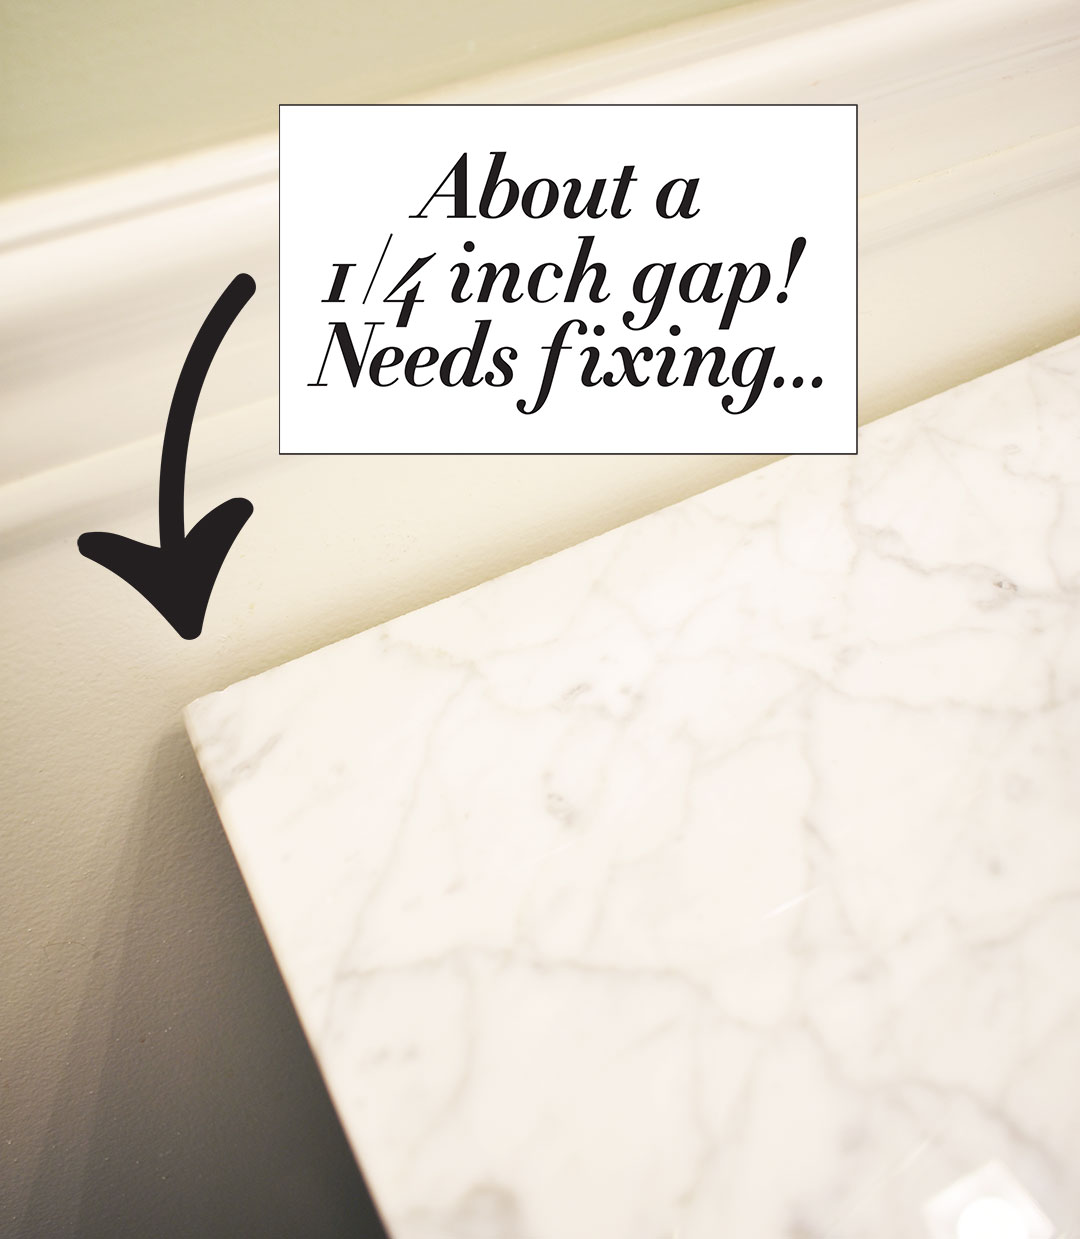
Not so fast…there’s always something that needs fixing or adjusting. Between the wall and the vanity itself, it is nowhere near a flush, clean fit. So, we needed to make some adjustments and affix the vanity to the wall by securing the back with some screws from underneath the cupboard. I don’t have a photo of that, it was too far up inside to shoot. We had to hold it against the wall while we were securing it to ensure it was as tight of a fit as possible.
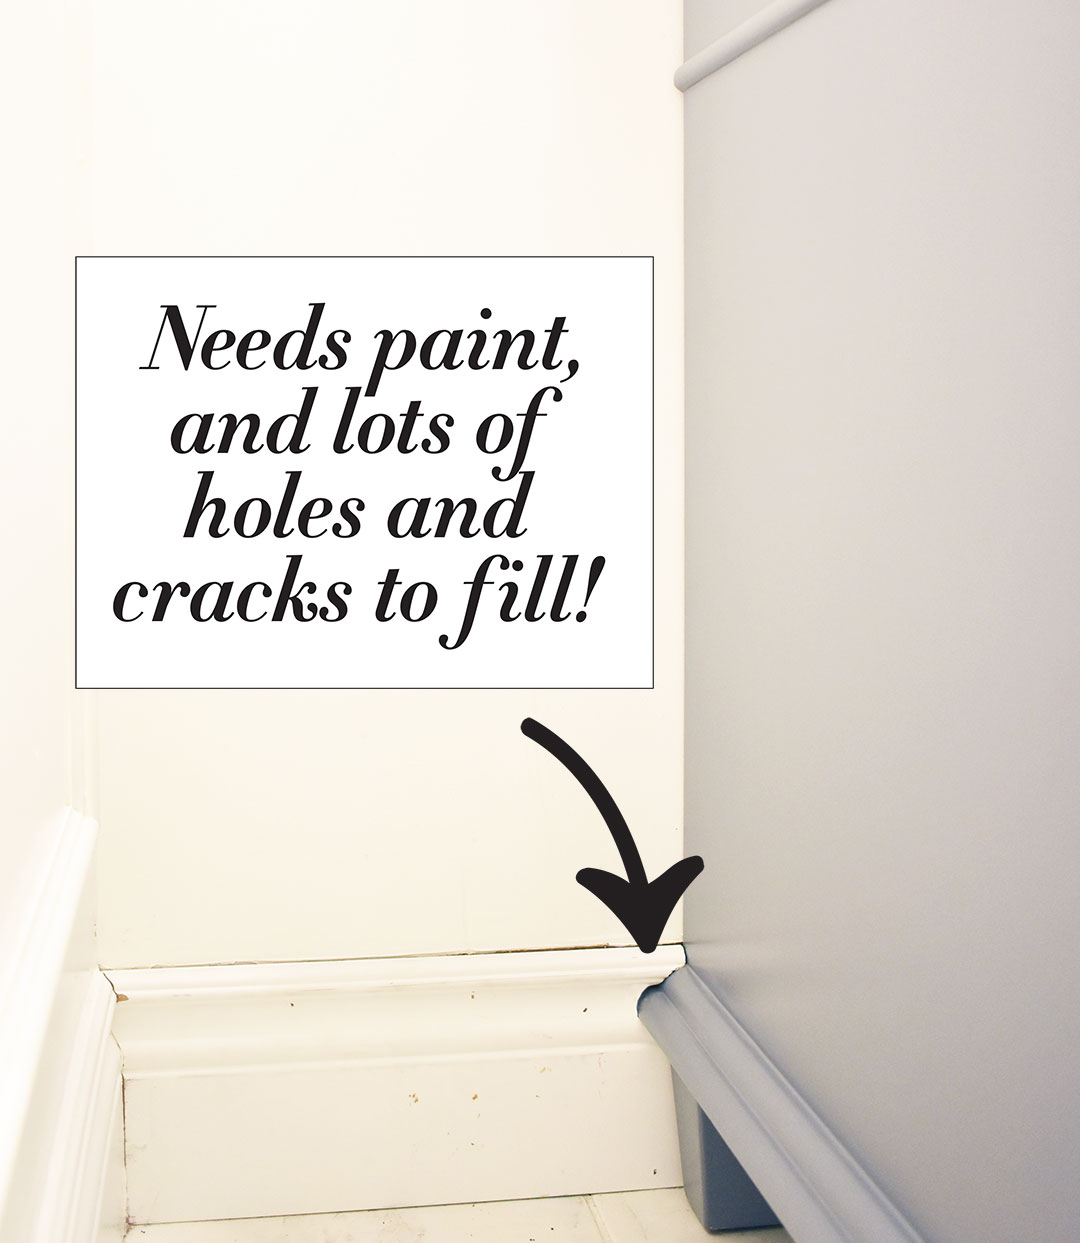
The new baseboard is cut (we ripped out the old one) to fit around the molded shape of the vanity base…a little tricky and not so pretty just yet! We have to paint and fill all the cracks and holes with putty for a clean and seamless look. I had planned to get this all painted before the vanity went in, but we couldn’t – it had to be fit together first, so the painting is still on our to-do list.
Then, the plumbing lines needed to be fit. Remember I mentioned how previously it was simple because it was all open underneath…not so easy this time. My quick thinking hubby came up with a plan – drill two holes, then a third one to join them, and bend the water lines through the holes and up inside the vanity. It’s not perfect, or that beautiful, but it works. Plus it will get strapped to the wall to make the most of the space – baskets for cleaning supplies, toiletries and toilet paper.
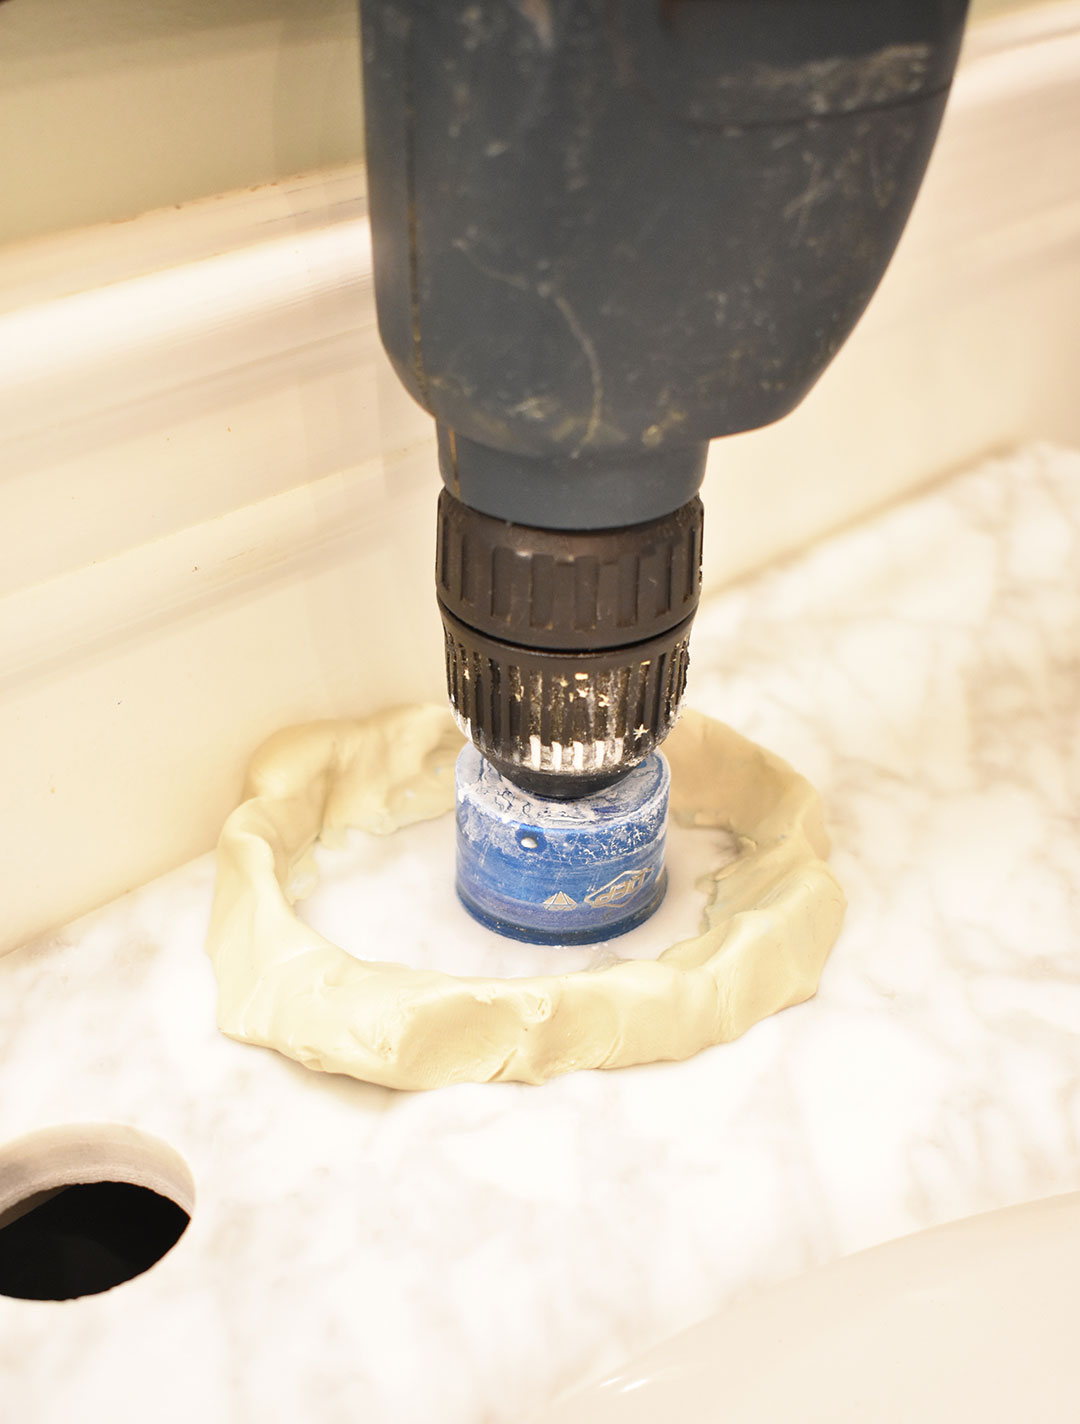
Another thing I don’t have a picture of, but I know you can imagine, is that there was only a single hole for the faucet. We ordered a widespread faucet if you remember – two handles that are separate from the faucet. We bought a diamond tipped drill bit for cutting marble, made a template for the exact placement of the holes we were cutting, and off to the races we went…or he went, not me haha.
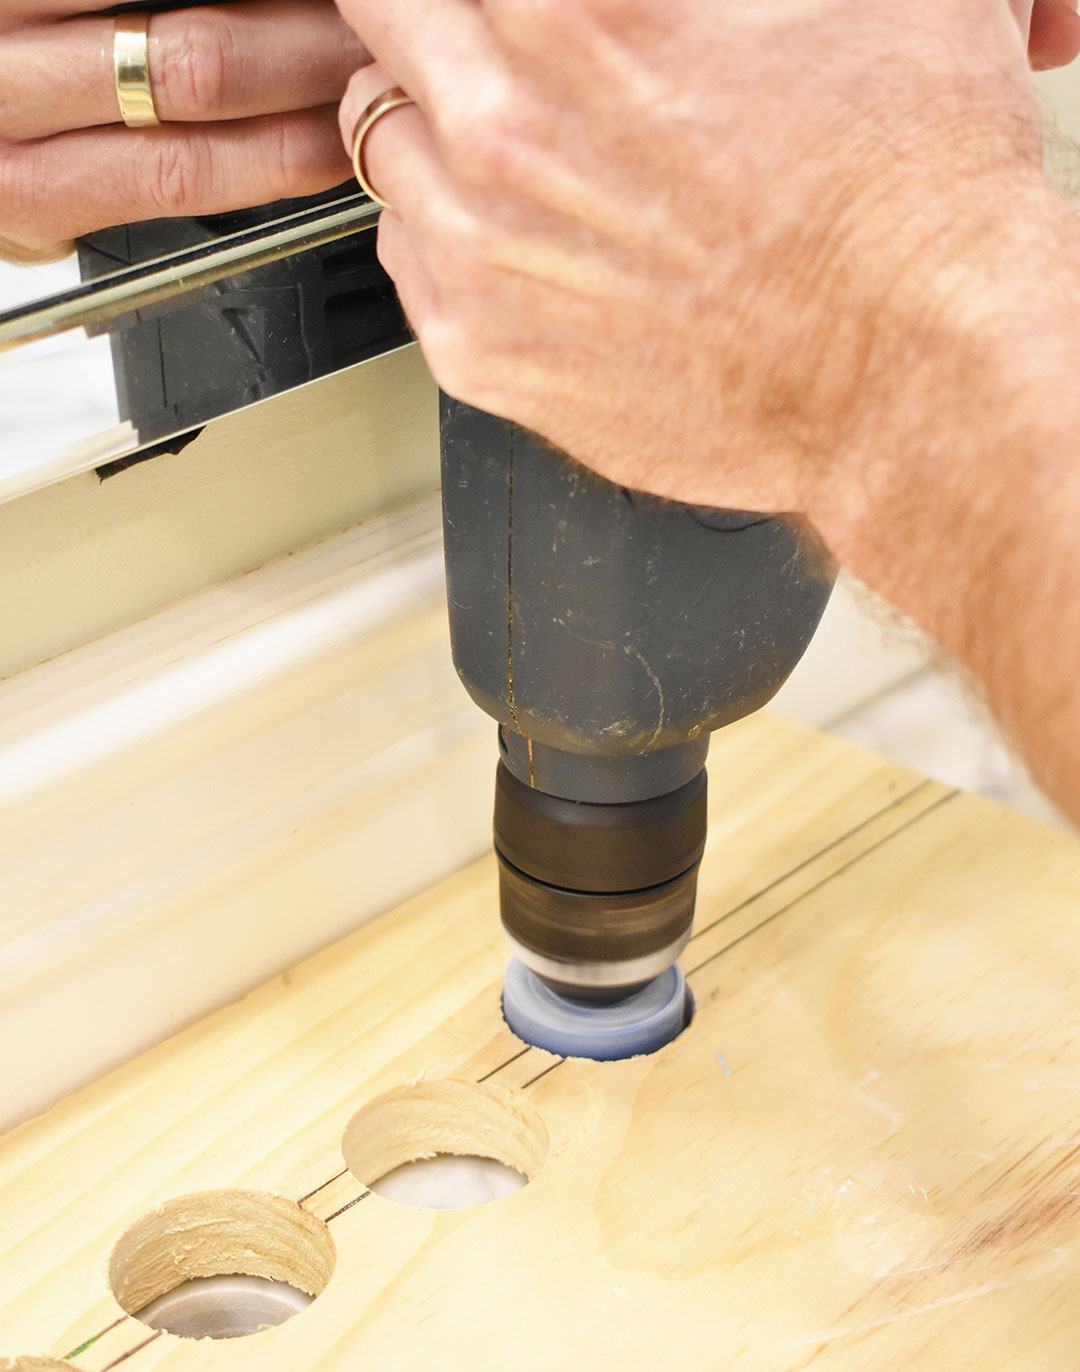
You can get this drill bit at any hardware store for about $30.
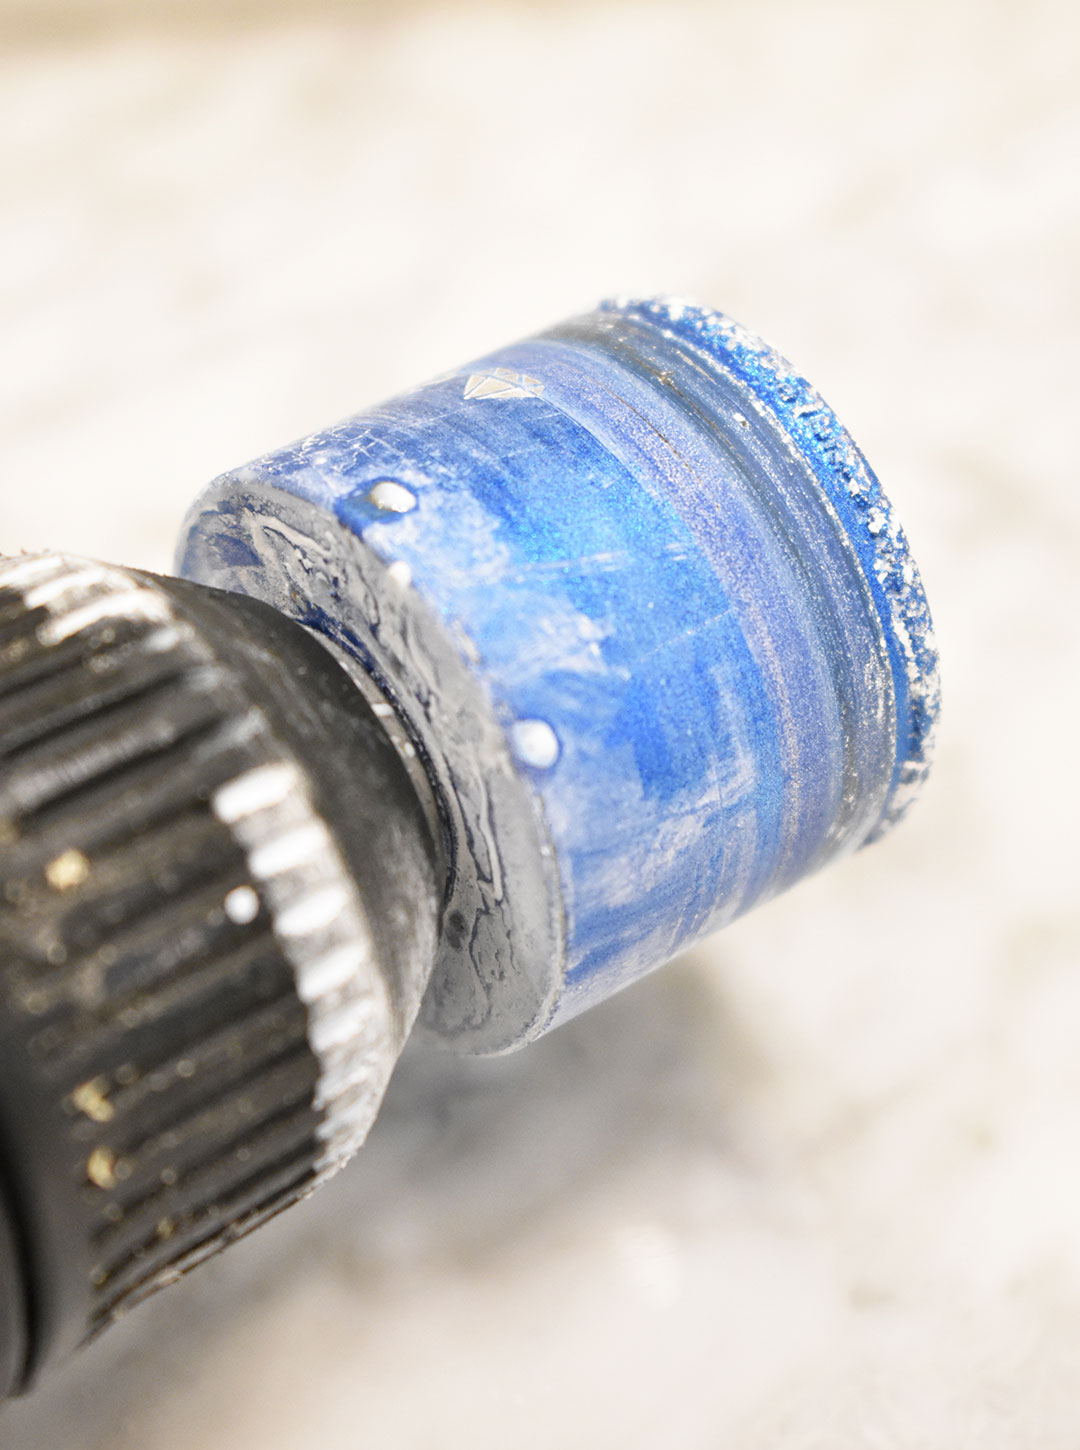
Once the marks are made for the holes, we removed the template and applied a ring of plumber’s putty around the hole before continuing to drill. The reason for this, is you need to pour water over the marble surface while you’re drilling into – and this keeps the water from running all over the place and getting too messy.
The holes are all cut, and my beautiful new brass faucets go in! I am very happy right now! I can’t stop salivating over the grey, brass and marble combination we have in here.
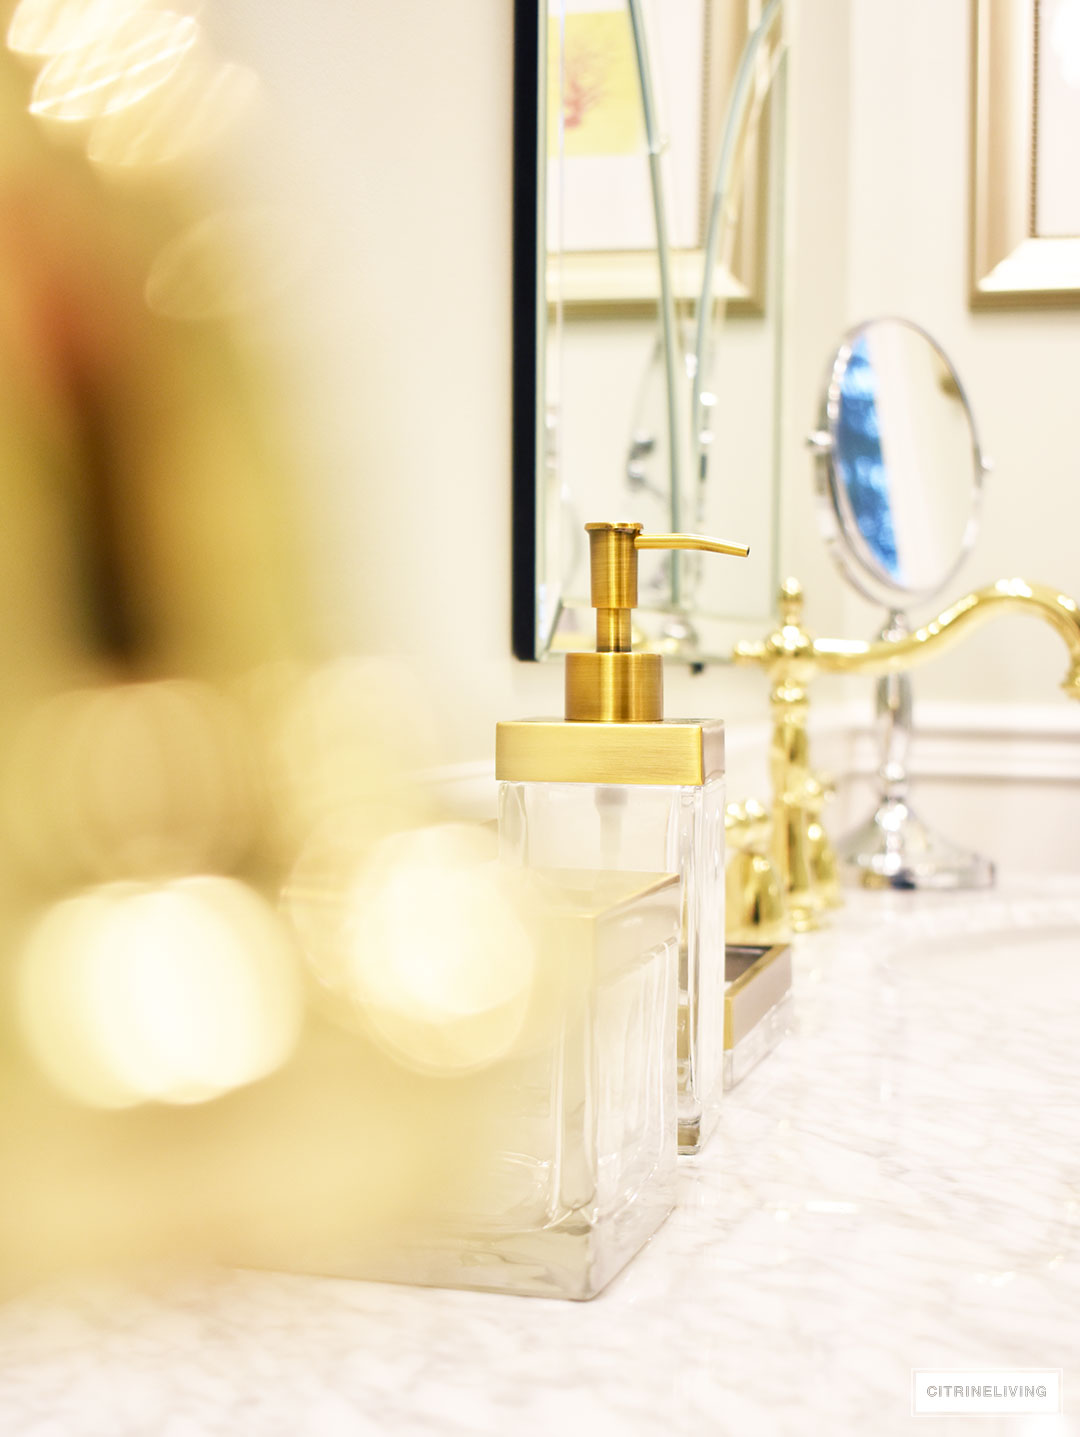
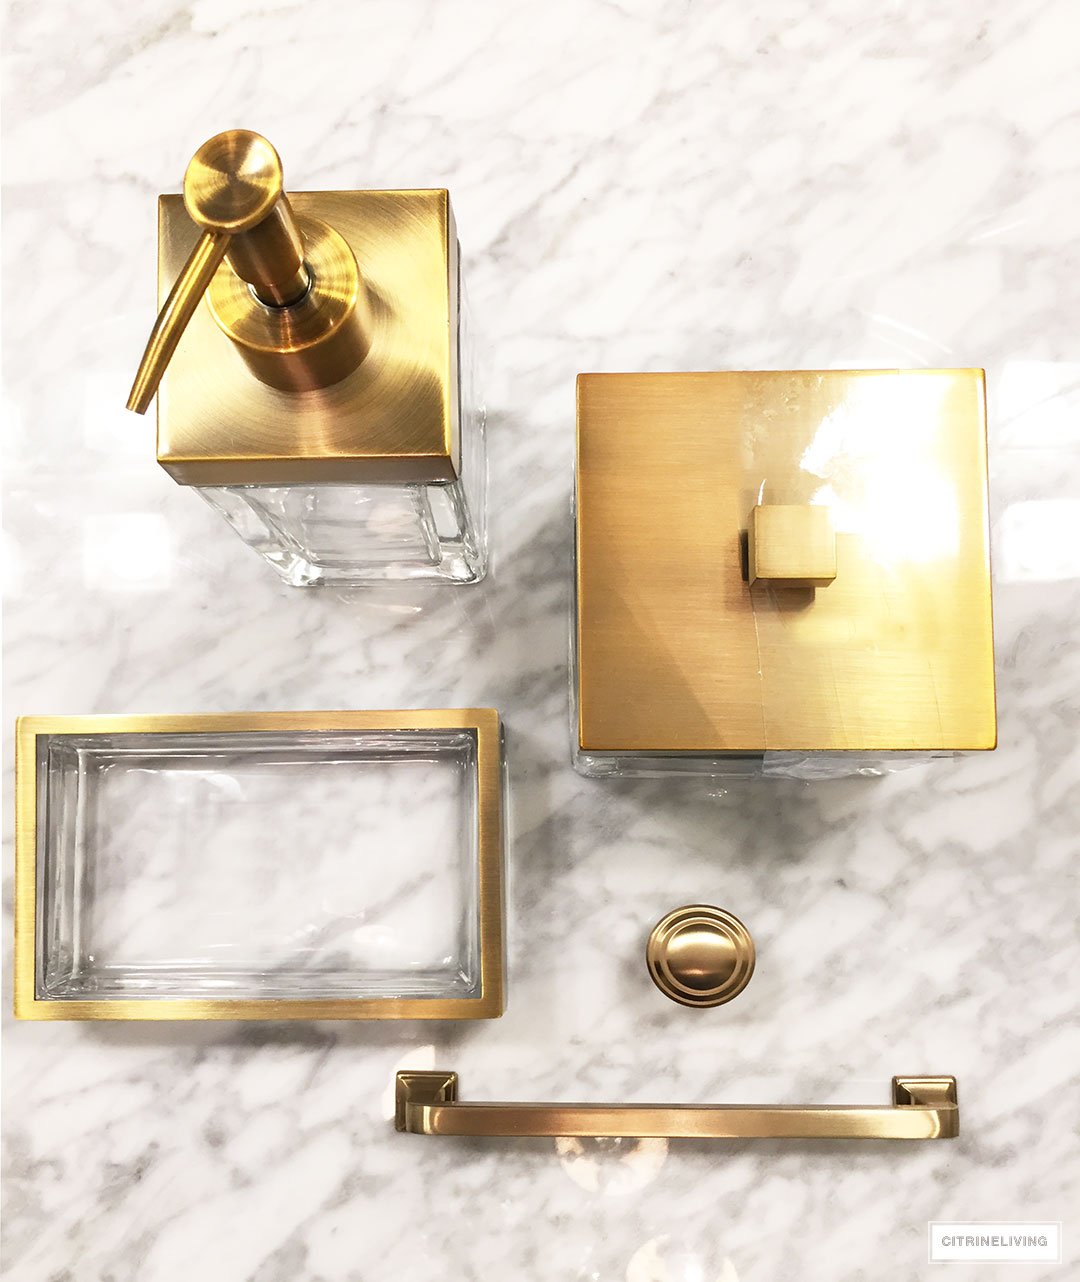
We installed the hardware right away – tell me it isn’t GORGEOUS?!! This is NOT your 80’s brass – trust me on this one!
There you have it! Week two is a wrap and I couldn’t be happier with the progress we’ve made. It took the whole weekend for the most part, but it was well worth the hard work. Next items on the list:
CUSTOM MIRRORS – MEASURE AND ORDER ASAP!
RECESSED WALL SHELF OVER TOILET – A WHOLE LOT NEEDS TO BE DONE – More details to come!
WALL MOLDINGS – MEASURE DESIGN, PURCHASE, INSTALL
PAINT – THE WHOLE BATHROOM WILL BE PAINTED A CRISP WHITE – Ultra Pure White by Behr
INSTALL WALL SCONCES
INSTALL CEILING LIGHT
TOILET – Remove the old one, install the new one
SHOWER FIXTURES – Remove the old ones, install the new ones
INSTALL ROMAN BLINDS
FINISH IT ALL OFF!
And here is what the status of the bathroom is now. Beautiful like this, I know, but just wait until I’m finished ;)

Don’t forget to check out last week’s post if you missed it! See WEEK ONE HERE.
YOU CAN SHOP ANY OF MY BATHROOM SELECTIONS BY CLICKING THE THUMBNAILS BELOW :
To shop my roman blind fabric, click here
![]() Just like last week, and each week during the challenge, I’ll be linking over to the guest participant page here as well as the 20 featured designers here – where all participants will be sharing their work and progress every step of the way! Thank you for following along! don’t forget to comment below and tell me what you think so far. I’m so happy to hear from everyone and I always love to have you here! You can also sign up for my emails just down below for the latest new sent to your inbox! xoxo
Just like last week, and each week during the challenge, I’ll be linking over to the guest participant page here as well as the 20 featured designers here – where all participants will be sharing their work and progress every step of the way! Thank you for following along! don’t forget to comment below and tell me what you think so far. I’m so happy to hear from everyone and I always love to have you here! You can also sign up for my emails just down below for the latest new sent to your inbox! xoxo
Thank you CC!! I love tat you love it, that means a lot to me my friend!! xox
It’s looking so good! Love the cabinet color and the fabric of that Roman shade!!
Thank you Bree! You’re the best cheerleader my friend!! Can’t wait to get it done! Aren’t these accessories awesome?! They were a lucky find!!
Summer you are the best! Thank you!! And that drill bit is awesome!!
Omgosh Tam!!!! It’s looking soooo good! Loving that drill bit! I’m totally getting one! Xoxo
Love the progress, Tamara!!! This is going to be one stunning bathroom my friend and I can’t wait to see it all finished…even though it already look amazing!!! xoxo p.s. I have the same brass and glass soap pump and other bath accessories:)
Thank you so much, Vanessa! I couldn’t be happier with the plethora of brass we have going on haha! So happy you like it! xoxo
Love the vanity! And the brass/gold everything is going to look so good. xo
Thank you so much Sue! We are so excited and loving the progress so far! Thanks for stopping by!
This is going to be gorgeous! I love everything you chose.
Nice!! I’m sure it will be fabulous! And thank you so much for the lovely compliment!
Thank you so much! We love it, and I’m sure it would have looked great in your bathroom!
I ALMOST bought that same vanity for our master- it’s quite lovely!
This is my next project on my list and knowing how beautiful everything in your home is, I know this will be smashing! Excited to follow along! For now, I’m doing my master bedroom!
Thank you very much Erin! We are loving it in here so far and really eager to get it all done :) Panelling is going up this weekend, yay!
Thank you so much Isabel!! I love that you love it!! Can’t wait to get this all finished! xo
LOVE LOVE LOVE TAM! It will be stunning! Can’t wait to see the finished room!
So gorgeous already! The vanity and brass hardware are amazing. Can’t wait to see how it turns out!
Lisa, that is the part I’m most looking forward too! And the panelling! So happy you like it all, thank you for stopping by! xo
Thank you Marion! We are so excited!!
its going to be so beautiful!!
Gorgeous vanity! I’m such a fan of grey and brass, and your choices are amazing. Can’t wait to see your mirrors with those sconces mounted on them!
LOVE that vanity! the previous one is more traditional and this one is just so streamline and classic! great hardware choices too. Can’t wait until week 3!
Awww! That new vanity is amazing! Mine is on its way and I’m so excited to follow along as we both redo our bathrooms. Yay for non 80’s brass!!!