HOW WE BUILT OUR CUSTOM BOOKSHELVES
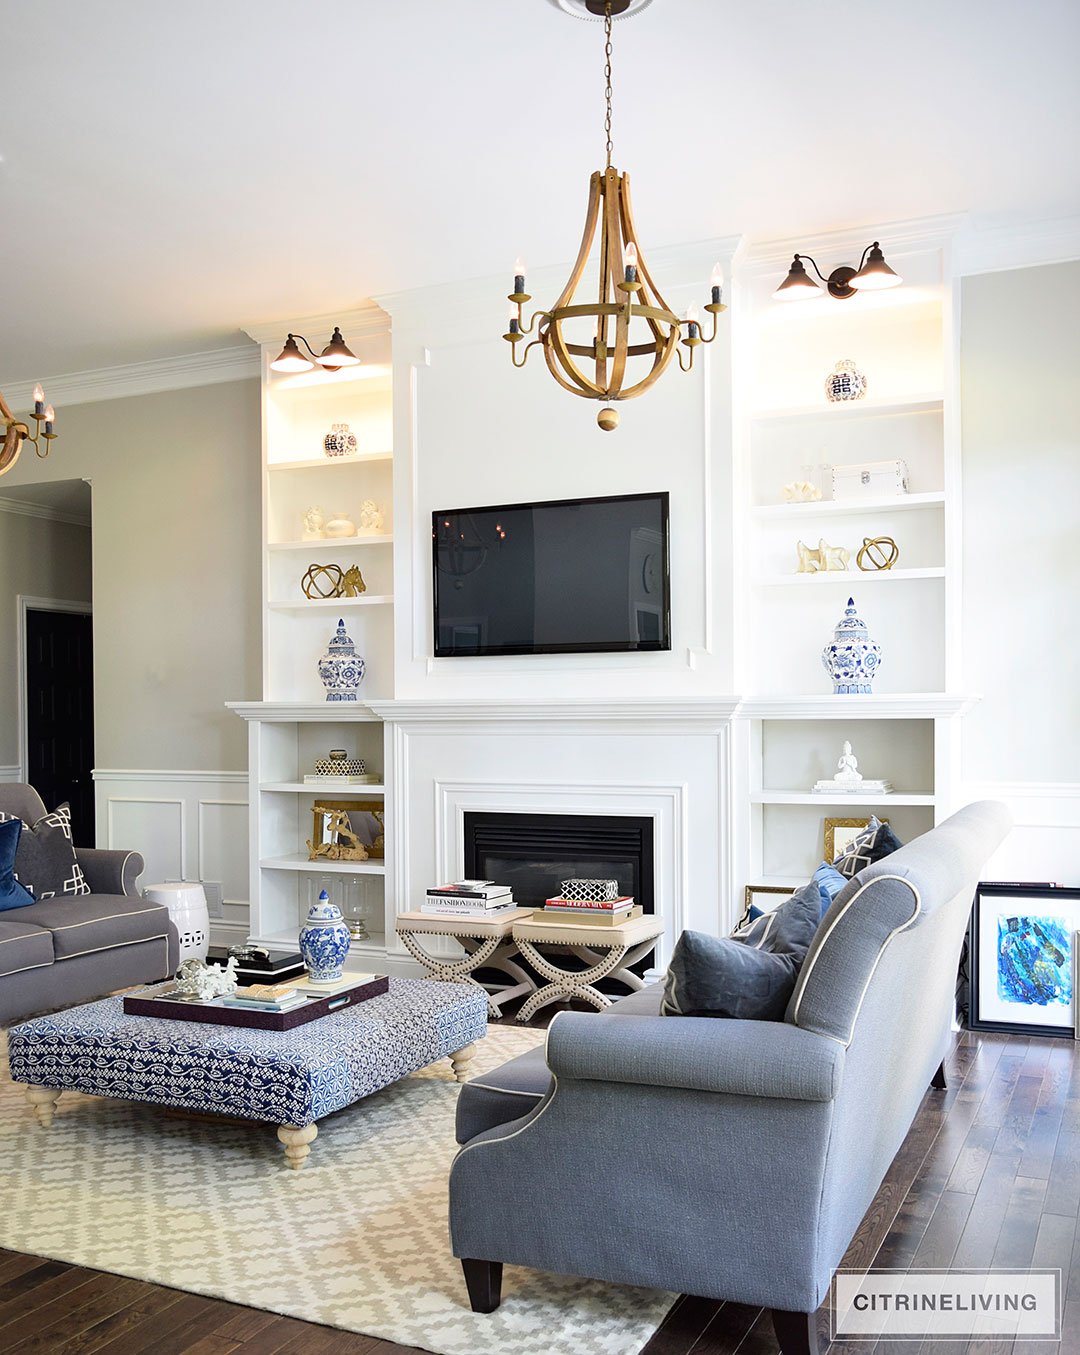 Today we’re getting into the nitty gritty, Building Bookshelves: The Process. I’m finally sitting down to write this post after so many of you have asked me to me share how we build our open shelving. Many have asked for a tutorial, and while I admit this isn’t quite a ‘how-to’ post, and it’s definitely not a pretty post, I will walk you through the process that we take to build our shelving. We’ve added many shelves throughout out home, and personally, I could never have enough! Our son jokes that eventually we’ll be living in one big built-in shelf since I happen to be obsessed with them haha. The two most recent projects we’ve tackled are our beefed-up living room shelves, shown above (read more about them here), and our newly added open kitchen shelving, shown below – find them here. Both projects were built using the same process, and for today’s post, I’ll be walking you through the living room shelves.
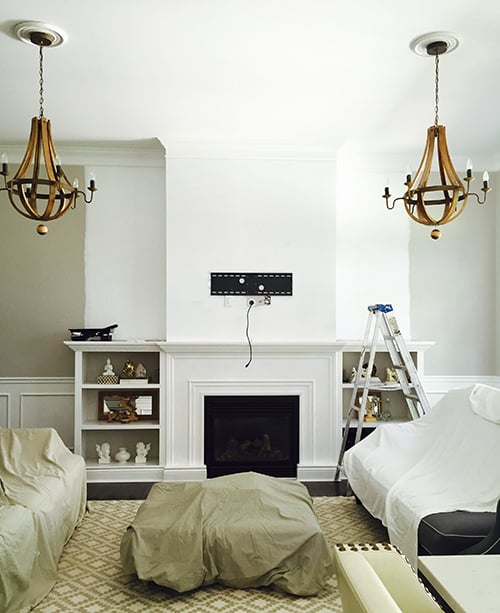
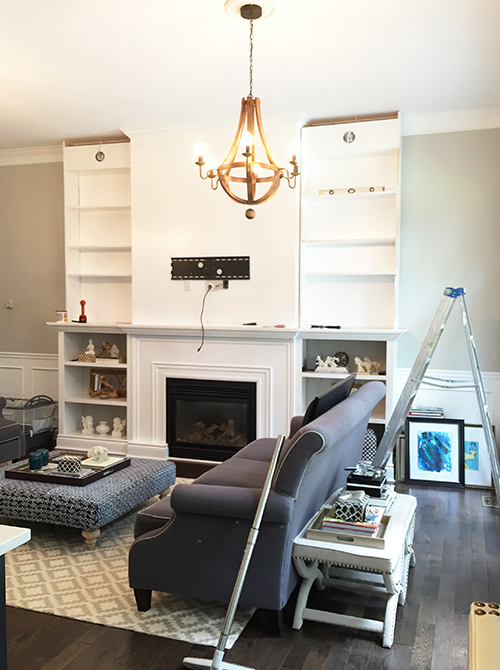
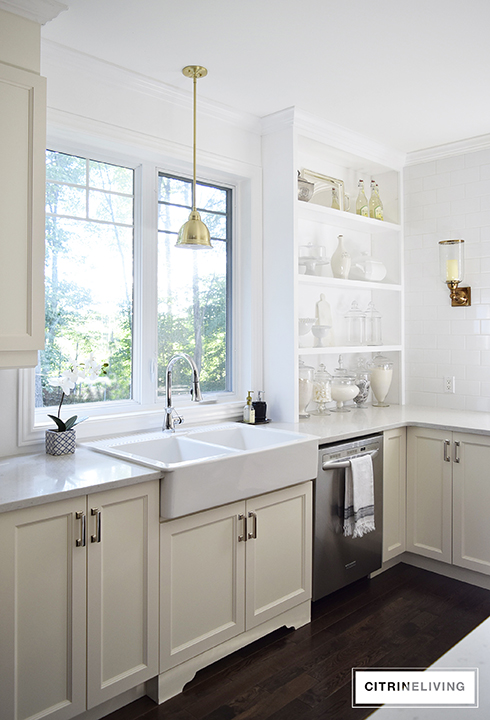 For those of you that are new readers, pictured below is the ‘before’ of our living room, which I recently shared this past summer, in a living room tour. You can read more about the details of this space here. The mirrors pictured were also recently repurposed in our master bathroom, where they make a very big difference. You can see how they look here. I have plans for that room eventually too, but for now let’s stay focused on the shelves!
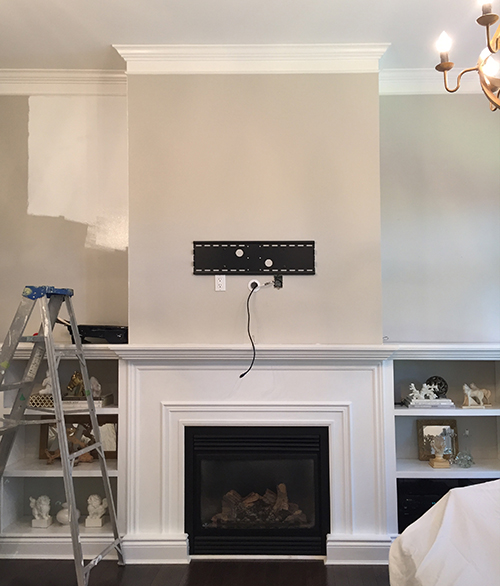
 So let’s get started. We wanted the shelves to continue to the ceiling, and we also wanted the center portion, which supports the tv, to be integrated into the design and also appear to be built in.
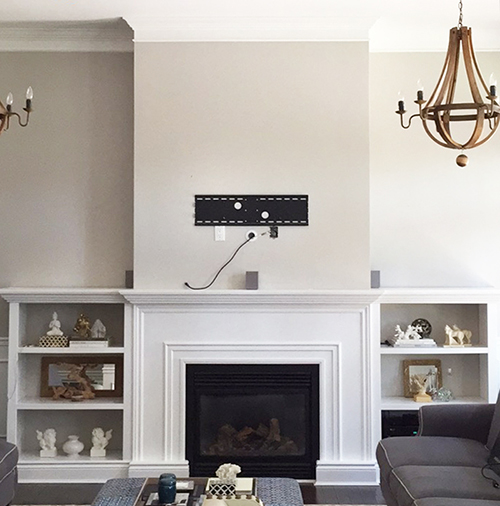
 The first order of business was to get everything painted. We used the same color as all of the trim and woodwork throughout our home, Ultra Pure White in a semi-gloss finish, by Behr Paints.
 We purchased a lower grade pine for these shelves and even though you see a lot of knots, knowing we were painting it all out, it didn’t matter. We had a very limited budget and my goal was to keep the total cost, including lighting, under $500. Whatever type of wood you choose, you want to be sure to prime and paint everything very well (it could take up to four coats), as knots can start showing after a while, which we’ve learned in the past. We’ve also built other shelves in our home with MDF – medium density fireboard – which is a manmade material that’s very cost effective. If you’re painting, it’s a great option. The only thing with MDF, is it’s very heavy and very messy when cutting. So we went with the pine on these.
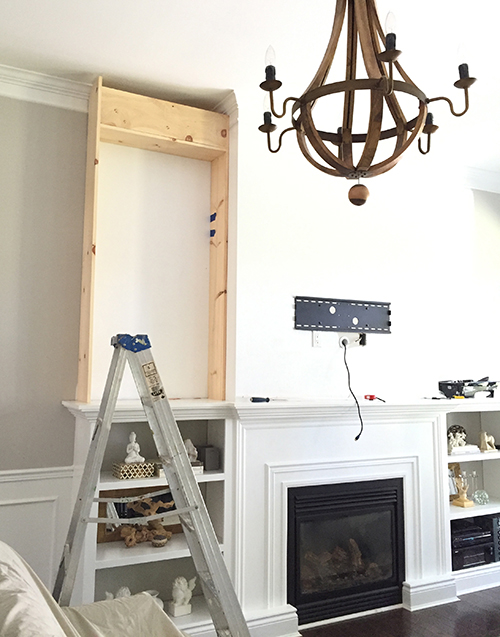
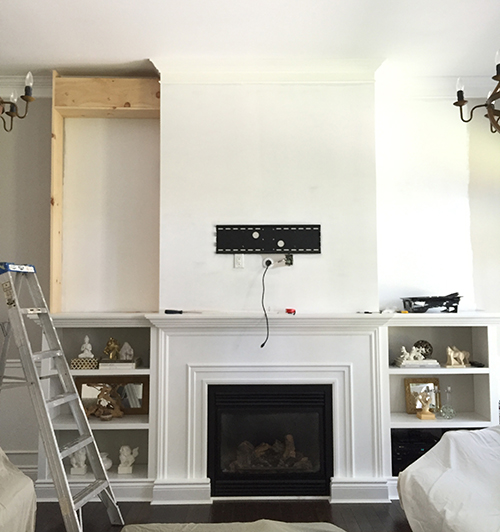 Now, I am not the handy man around here, it’s my hubby. So it’s really his know-how that I’m sharing. I just like to give the orders haha. After deciding the size, we measured everything and started by building a basic box for the base. You must built a box that can be secured to the wall in order to have strong shelves. Always make sure to use screws for strength as well, not nails. You’ll notice that the box doesn’t go all the way to the ceiling – we’ll be hiding that with crown moulding afterward. It’s very hard to see here, but the exposed side is cut at an angle at the very top, where it meets the existing crown moulding. Rather than remove the existing crown, we built around it, which is much easier. The large box at the top is to house the lighting fixture, and as you can see, the first ‘box’ for the shelving is in place to make sure the fit is good.
 Once both sides were built and checked for a proper fit (they are not installed yet at this point), they were removed, then primed and painted. You’ll also notice the hole for the light fixture at the top, shown below. We did install the lights ourselves, and we wired the new fixtures to the existing chandelier switch. To install these lights, we drilled a hole in the ceiling and wired them through the attic. Living on one level makes this a very easy task. I’d definitely recommend an electrician to do this kind of work, especially if you’re wiring to an existing switch. Thankfully our neighbour is an electrician and he guided us through the process.
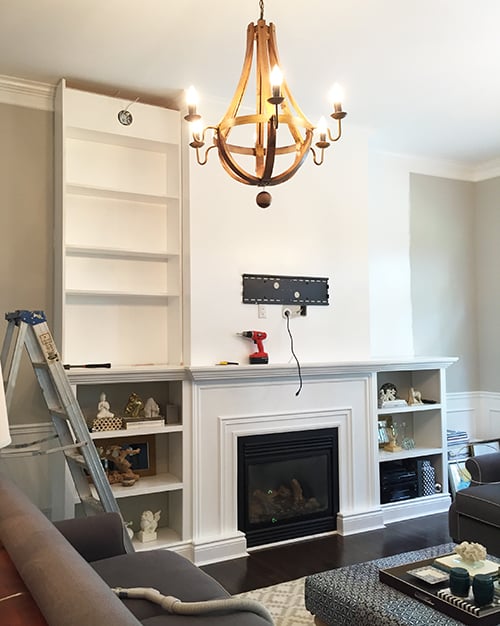
 Now you can see them really taking shape and below are the first pieces of trim that were added. When you’re planning your shelves, make sure to take into account the size of the trim you’re adding to the face of the shelves. For each shelf, the trim is applied flush from the top surface. In other words, the top of the trim meets the shelf for a continuous surface and it will hang just below the shelf, if it’s larger than the thickness of the shelf itself. The same applies to the side trim – everything should be flush on the outside edges.
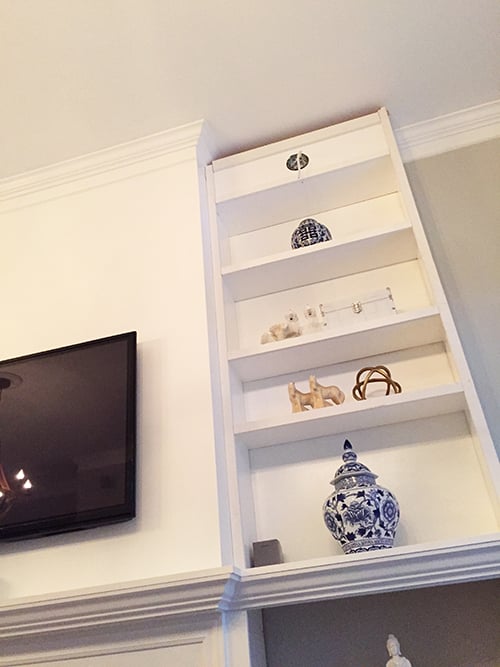 At this stage, there are still plenty of gaps showing and that’s totally fine. It will all get filled in as the last step, with silicone caulking.
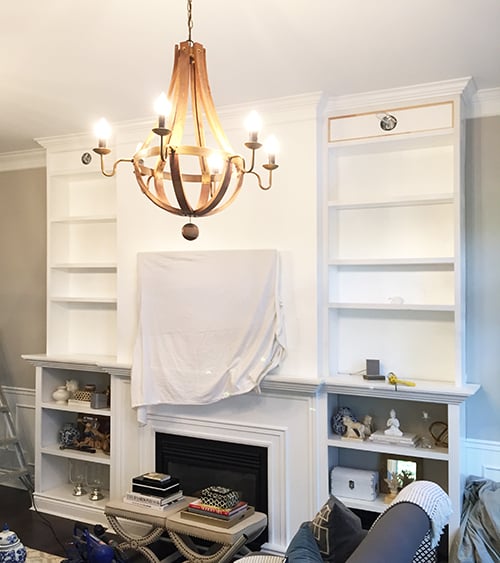
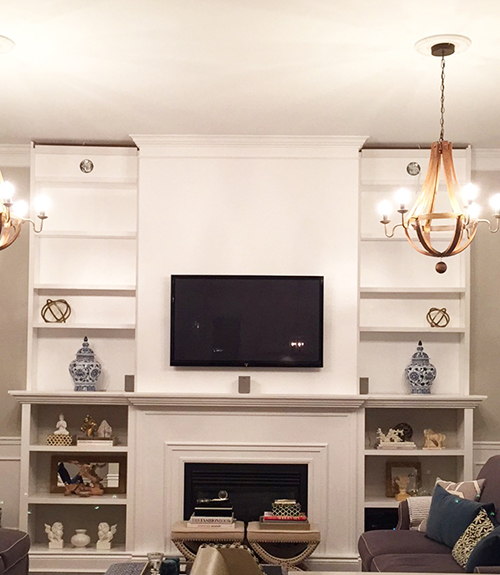 Next is the crown molding, as well as the detail trim that’s applied to the boxes surrounding the lights. That small trim is one of my favorite details! It’s a very tiny element, but really makes a very big difference! As for the crown installation, it was cut to the shape of the existing crown for a perfect fit. This is not a typical mitred joint, it’s a technique called ‘cope crown moulding’. Click here for a link to a video tutorial with a clear demonstration on how to tackle this.
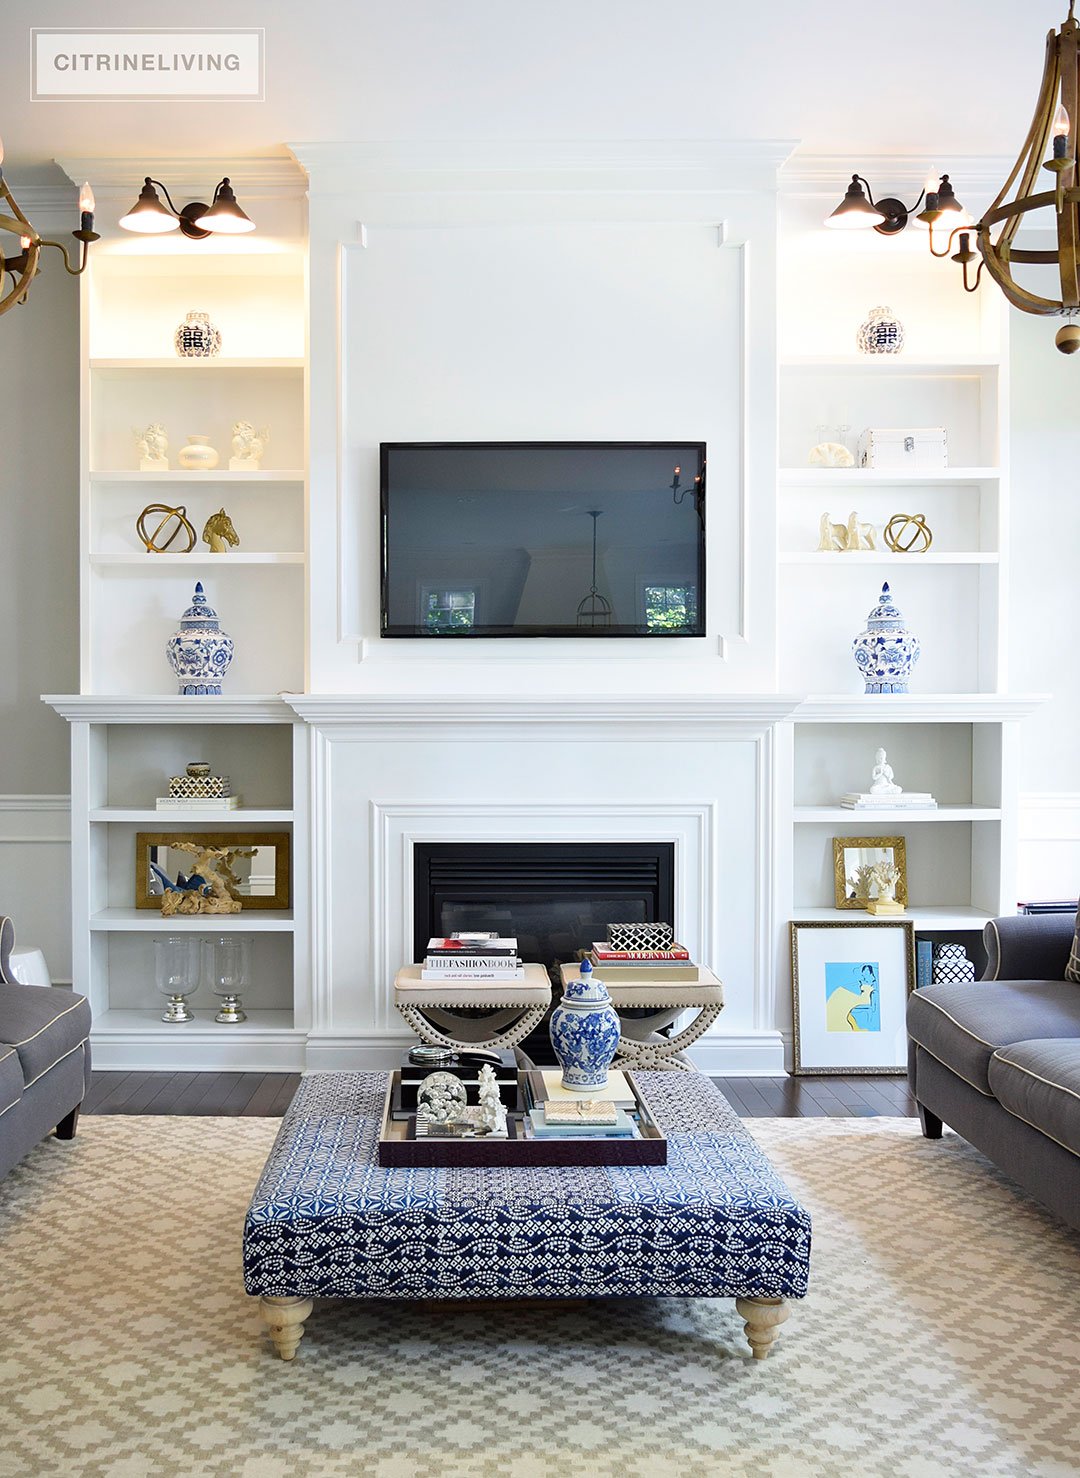
 The difference these shelves make in our space is amazing, I just wish you could see them in person!
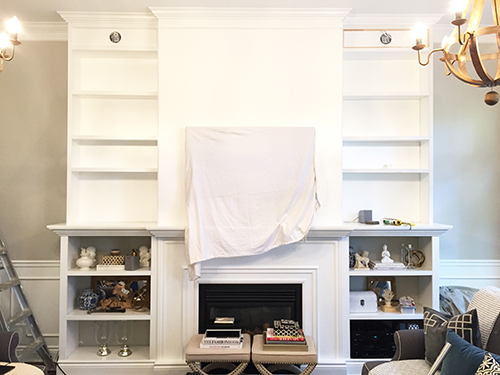 Finally, as you can see below, we installed the lighting and added decorative moulding surrounding the tv. Here, I wanted something a little more detailed rather than a simple box. So we went with a regency-inspired shape, with a return on each corner. I love the elegance it adds – another favorite detail! I’m still debating whether or not to paint the lights gold. I think it will add a a very chic factor to the overall design, but I’m still on the fence.
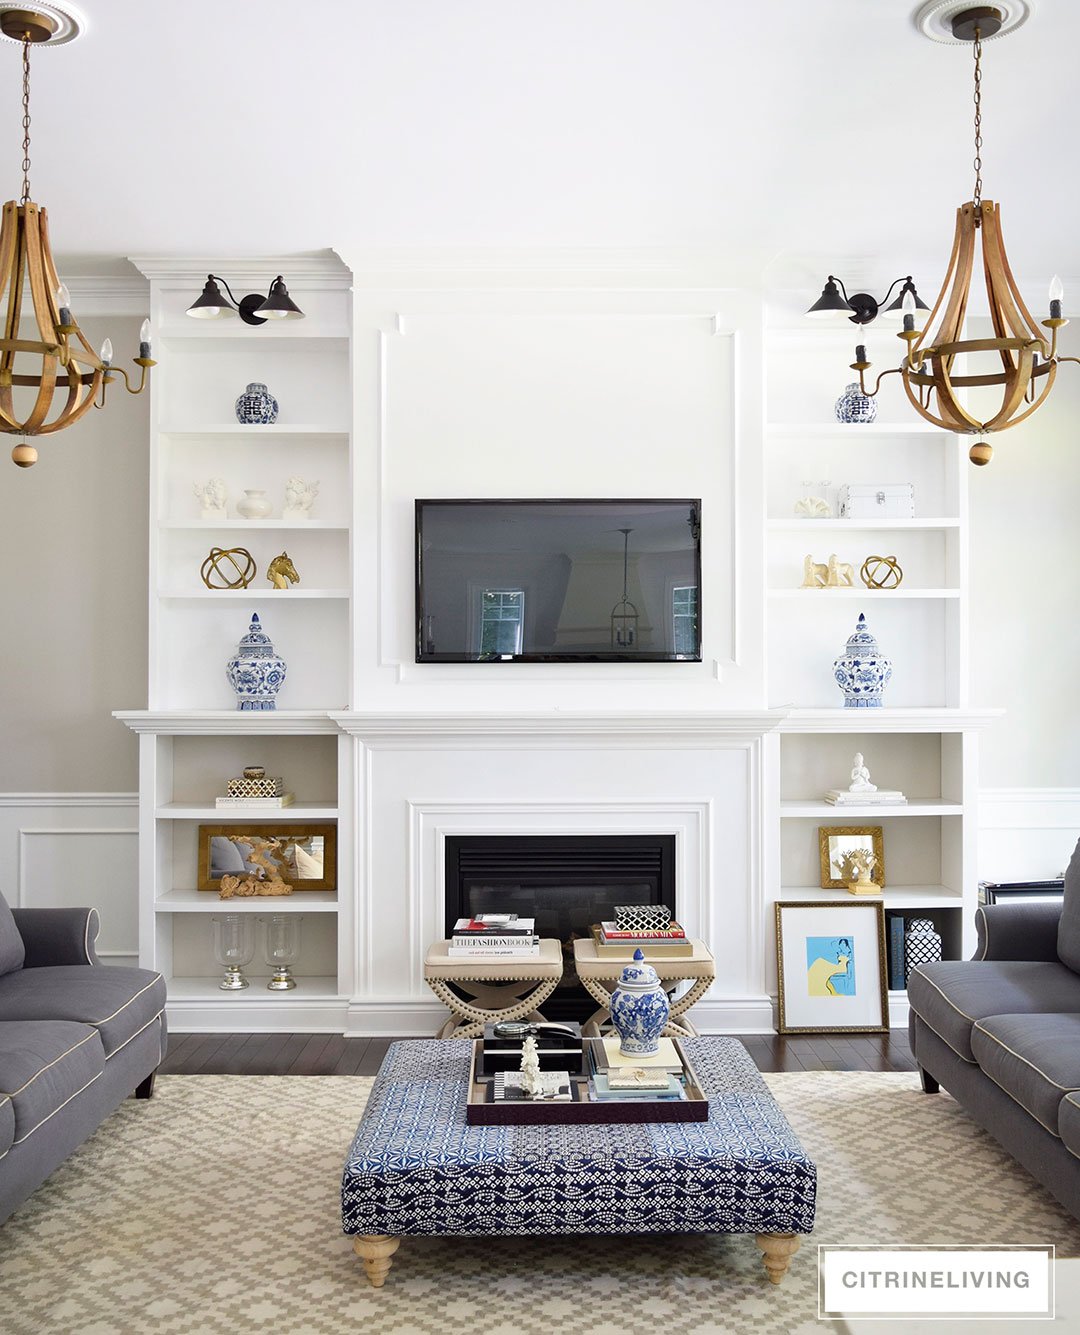 Last but not least, all of the gaps and holes get filled and touched up. The total cost of this project was approximately $400 in the end. We encountered a few obstacles along the way, as you do with any DIY project, and it took us a little longer than we anticipated, but it was so worth it!
 I hope this gives you a idea of where to start if you’re planning something of this nature in your home. If you’re handy, then this should be pretty simple to do, and you’ll most likely have a good idea of where to start. However, I strongly recommend hiring someone if you’re not handy! There are a lot of details that you’ll need to make sure are handled properly – and trust me, even handly people like my hubby and I encounter challenges and problems along the way!
SHOP THE LOOK OF MY LIVING ROOM HERE :

*Affiliate links are used as sources for some of my favorite items. These are either the same as the items featured in this post, or are similar options for your shopping convenience.

Hi Cindy! Thank you so much! I wish you had the space to get them done! If not your living room, maybe another one! I’m so happy to hear from you, as always thank you for stopping by to say hello! Hope you had a good trip, I love NYC! xo
Hi Tam, just back from a week long business trip to NYC, and catching up on your beautiful blog. I just love the built in’s, they look amazing, I am trying to figure out how to fit them in my den here, but we just don’t have enough space around this fireplace, and the one in the livingroom is flanked by windows, so I will just have to admire yours! hope all is well with you.
Cindy.
Bree you are the best! Thank you so much, my friend and thank you for dropping in!! xoxo
Tamara, your built-ins were such a great decision and I love how they took this already gorgeous room to the next level!! Such a great tutorial and thanks for sharing with us!!!